The dreaded sludge issue ia a big problen for early SAAB 9-5 owners & one not to be taken lightly, Is it sludged up, isnt it..........The only way to find out is to drop the sump pan & have a look for yourself.
The main problem with engine sludge is that it blocks the gauze on the oil pick up pipe inside the sump itself, reducing oil flow to the cylinder head & turbo causing engine failure in a big way. The main cause as I understand it was the poor design of the PCV crank case breather system & the 12000 mile service schedule.
These issues have been solved by extending the oil & filter change to every 6000 miles or six months & using only fully synthetic oil, not semi synthetic oil, & also the introduction of the PCV breather kit (number six) upgrade, around £40-£60.
All Saab dealers & independent Saab garages will offer this service for around £250.
I consider myself a compentent home mechanic & I decided to do this job myself after reading many threads written by members of Saab forums who offer some great advice.
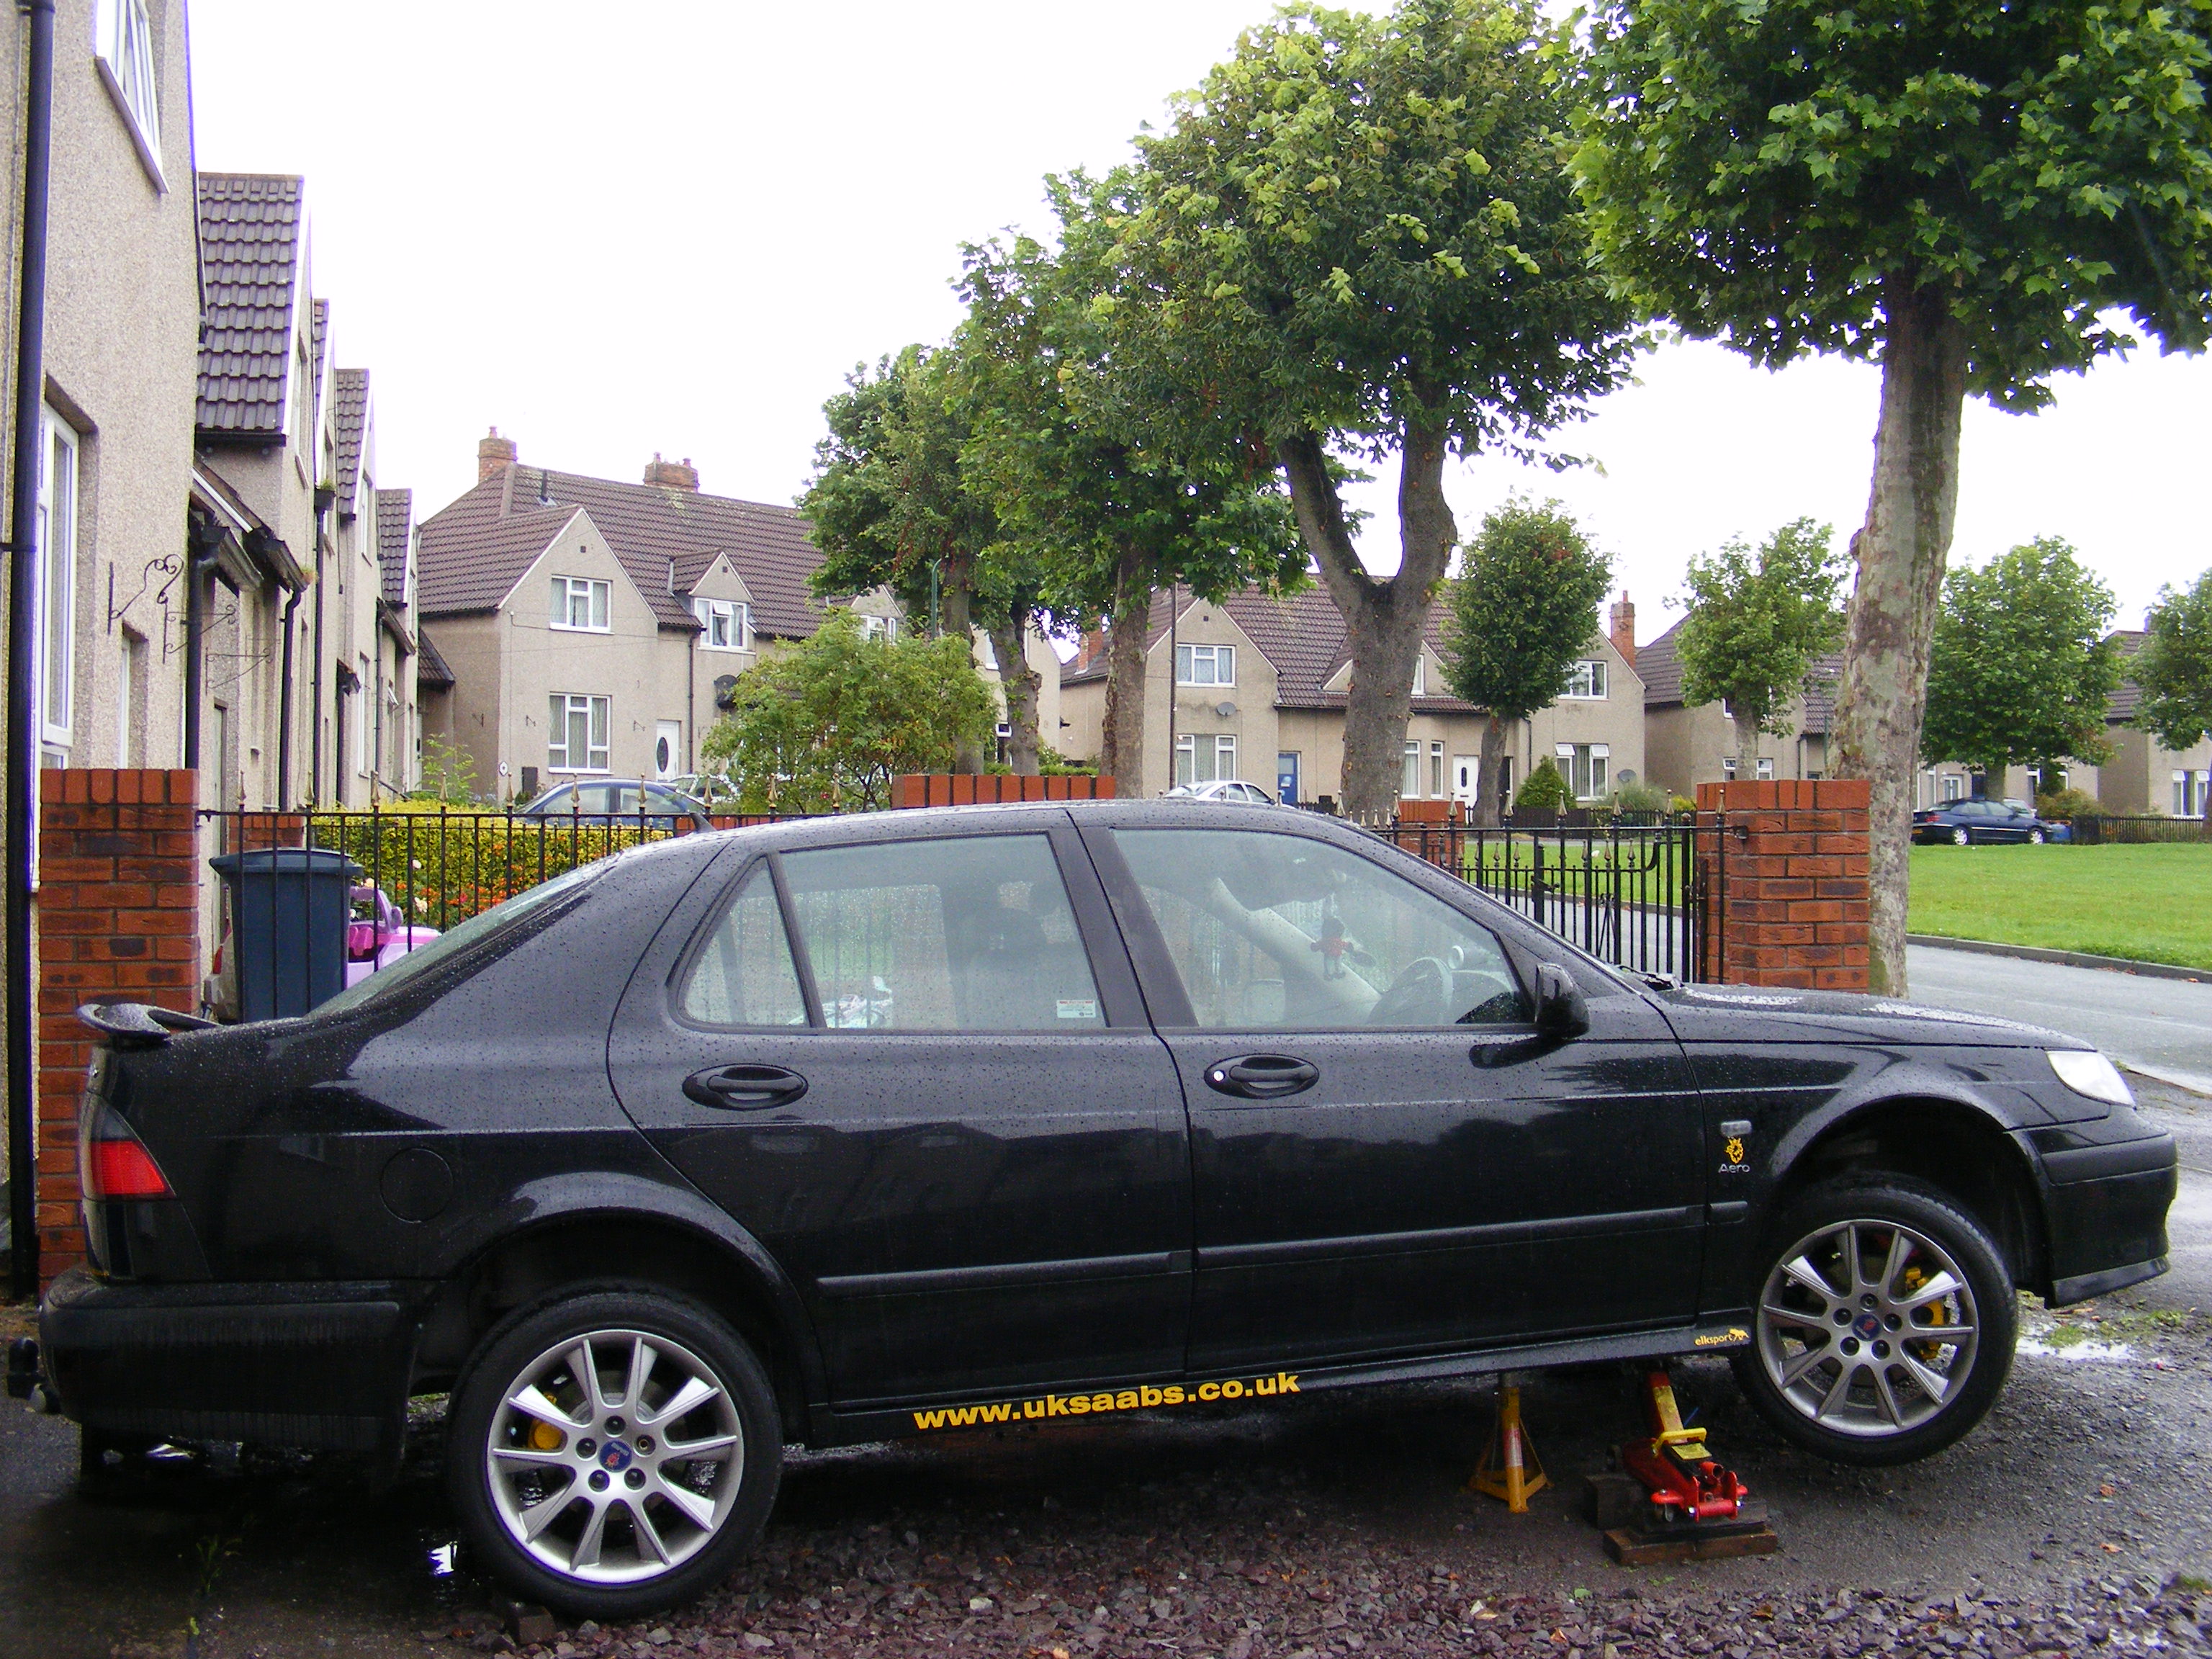
Saftey is the most important thing when working under any vehicle, a decent work surface, good strong axle stands, a good jack & much thought for the procedure about to be undertaken is needed. For this task I used two axle stands & I left my trolley jack in place under the o/s/f jacking point.
Please note, this page is ment as a guide only, to help fellow 9-5 owners. Any engine work is done at your own risk & could invalidate any warranty you may have on your car, & cause damage to your health if things go wrong, this is all based on a 2.o lpt 1998 9-5, 5 speed manual model & written from my own experences. Be warned, later 9-5's may be different. Please check your cars spec first.
So, here we go then.
The first thing to do is get the front of the car up in the air (saftey is rather important here) & to remove the front underside plastic engine tray. Then drain the engine oil & remove the oil filter. I always warm the engine up for this part to get the oil nice & thin & to ensure most of it comes out when the drain plug is removed. After the car is up to normal running temp I usually leave it to drain overnight & resume any other work the following morning when everything is nice & cold with no risk of burning myself on hot engine/exhaust parts.
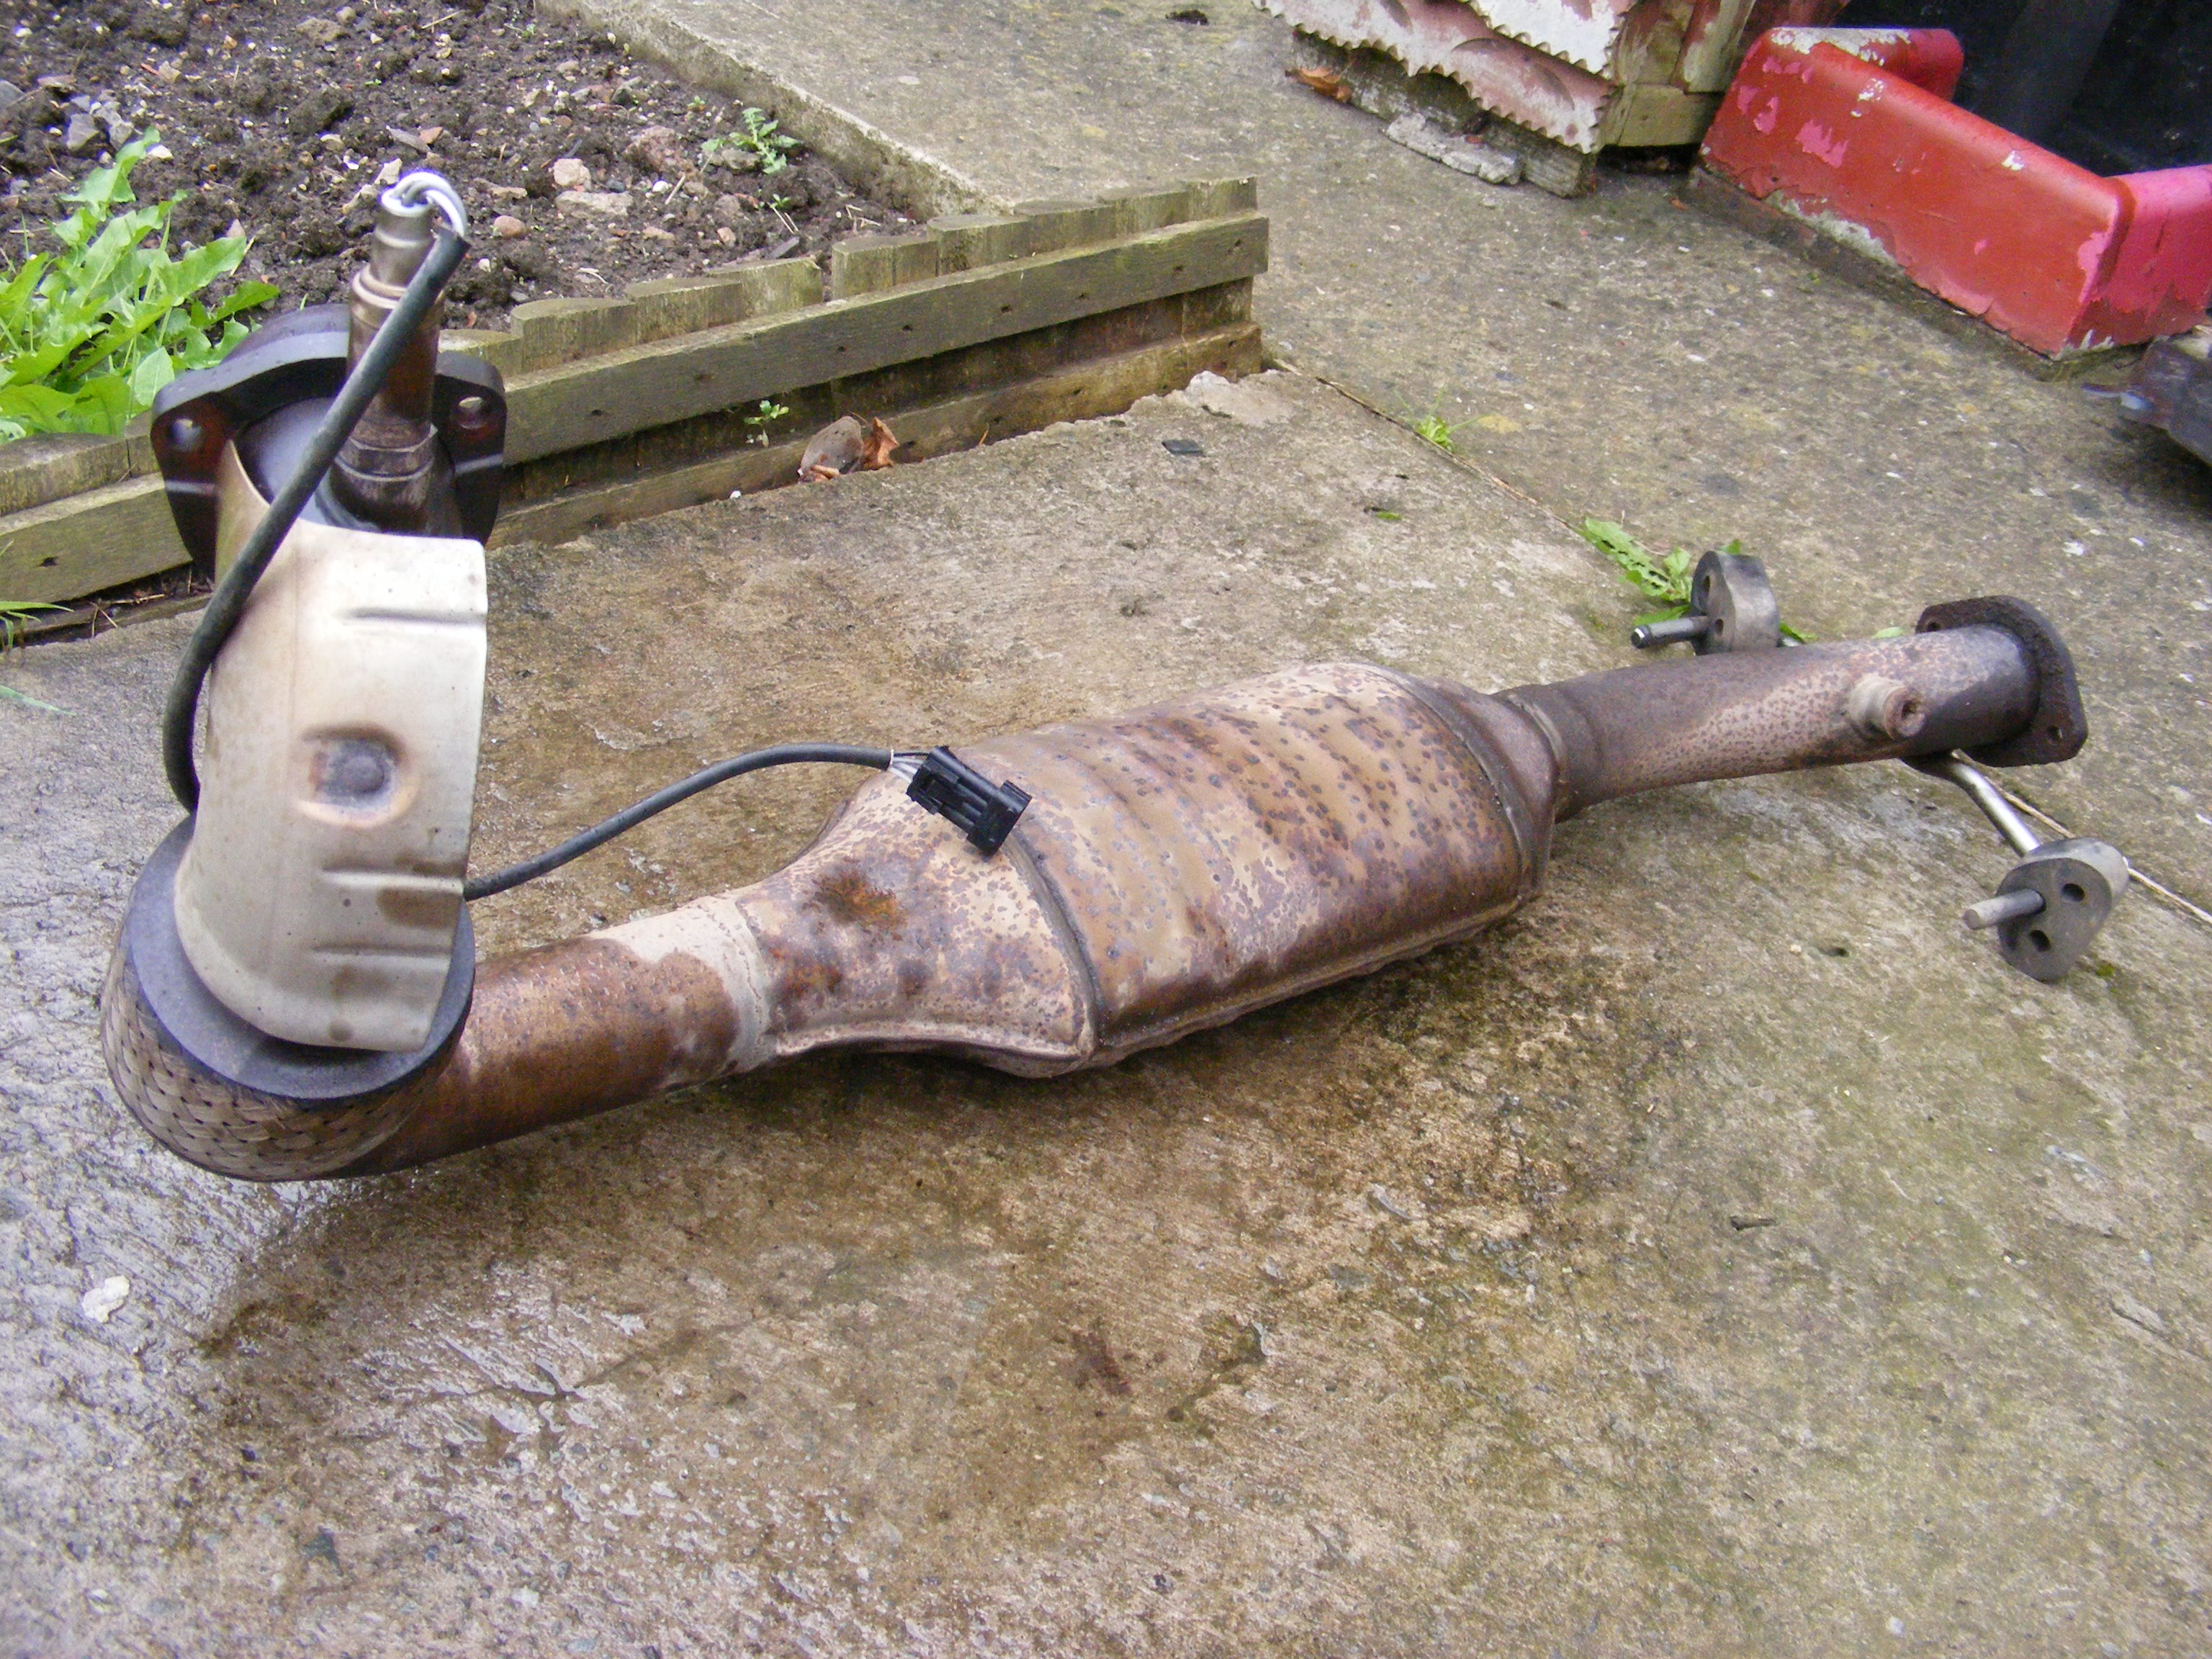
Ok, now the engine oil has been drained its time to remove the exhaust downpipe & cat. This is a one piece pipe & is an easy job, but best done when the exhaust is cold! Un plug the 02 sensor wiring plug which you will find on a black metal bracket at the rear right hand side of the cylinder head & let this wire & plug hang down through the engine bay. Then unbolt the three 13mm nuts on the turbo end clamp. Remember, WD40 is your freind when working with exhaust nuts! Then undo the two 13mm nuts on the joint clamp between the cat & the center exhaust box & slide the cat off its hangers & store in a safe place.
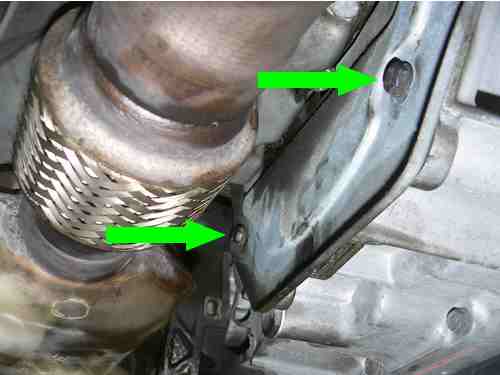
With the cat out of the way you now need to remove the two 12mm bolts & the blanking plate from the bottom end of the gearbox arrowed here. I'm not sure if the auto boxes are the same. When this plate is removed this will give you access to three sump bolts that you would not have been able to undo with a 13mm socket.
|   |
Just a quick note to say I had a broken exhaust stud on the turbo/downpipe end. I had some spare studs in my toolbox & after a quick drill & re thread this little problem was sorted in about ten mins. | 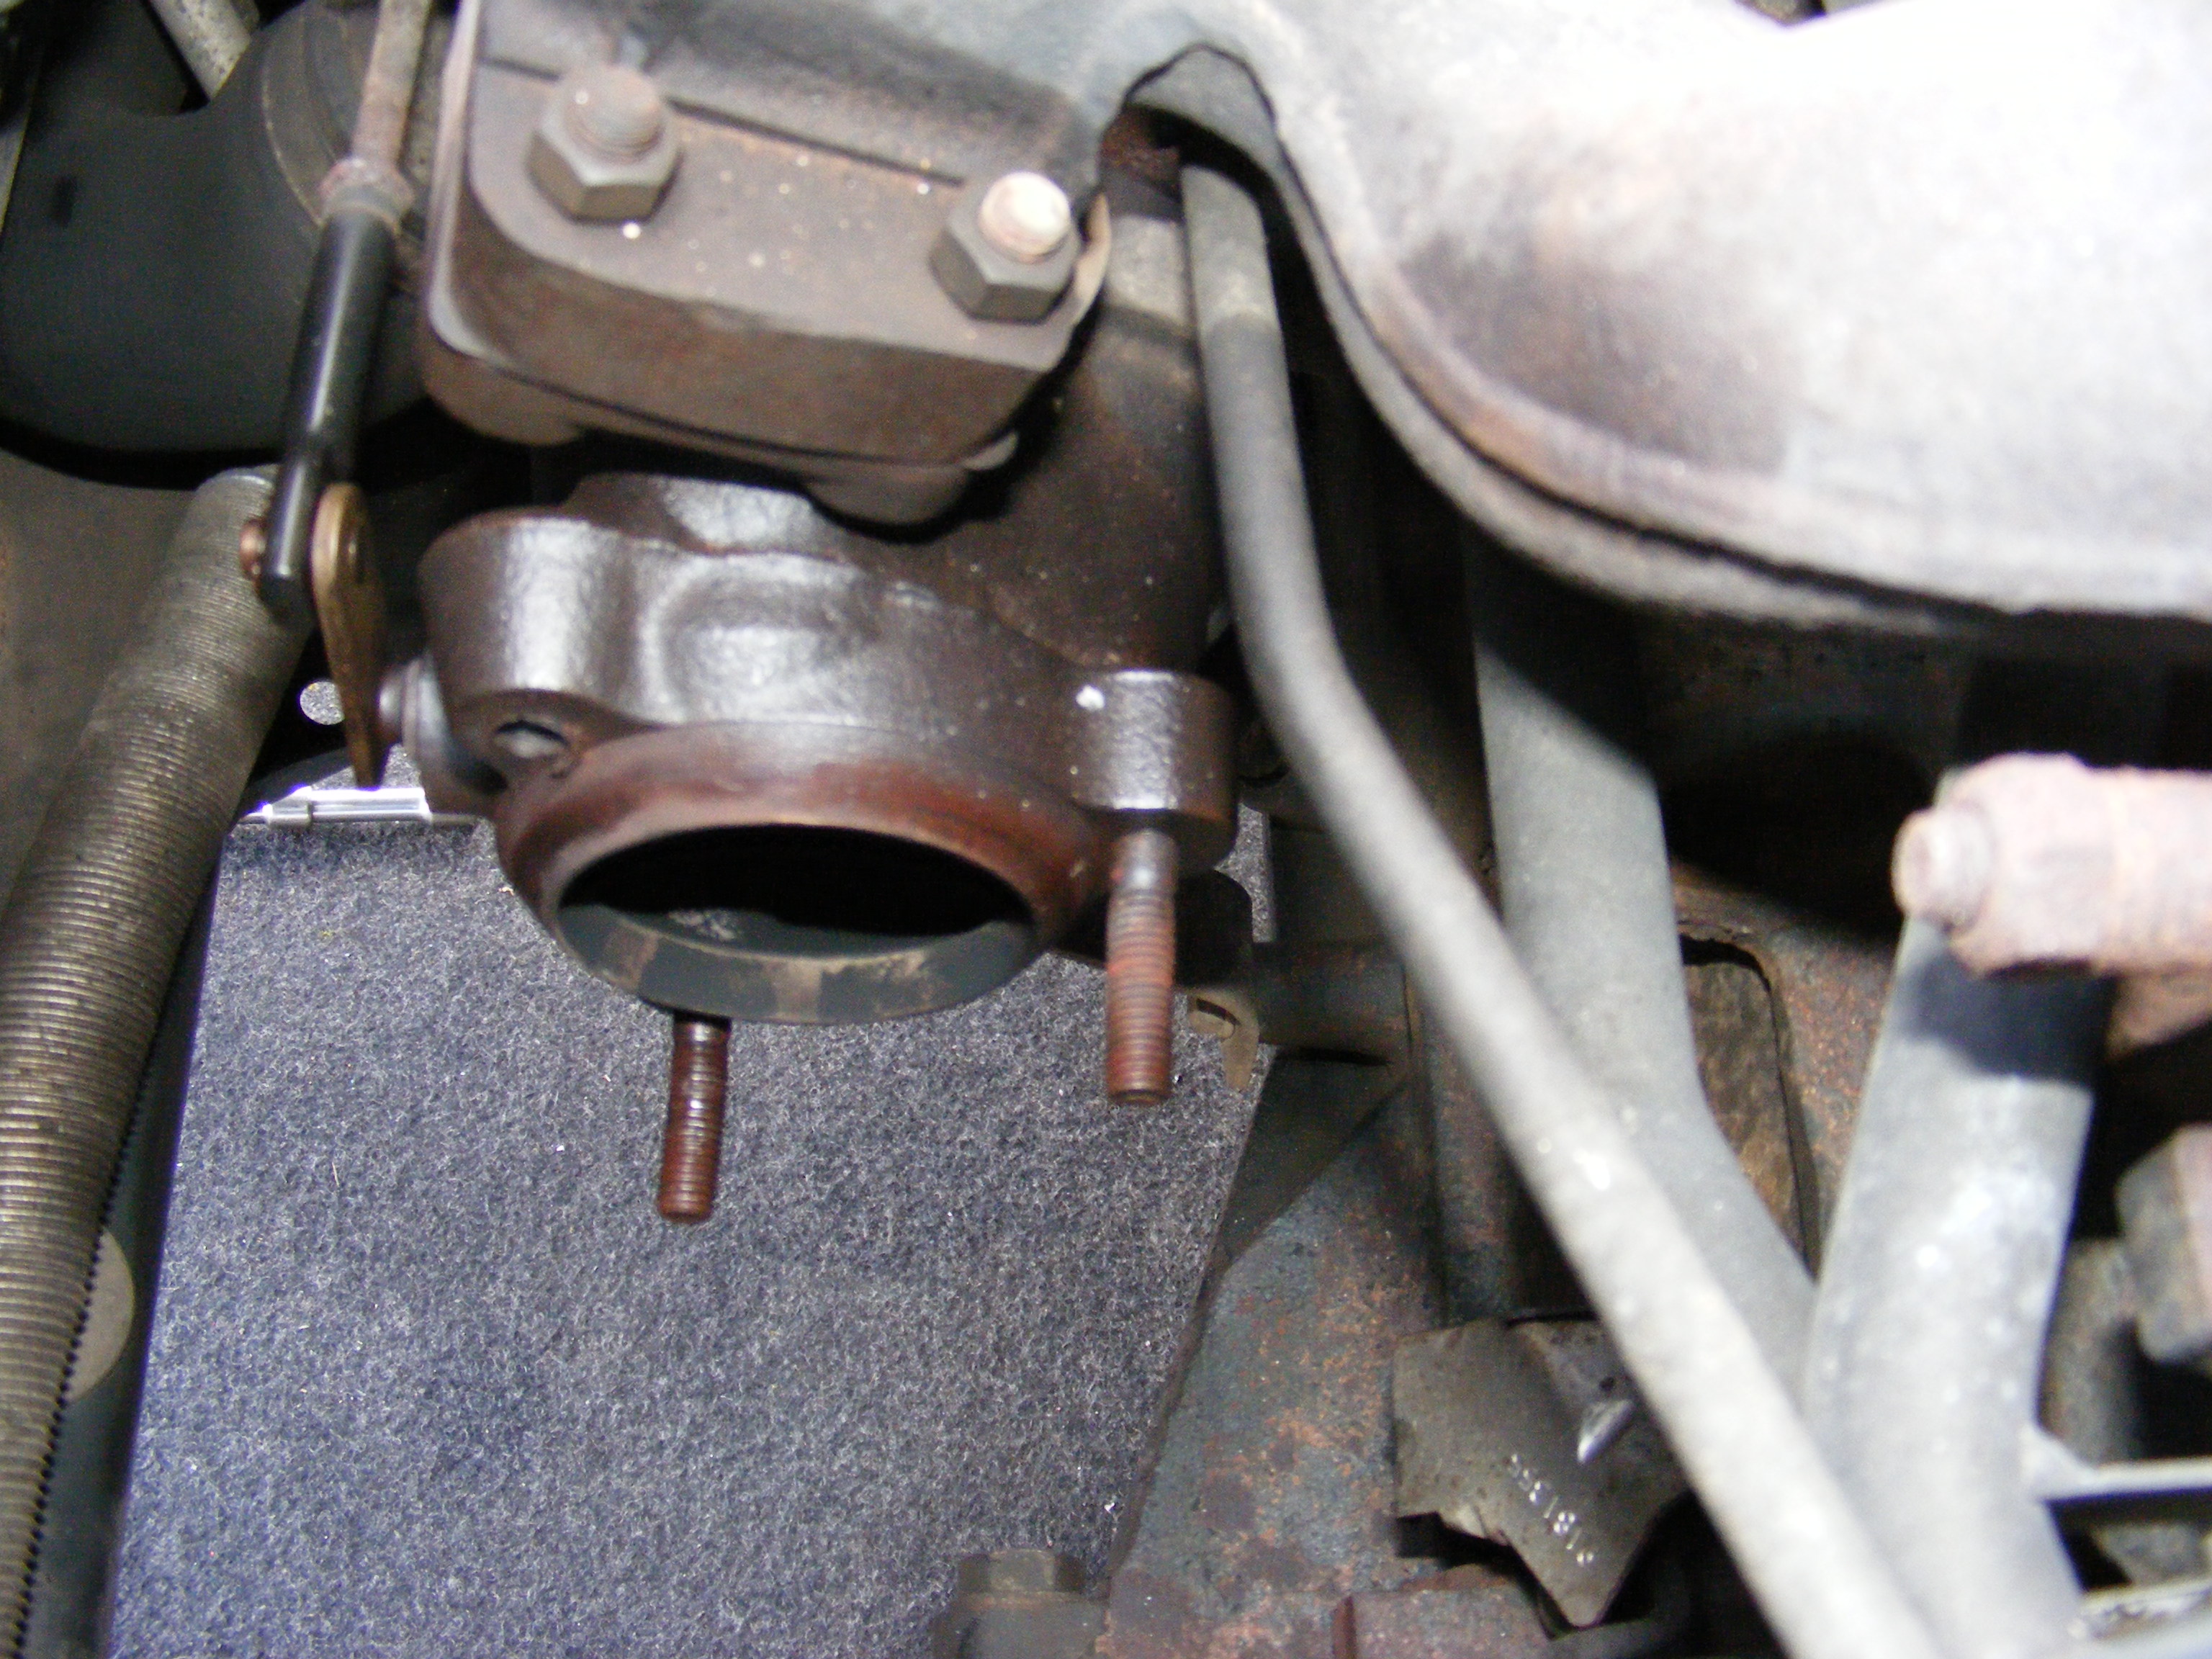 |
 | 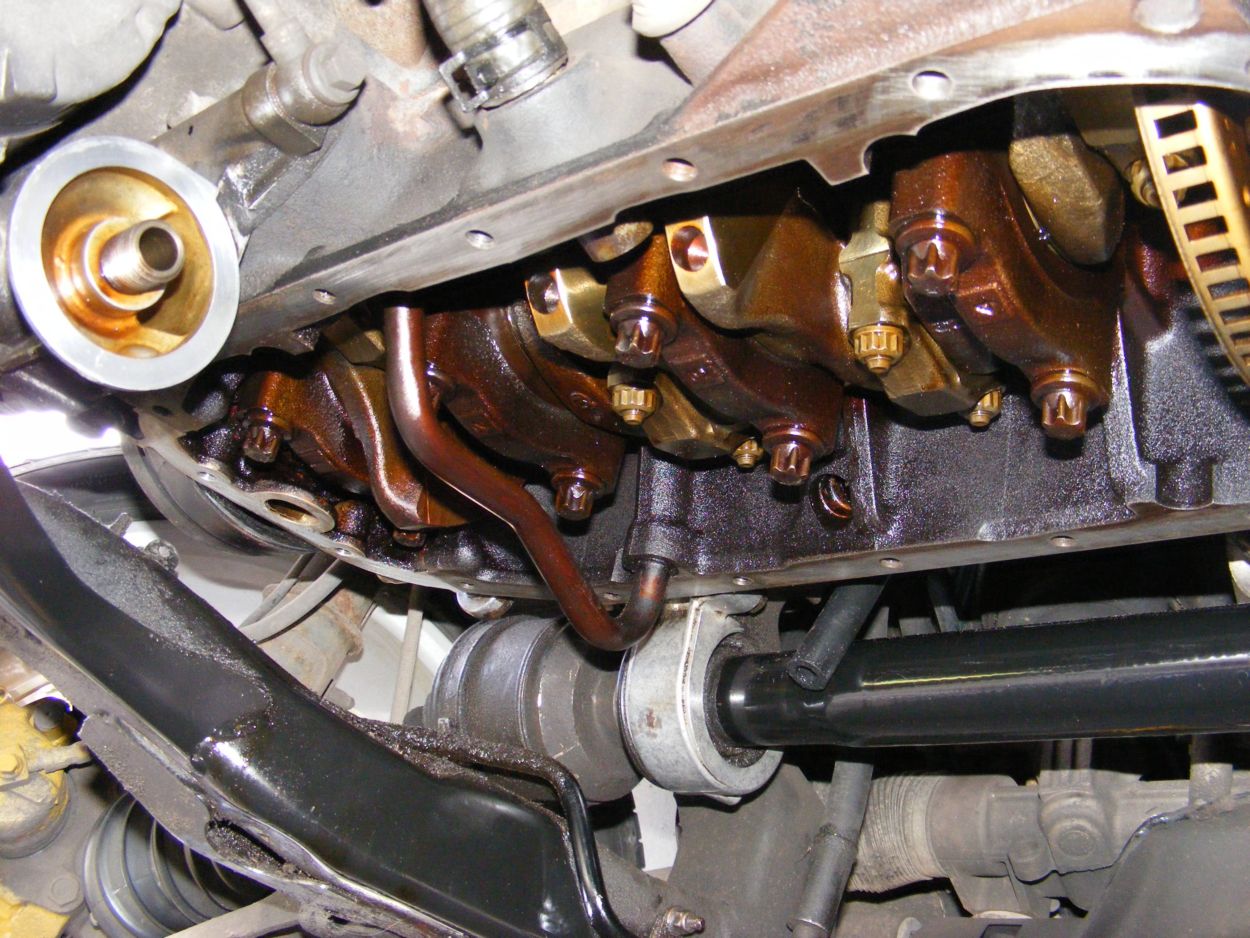 |
There are eighteen 13mm mounting bolts to remove. All of these can be removed with a 13mm socket & an extension bar apart from three at the crank pully end of the engine where you will need to use a 13mm spanner. With all the bolts removed you will need to prise the sump off as it will be stuck fast by the old gasket seal. Do not use a hammer to move it as the alloy cast may crack & this is bad news. Some report having to remove gearbox & engine mounts to get it off, I found mine just came out with no problems at all. My sump pan came away fine using a long screwdriver as a lever against the gearbox to crack the seal.
| 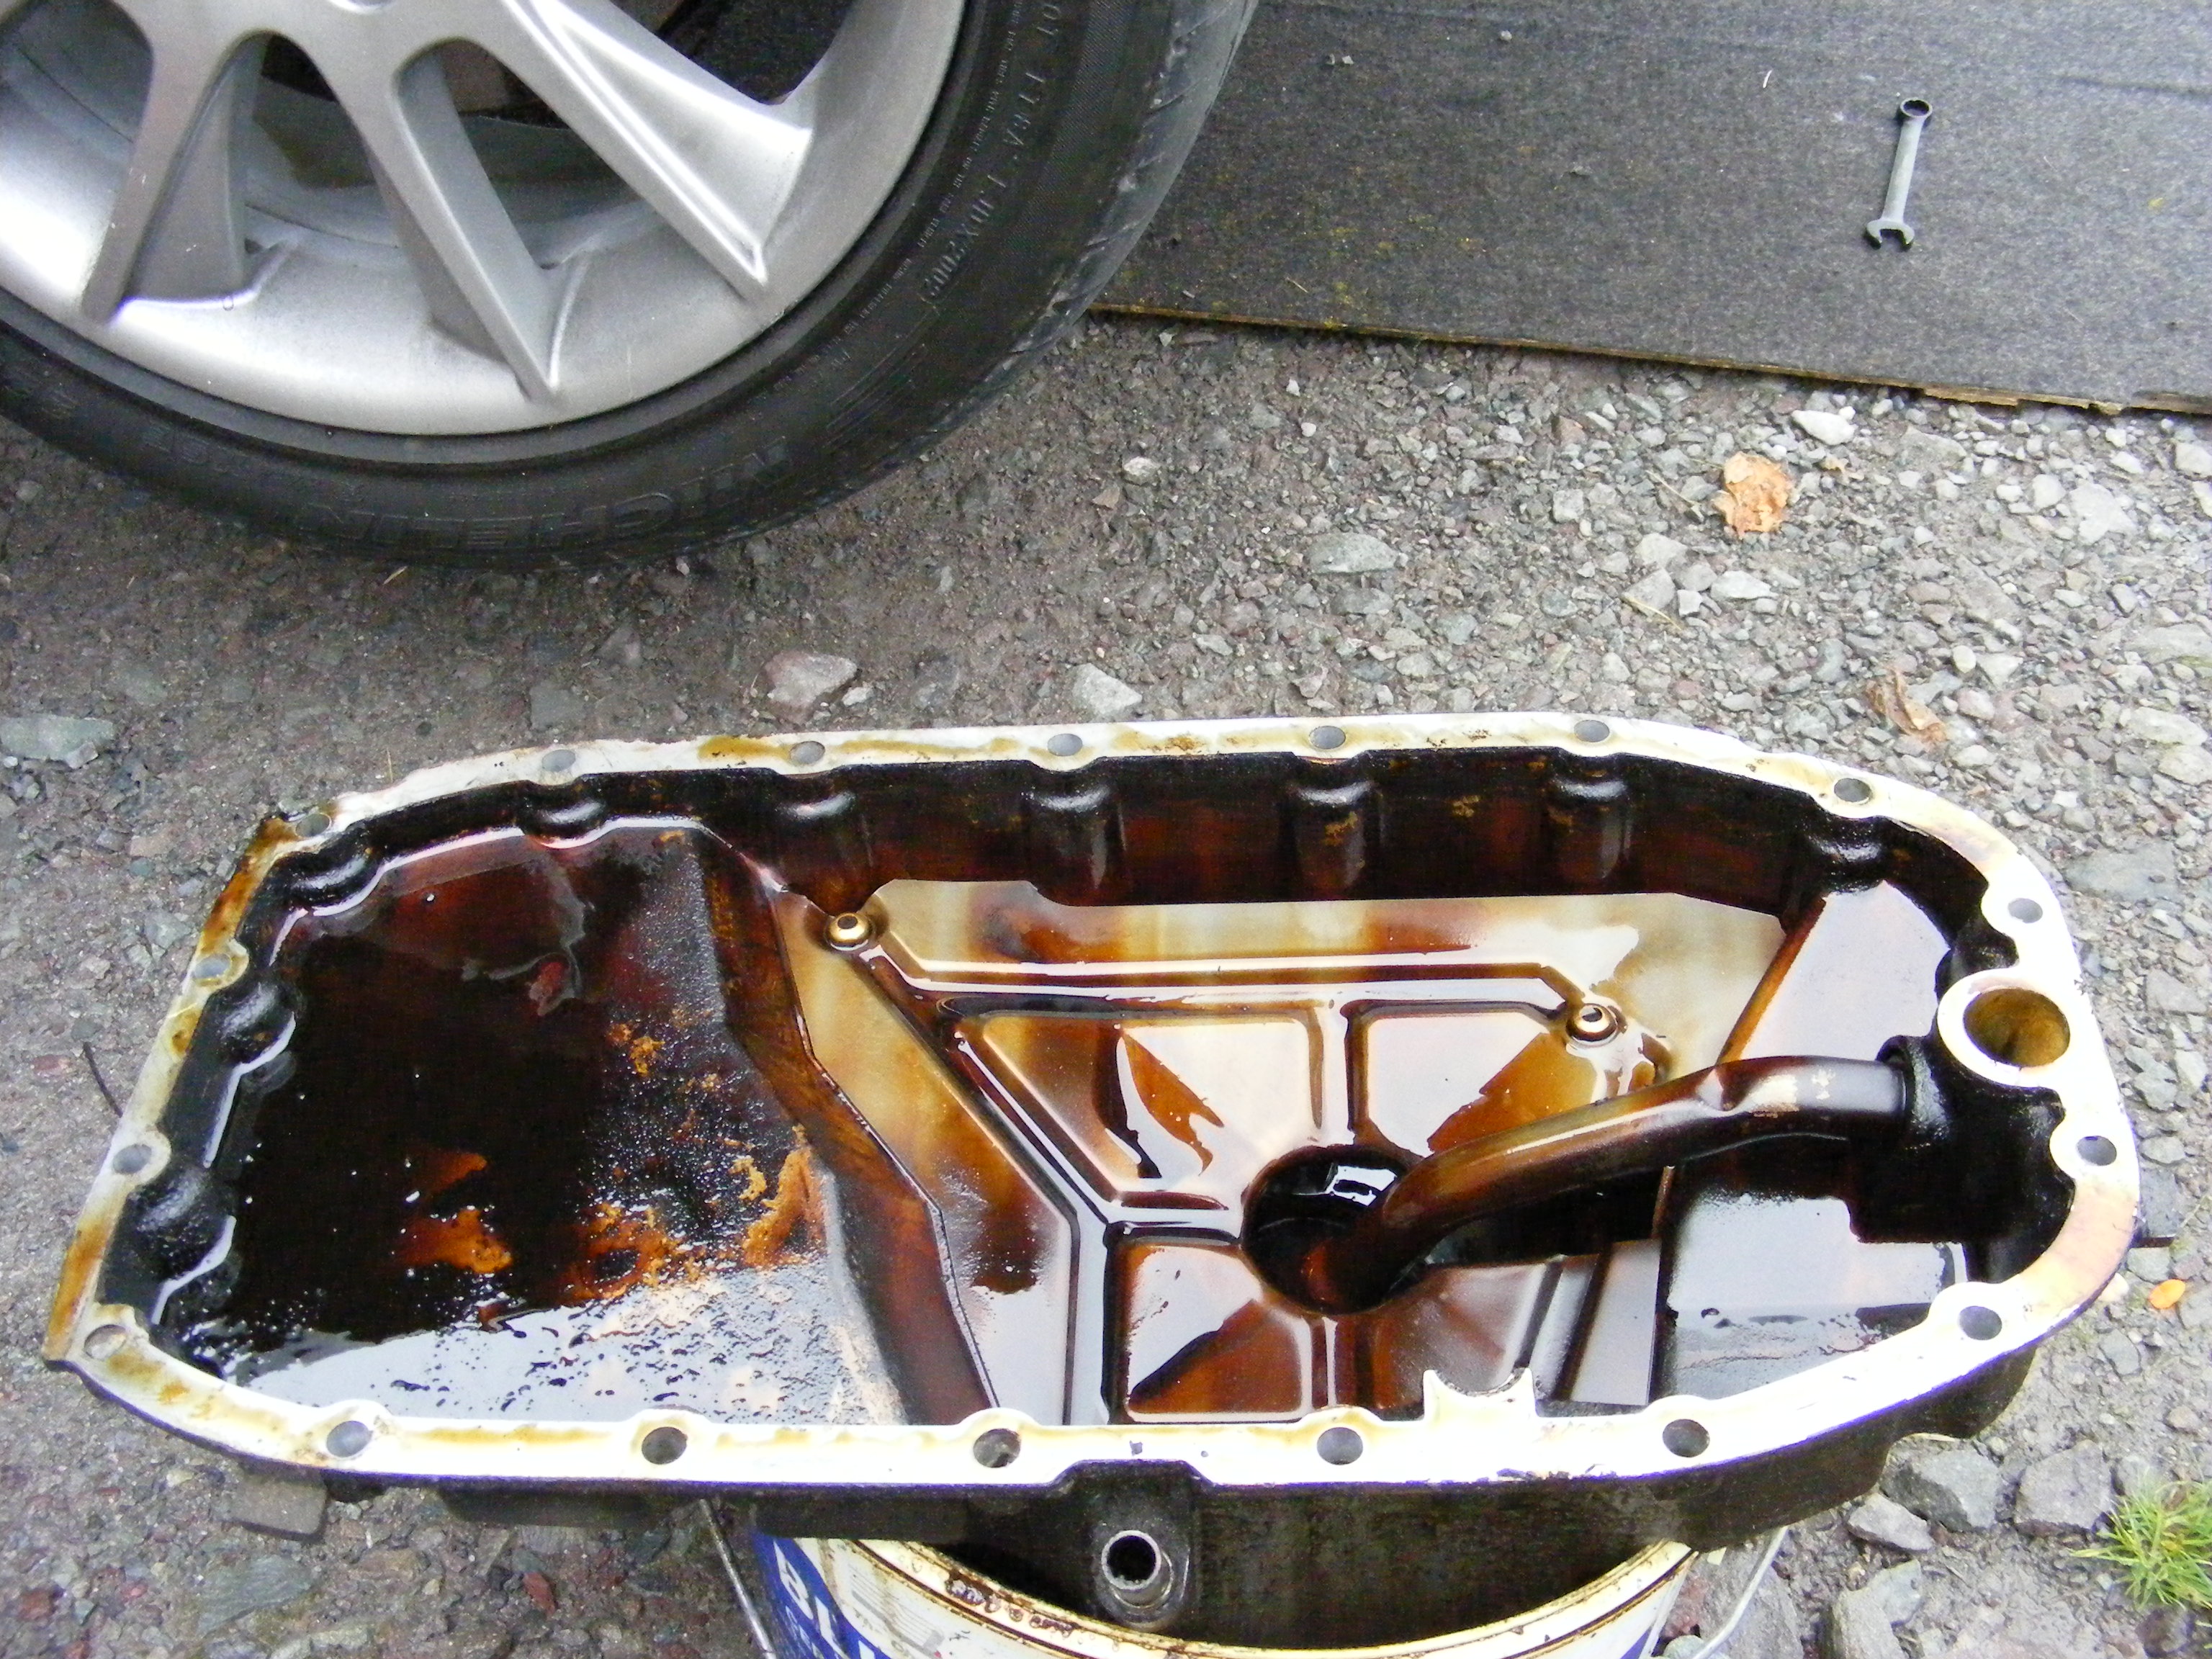 |
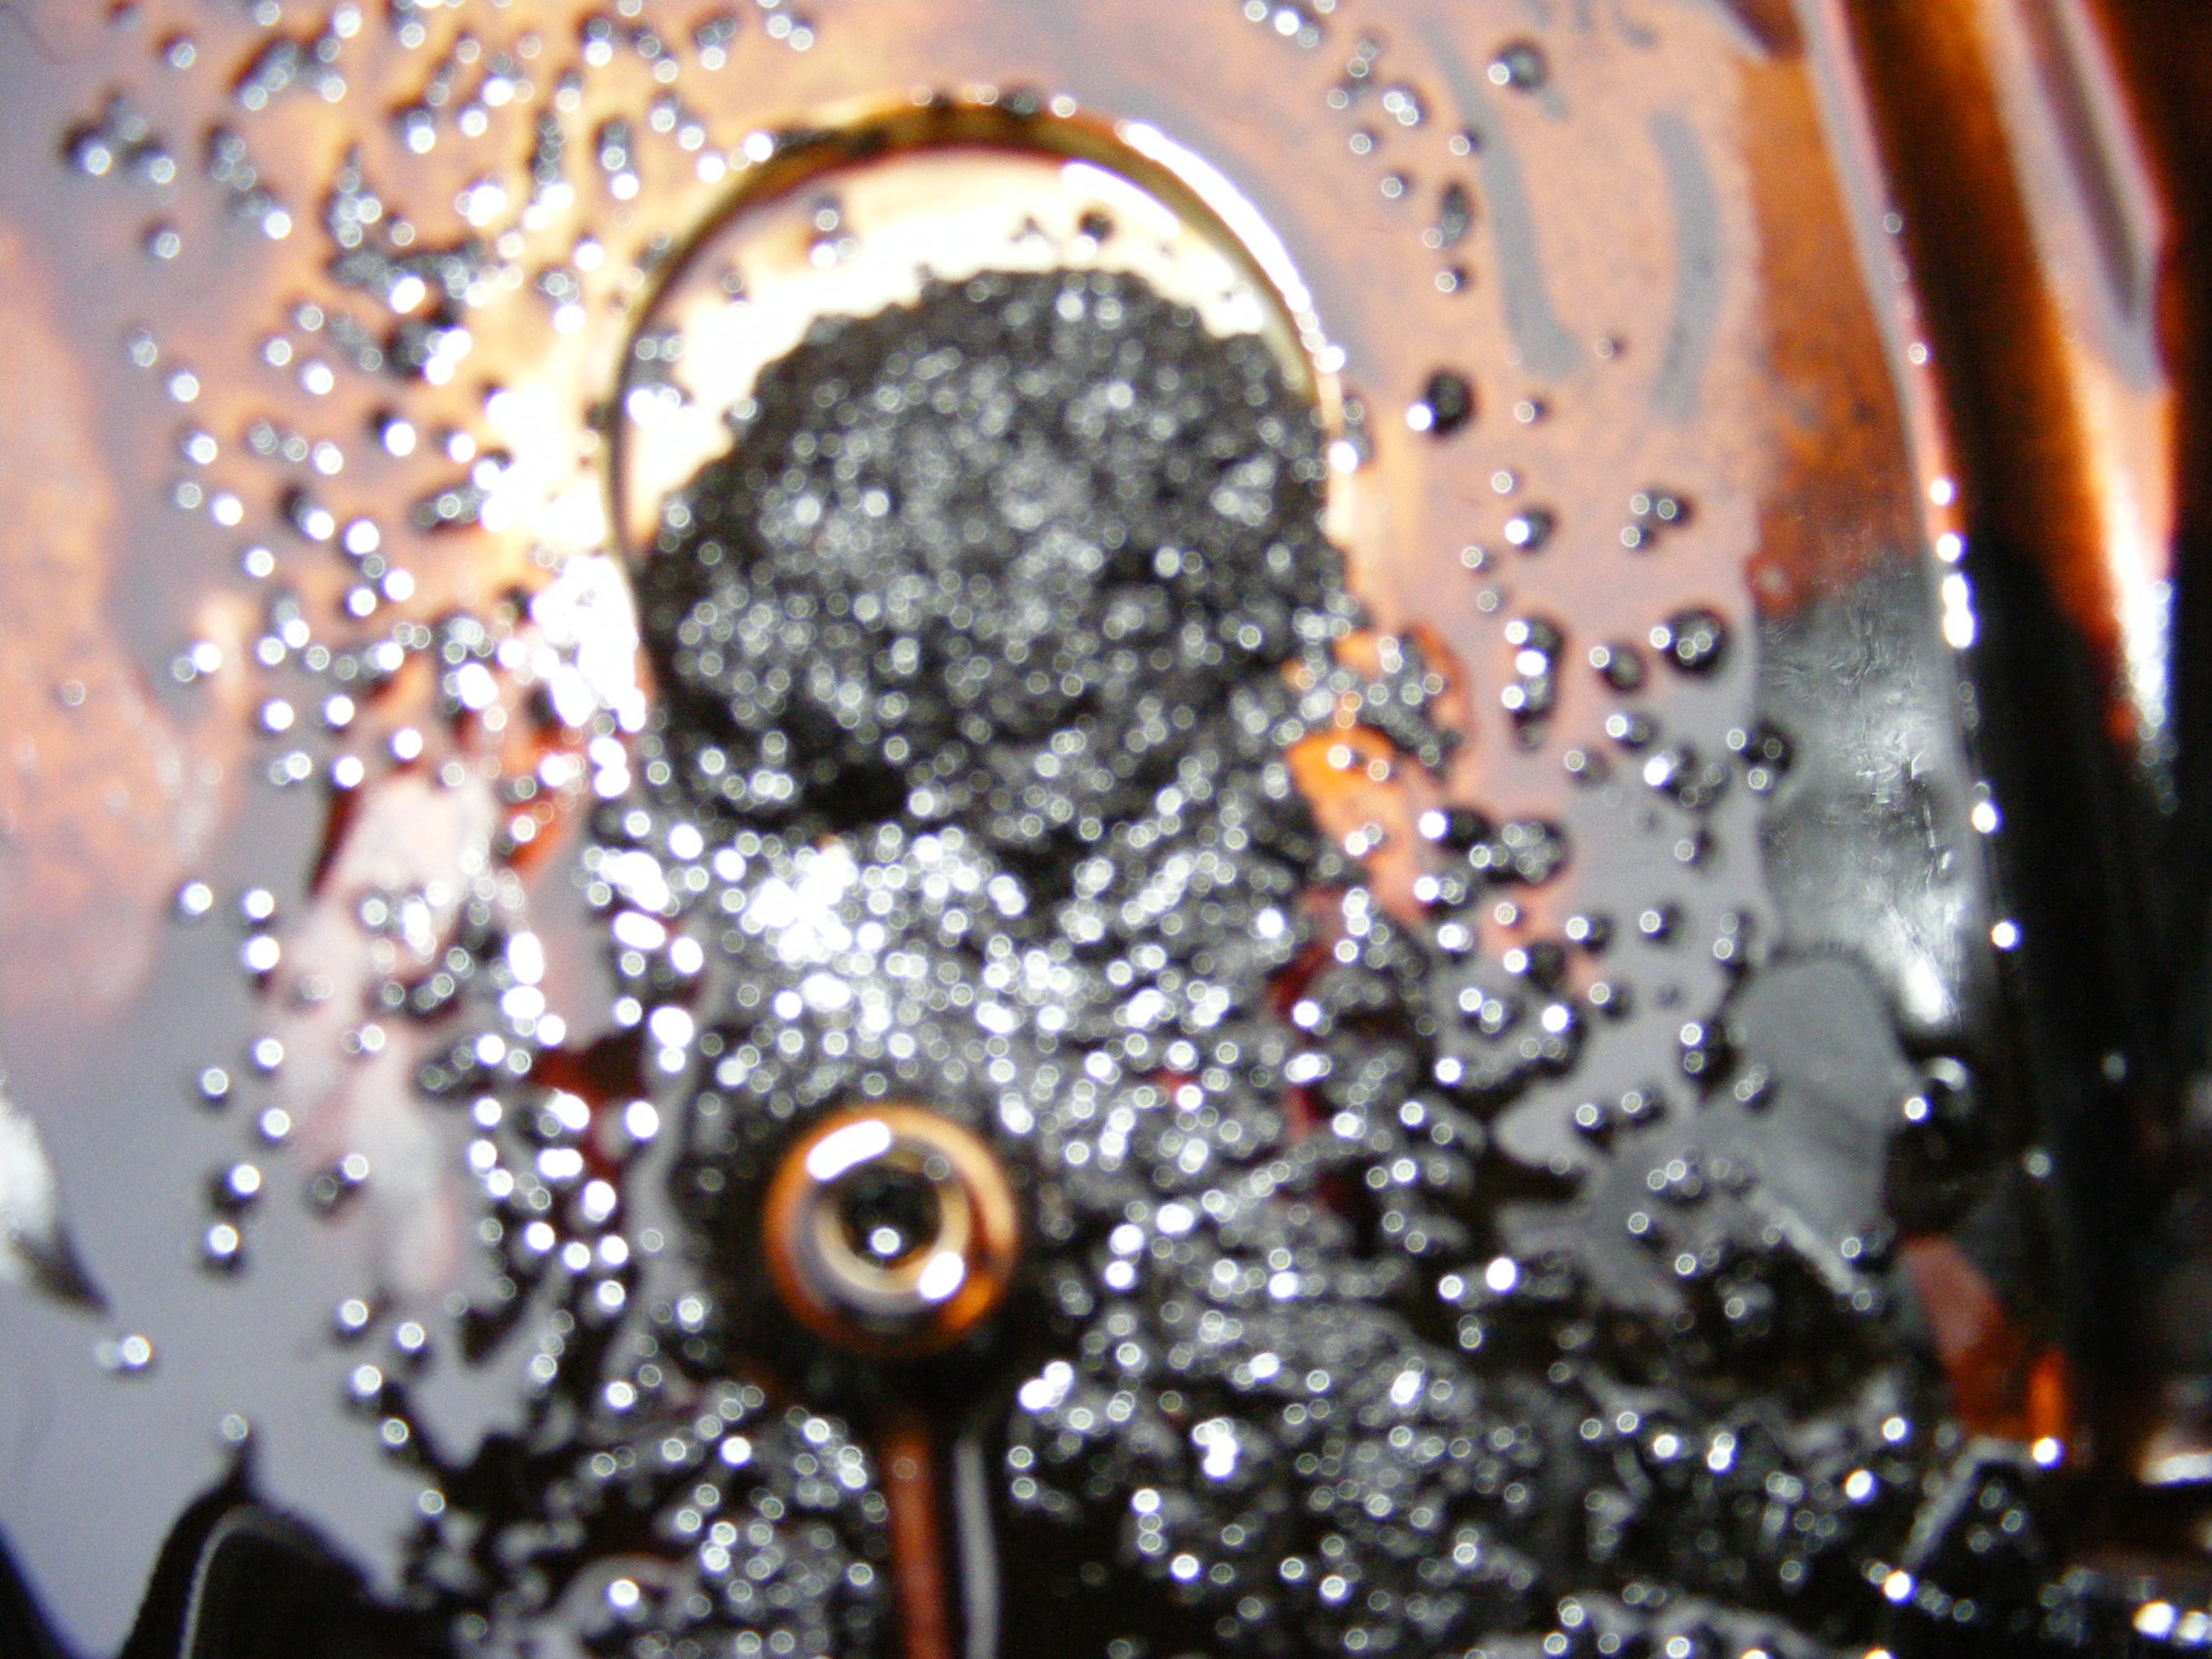
So, with the sump pan off the car, I removed the baffle plate by removing the four torx screws & cleaned this with spray on carb cleaner. As you can see from the pictures my sump was in a bad way, if left much longer I think it could have been bye bye engine..........What a mess! The biggest shock was when I removed the oil pick up pipe by un screwing two more torx screws. A gentle tug is needed to pull it away from its housing & a new O ring will be needed when it is re fitted. The amount of gunge I found under the gauze strainer was amazing!
|  |
As you can see here the sludge had formed a dome shaped mound underneath the strainer head & must have been causing oil flow problems. I have been using an engine flush at every other service (every 12k miles) & still there is a worring amount of sludge that did not come out when the engine oil was drained.
| 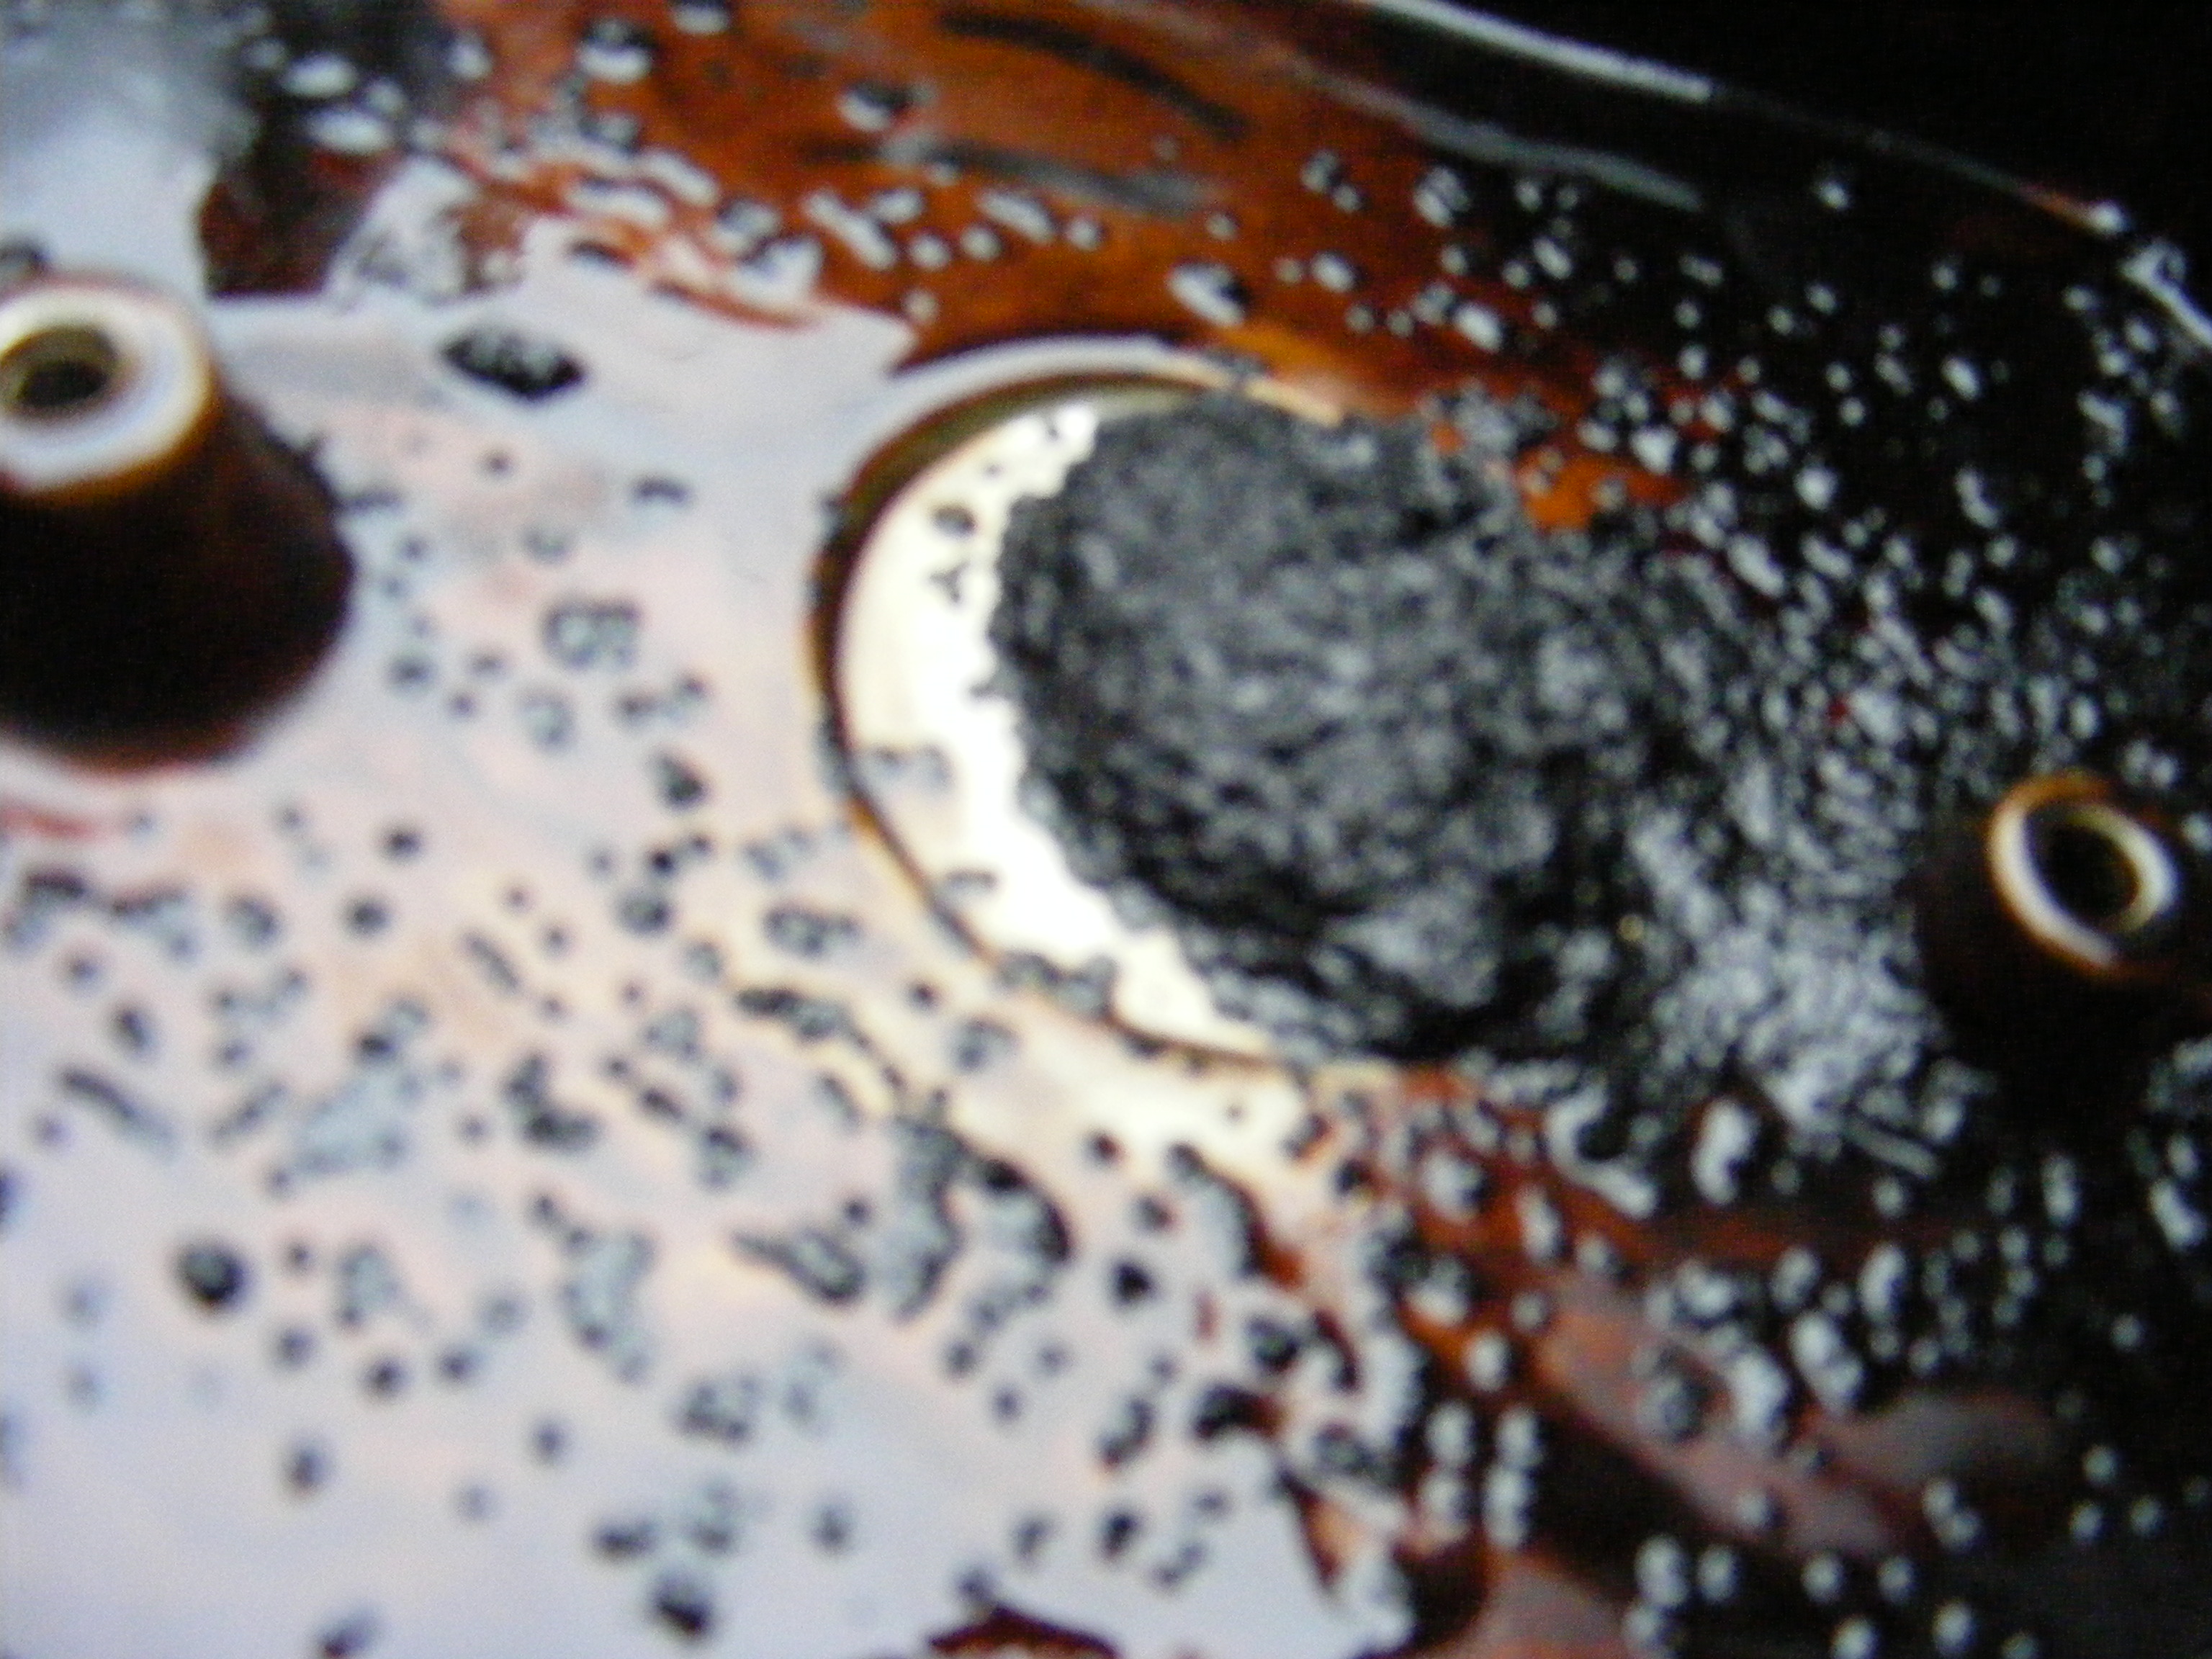 |
The sludge had a rubber feel to it, not really any metal bits so at least that was good news. I assume this was caused by the old PCV crankcase breather hoses as they perished from the inside & crumbled away into the engine oil. So if your 9-5 does not have the latest PCV breather hose kit fitted........Get it done soon!
|  |
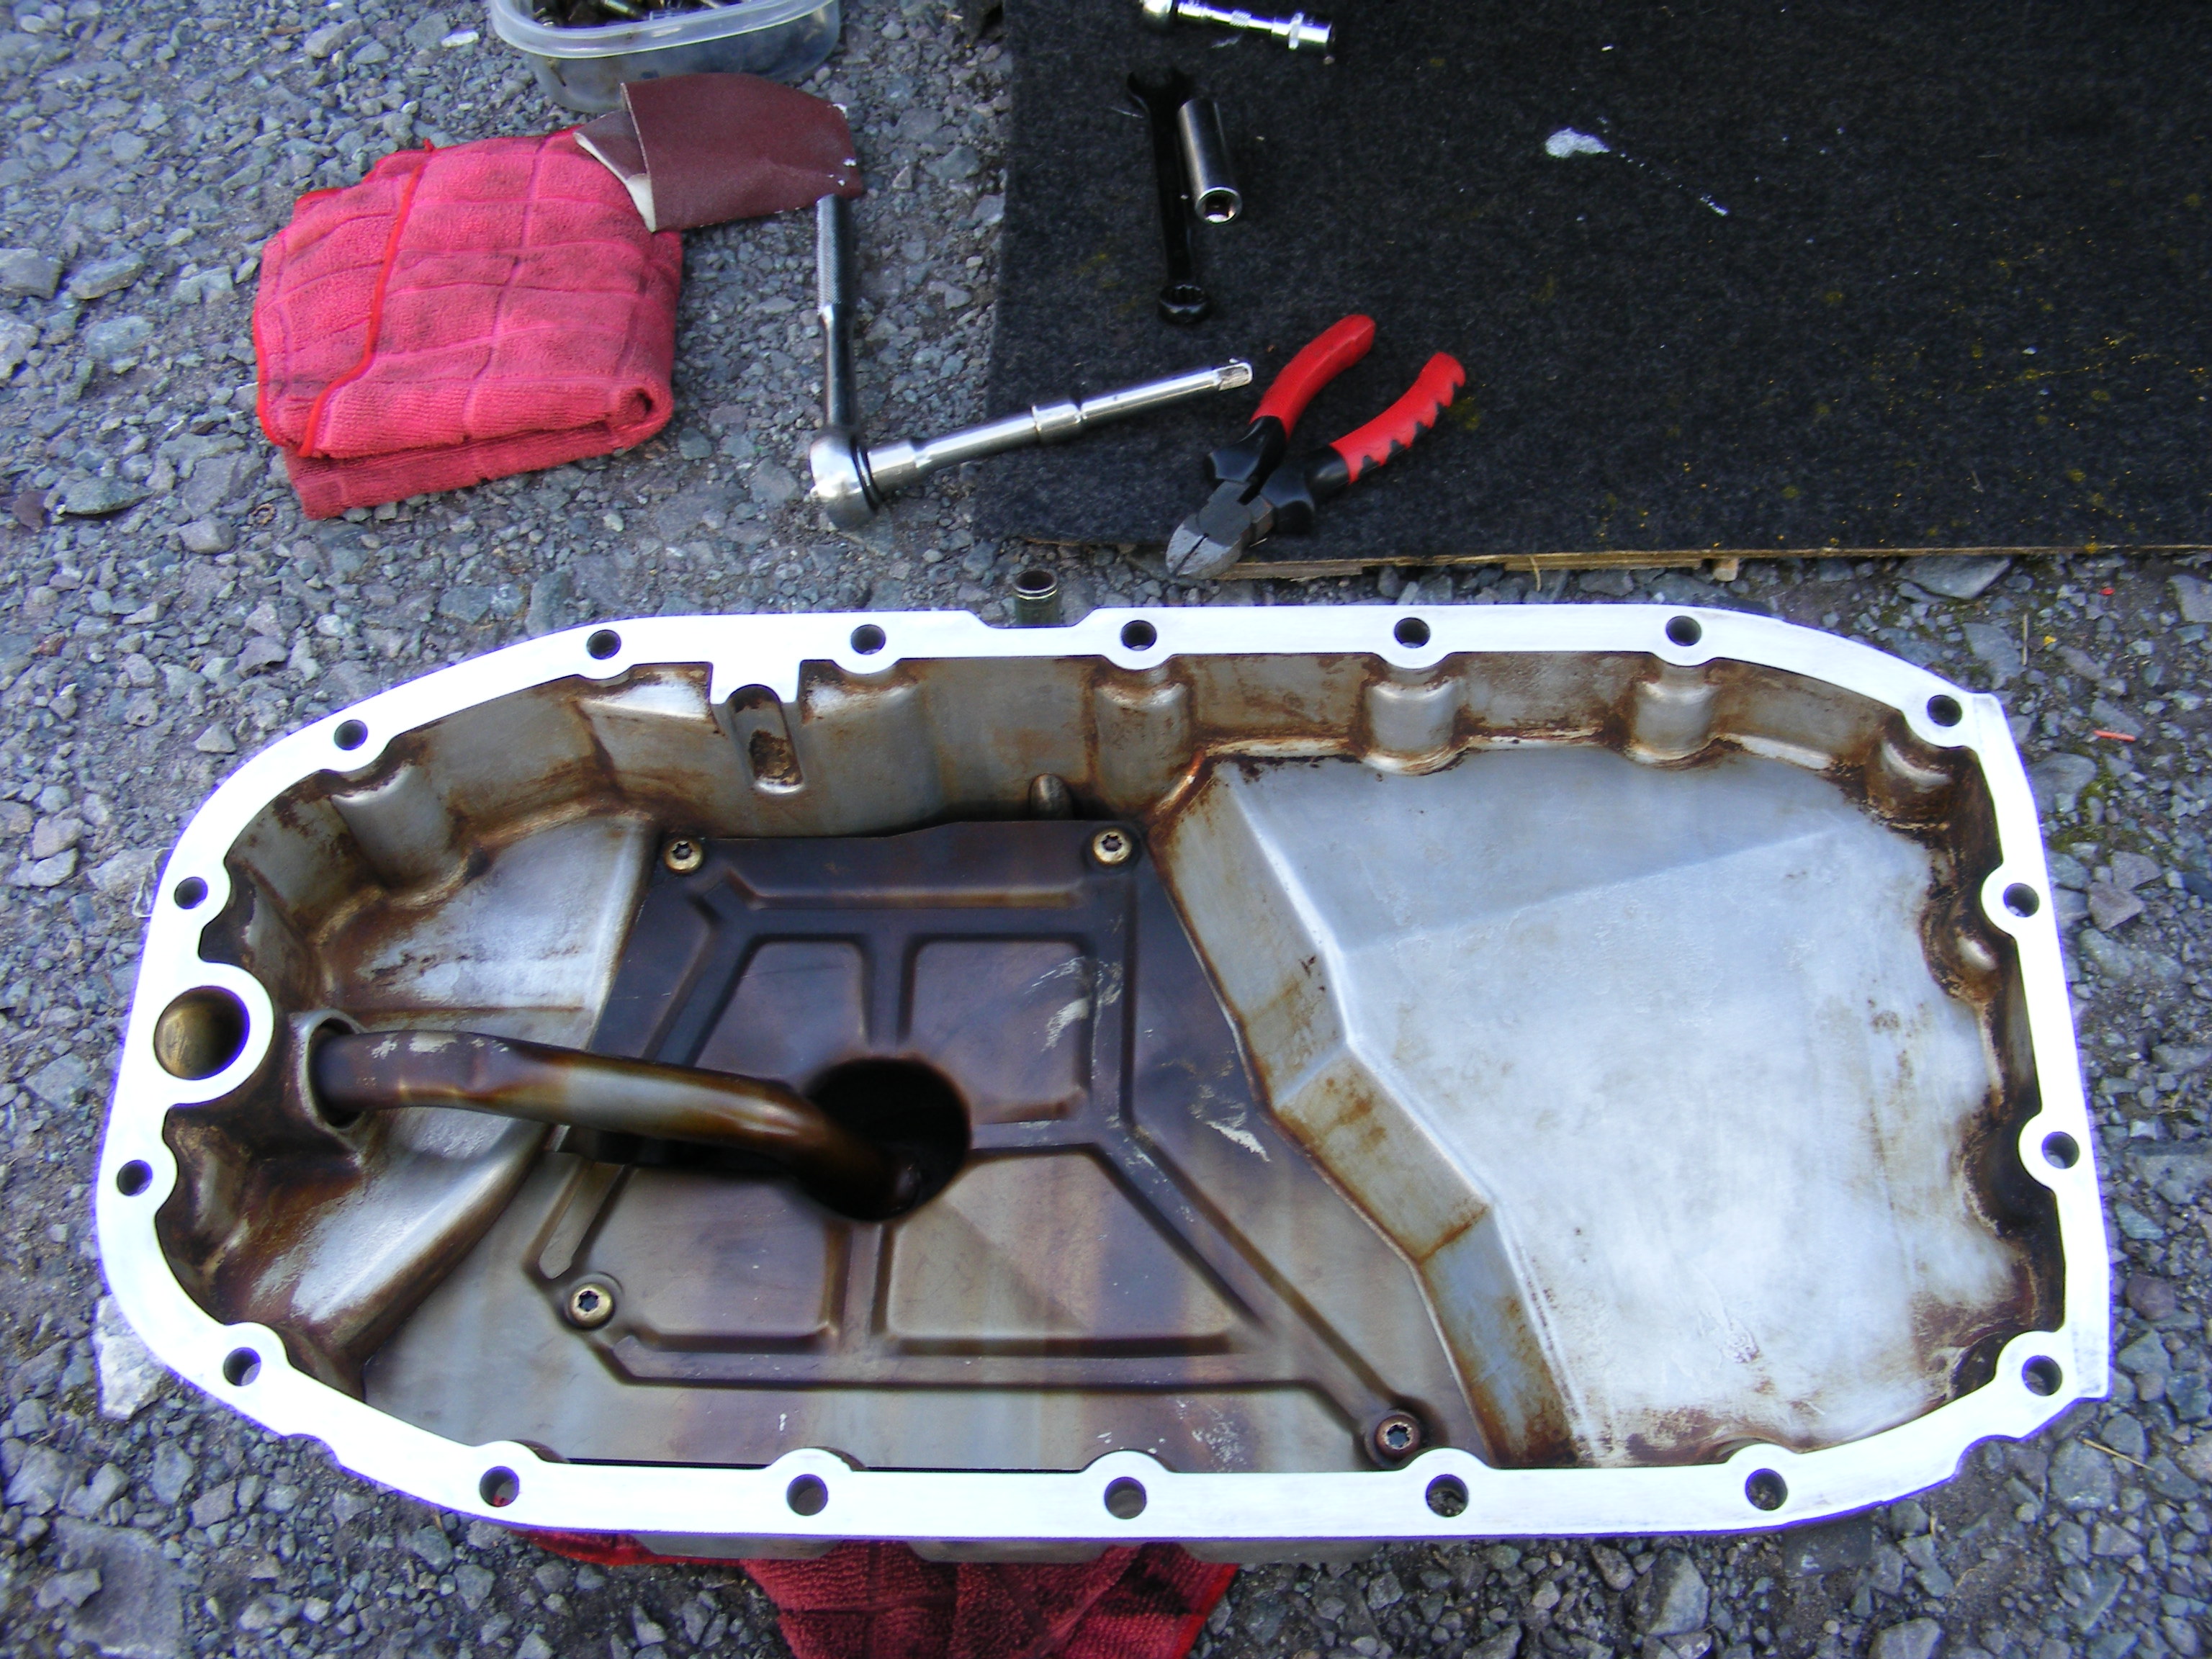
The oil pick up strainer pipe was not in bad condition at all , a good clean with carb cleaner & a back flush with some fresh engine oil was all that was needed here. The O ring was perished & needed replacing. If your O ring looks cracked & flat then it needs changing to help create a good seal & also help with oil pressure when its all back together again. 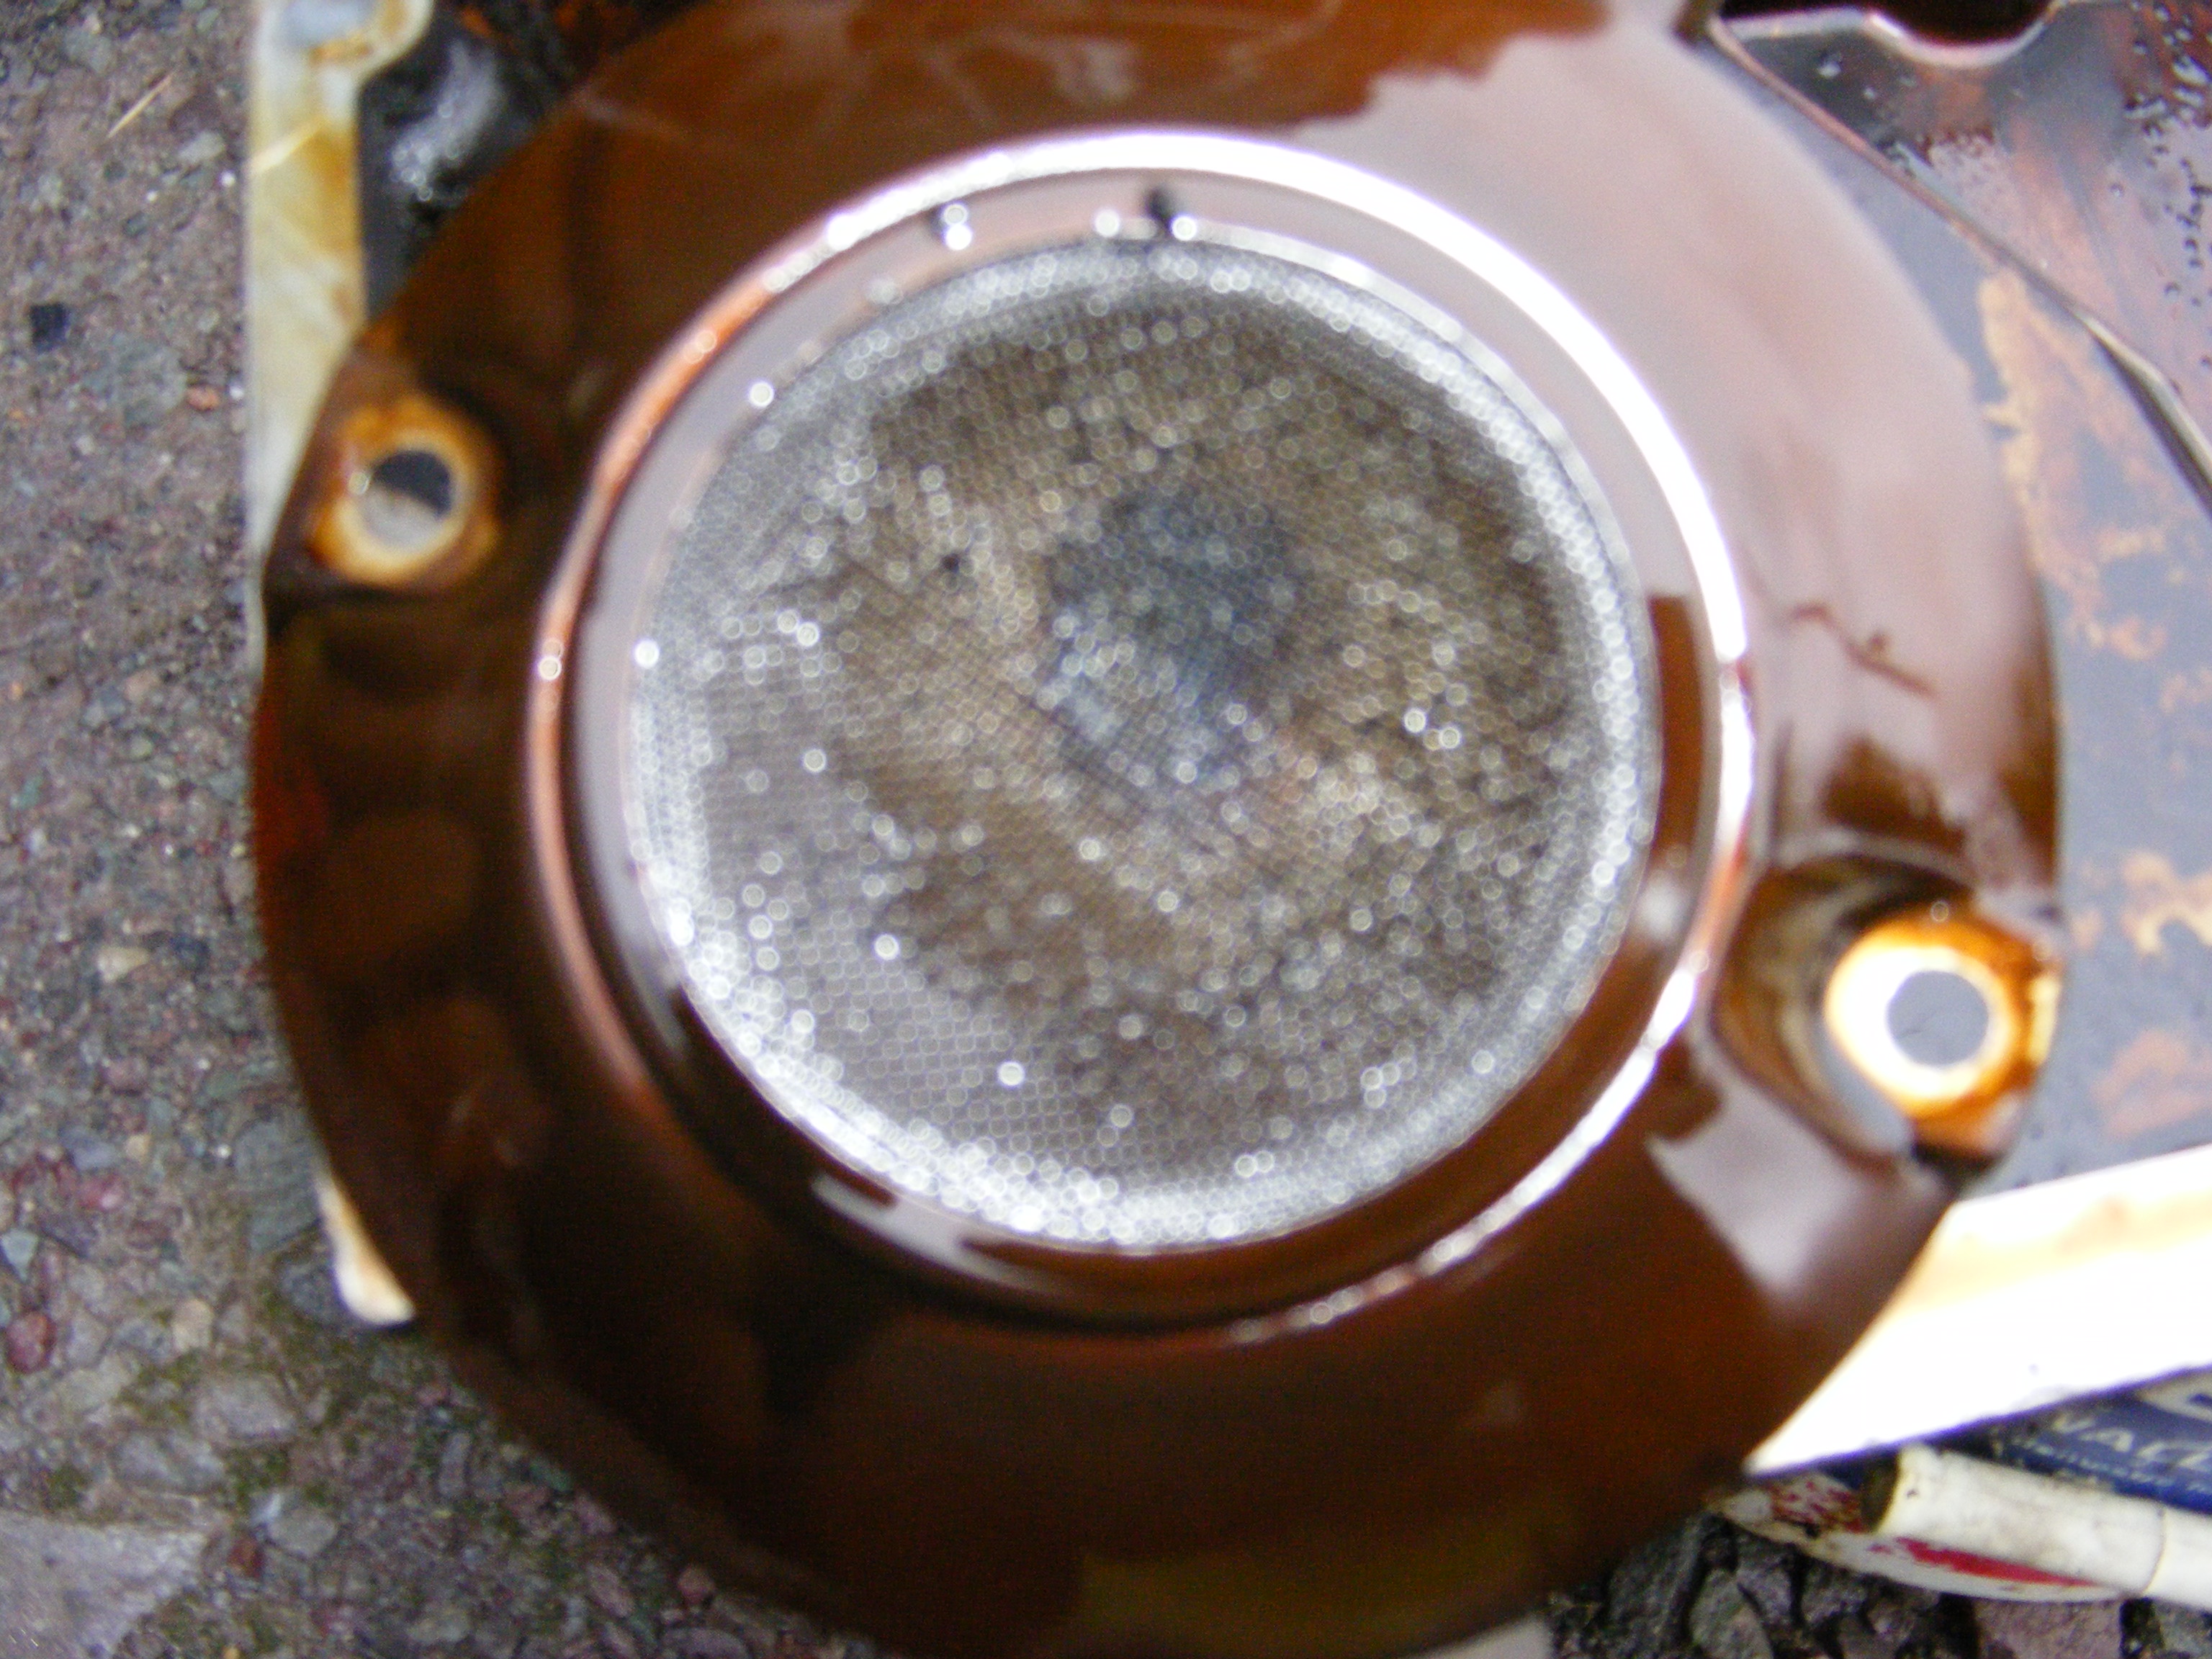 Ok, now its time to clean the sump pan. I used spray on carb cleaner & WD40. Some people use petrol but I did not have any to hand.I gave it a good soak to let the cleaner soften the carbon deposits which were baked onto the sump. After a good half hour soak I blasted the sump with my pressure washer. Most of the carbon came out without any issues & then the sump was left to dry in the sun. Another good clean with carb cleaner just to get the last bits of grime out & a really good clean of the flange lip to esnure a good seal when the sump pan is refitted. Another good wipe around with a clean cloth to make sure any water droplets & dust were gone & it was ready to be put back together. A new O ring was fitted to the oil strainer pick up pipe & then this was screwed back in place & then the baffle plate was refitted. Now to apply the seal. It is recomended that Loctite 518 is the only flange seal to be used here, so I went with that theroy & applied a small amount of Loctite around the edge & refitted the sump pan to the bottom end of the engine. No real dramas here, it went back on with no problems & I then bolted it back into place.
|

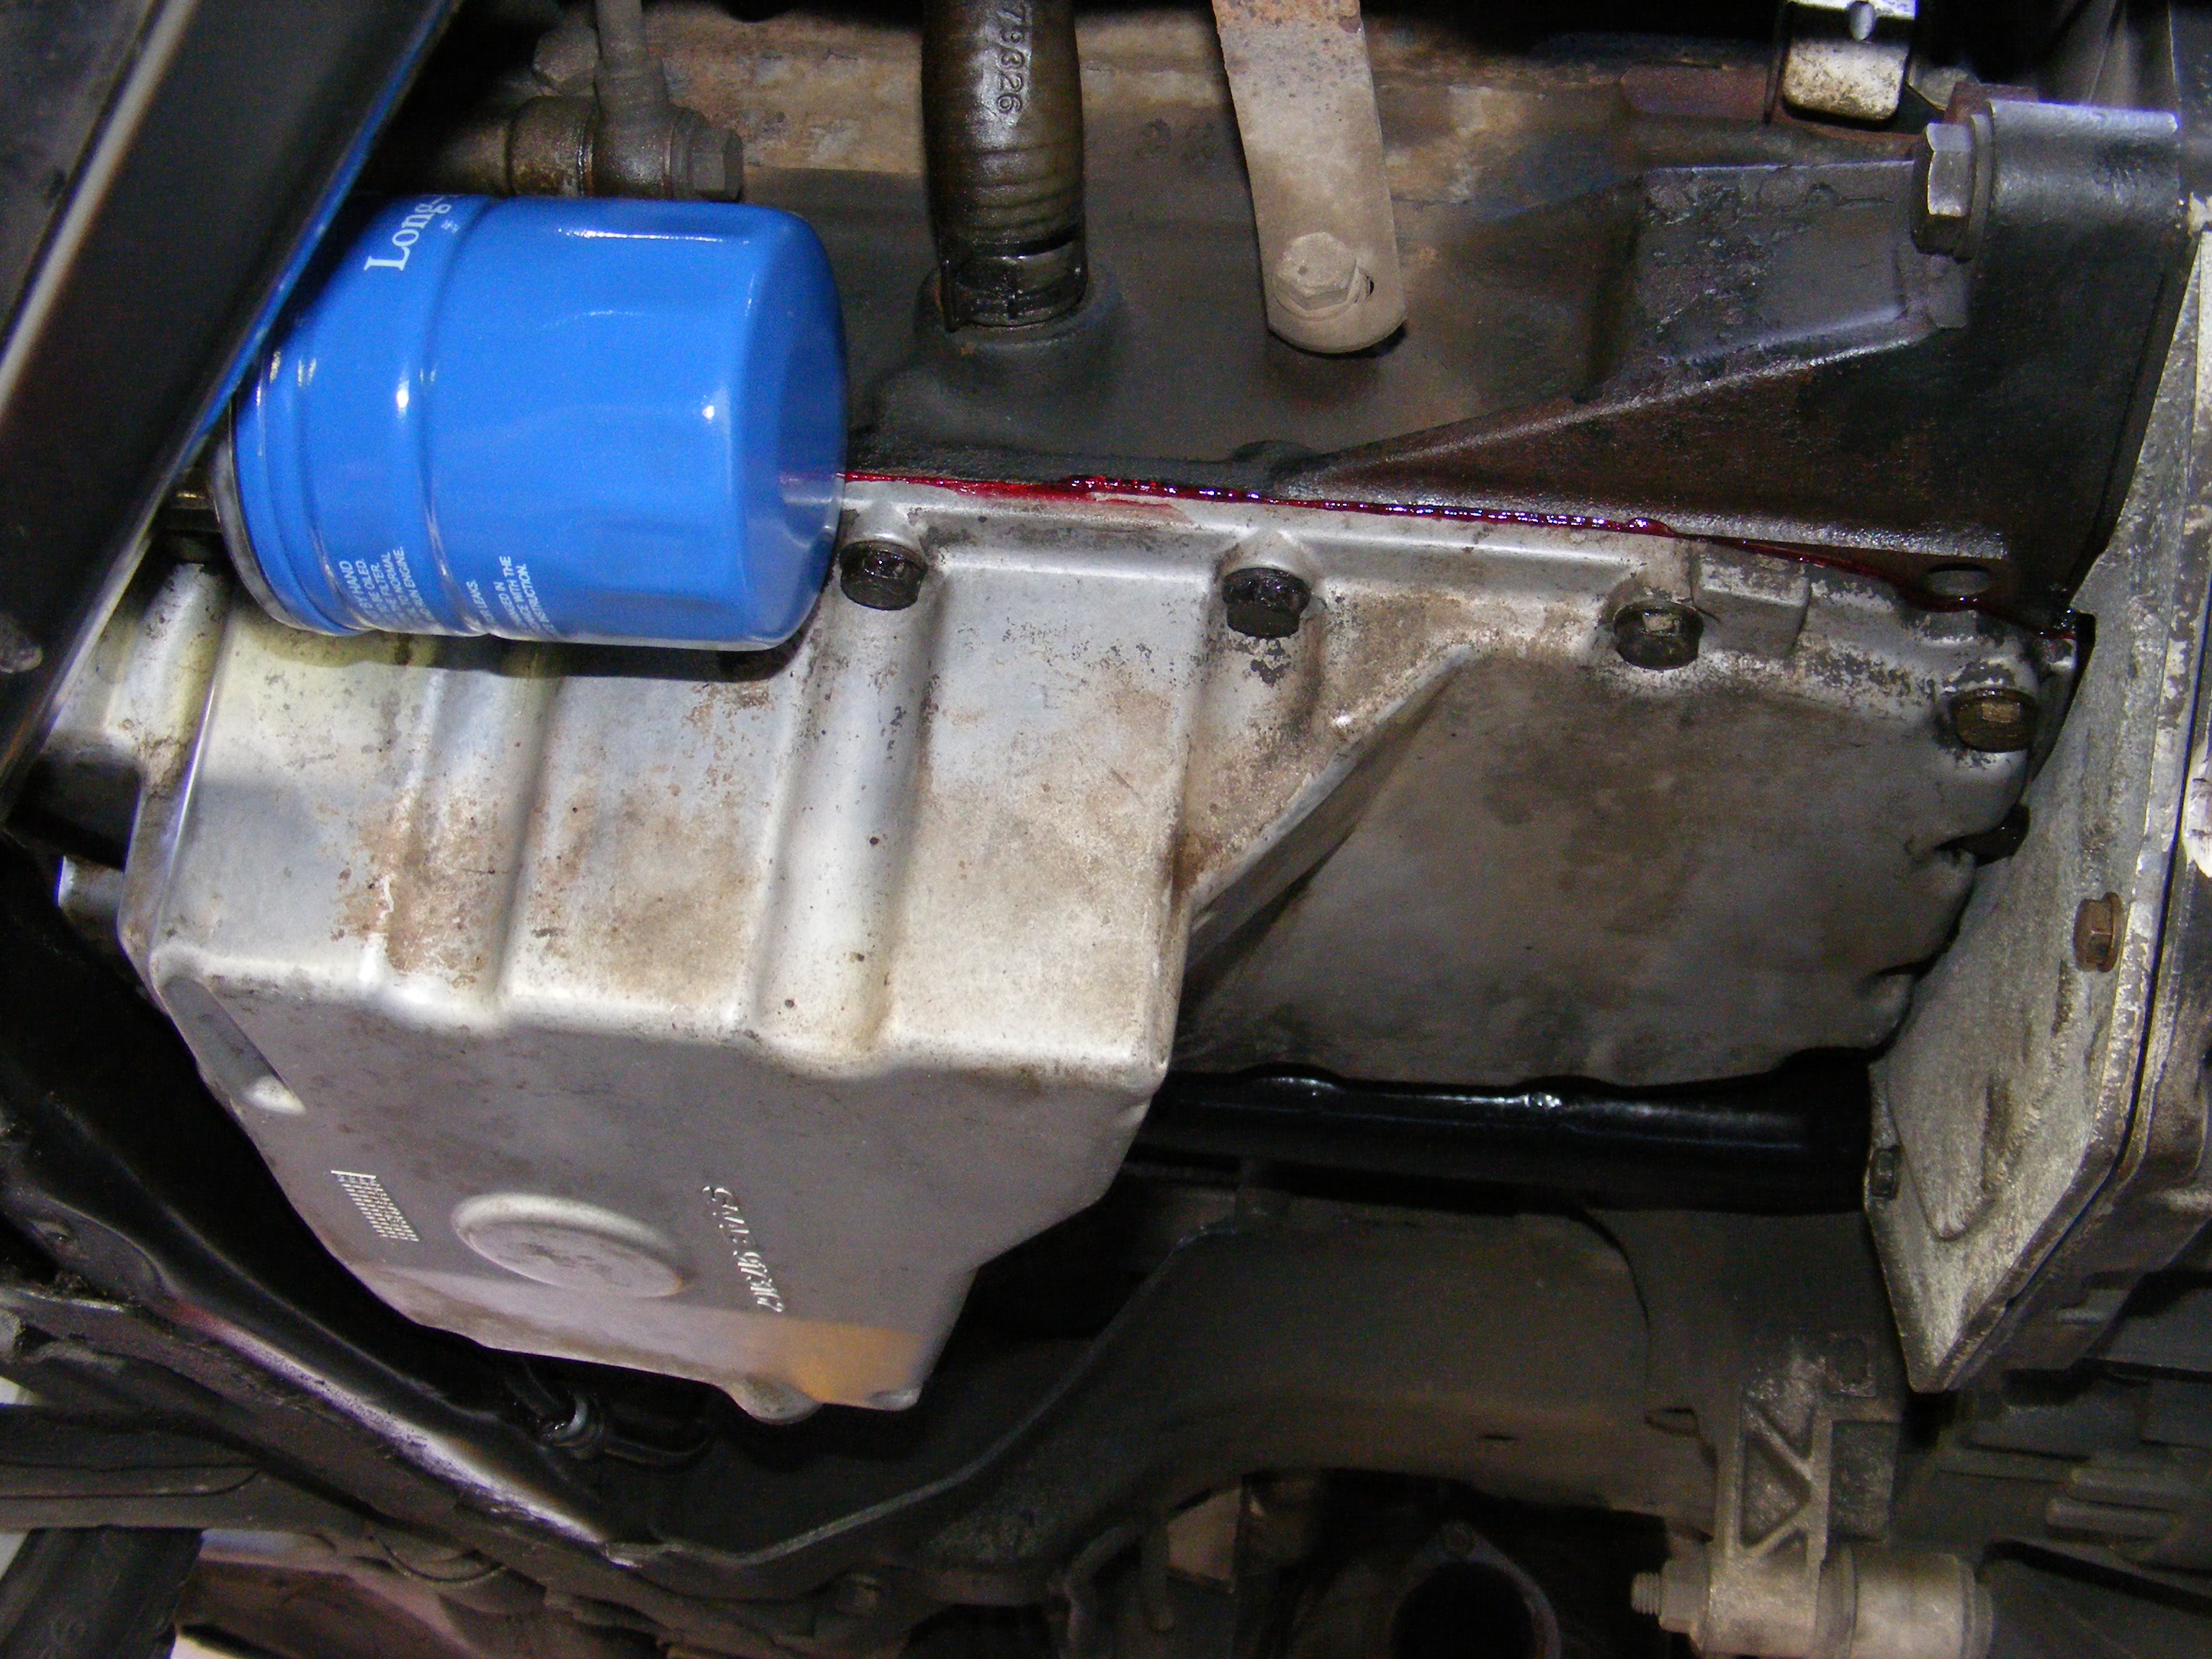
All done, the sump pan is refitted to the car, with fresh Mobil One fully synthetic oil & a new Saab oil filter. All that is left to do is refit the cat & downpipe after giving the two joints a good clean & fit the under engine plastic tray & that is it, a nice clean sump & strainer & the piece of mind in knowing your sump is sludge free.
|  |