Saab 9-5 boost gauge fitting.
A popular mod for many 9-5 owners wanting to keep an eye on turbo boost levels.
Why? Well cosmetic reasons, or just to see how well your turbo is working & perhaps a good early warning of turbo problems.
The Aero model (& other later HPT models) had a turbo gauge fitted into the dash cluster, the LPT models did not, however this is not a boost gauge as such, more of an engine load meter which receives signals via the ECU rather than direct Vacuum pressure from the inlet manifold, its more an electrical meter than a true mechanical pressure gauge.
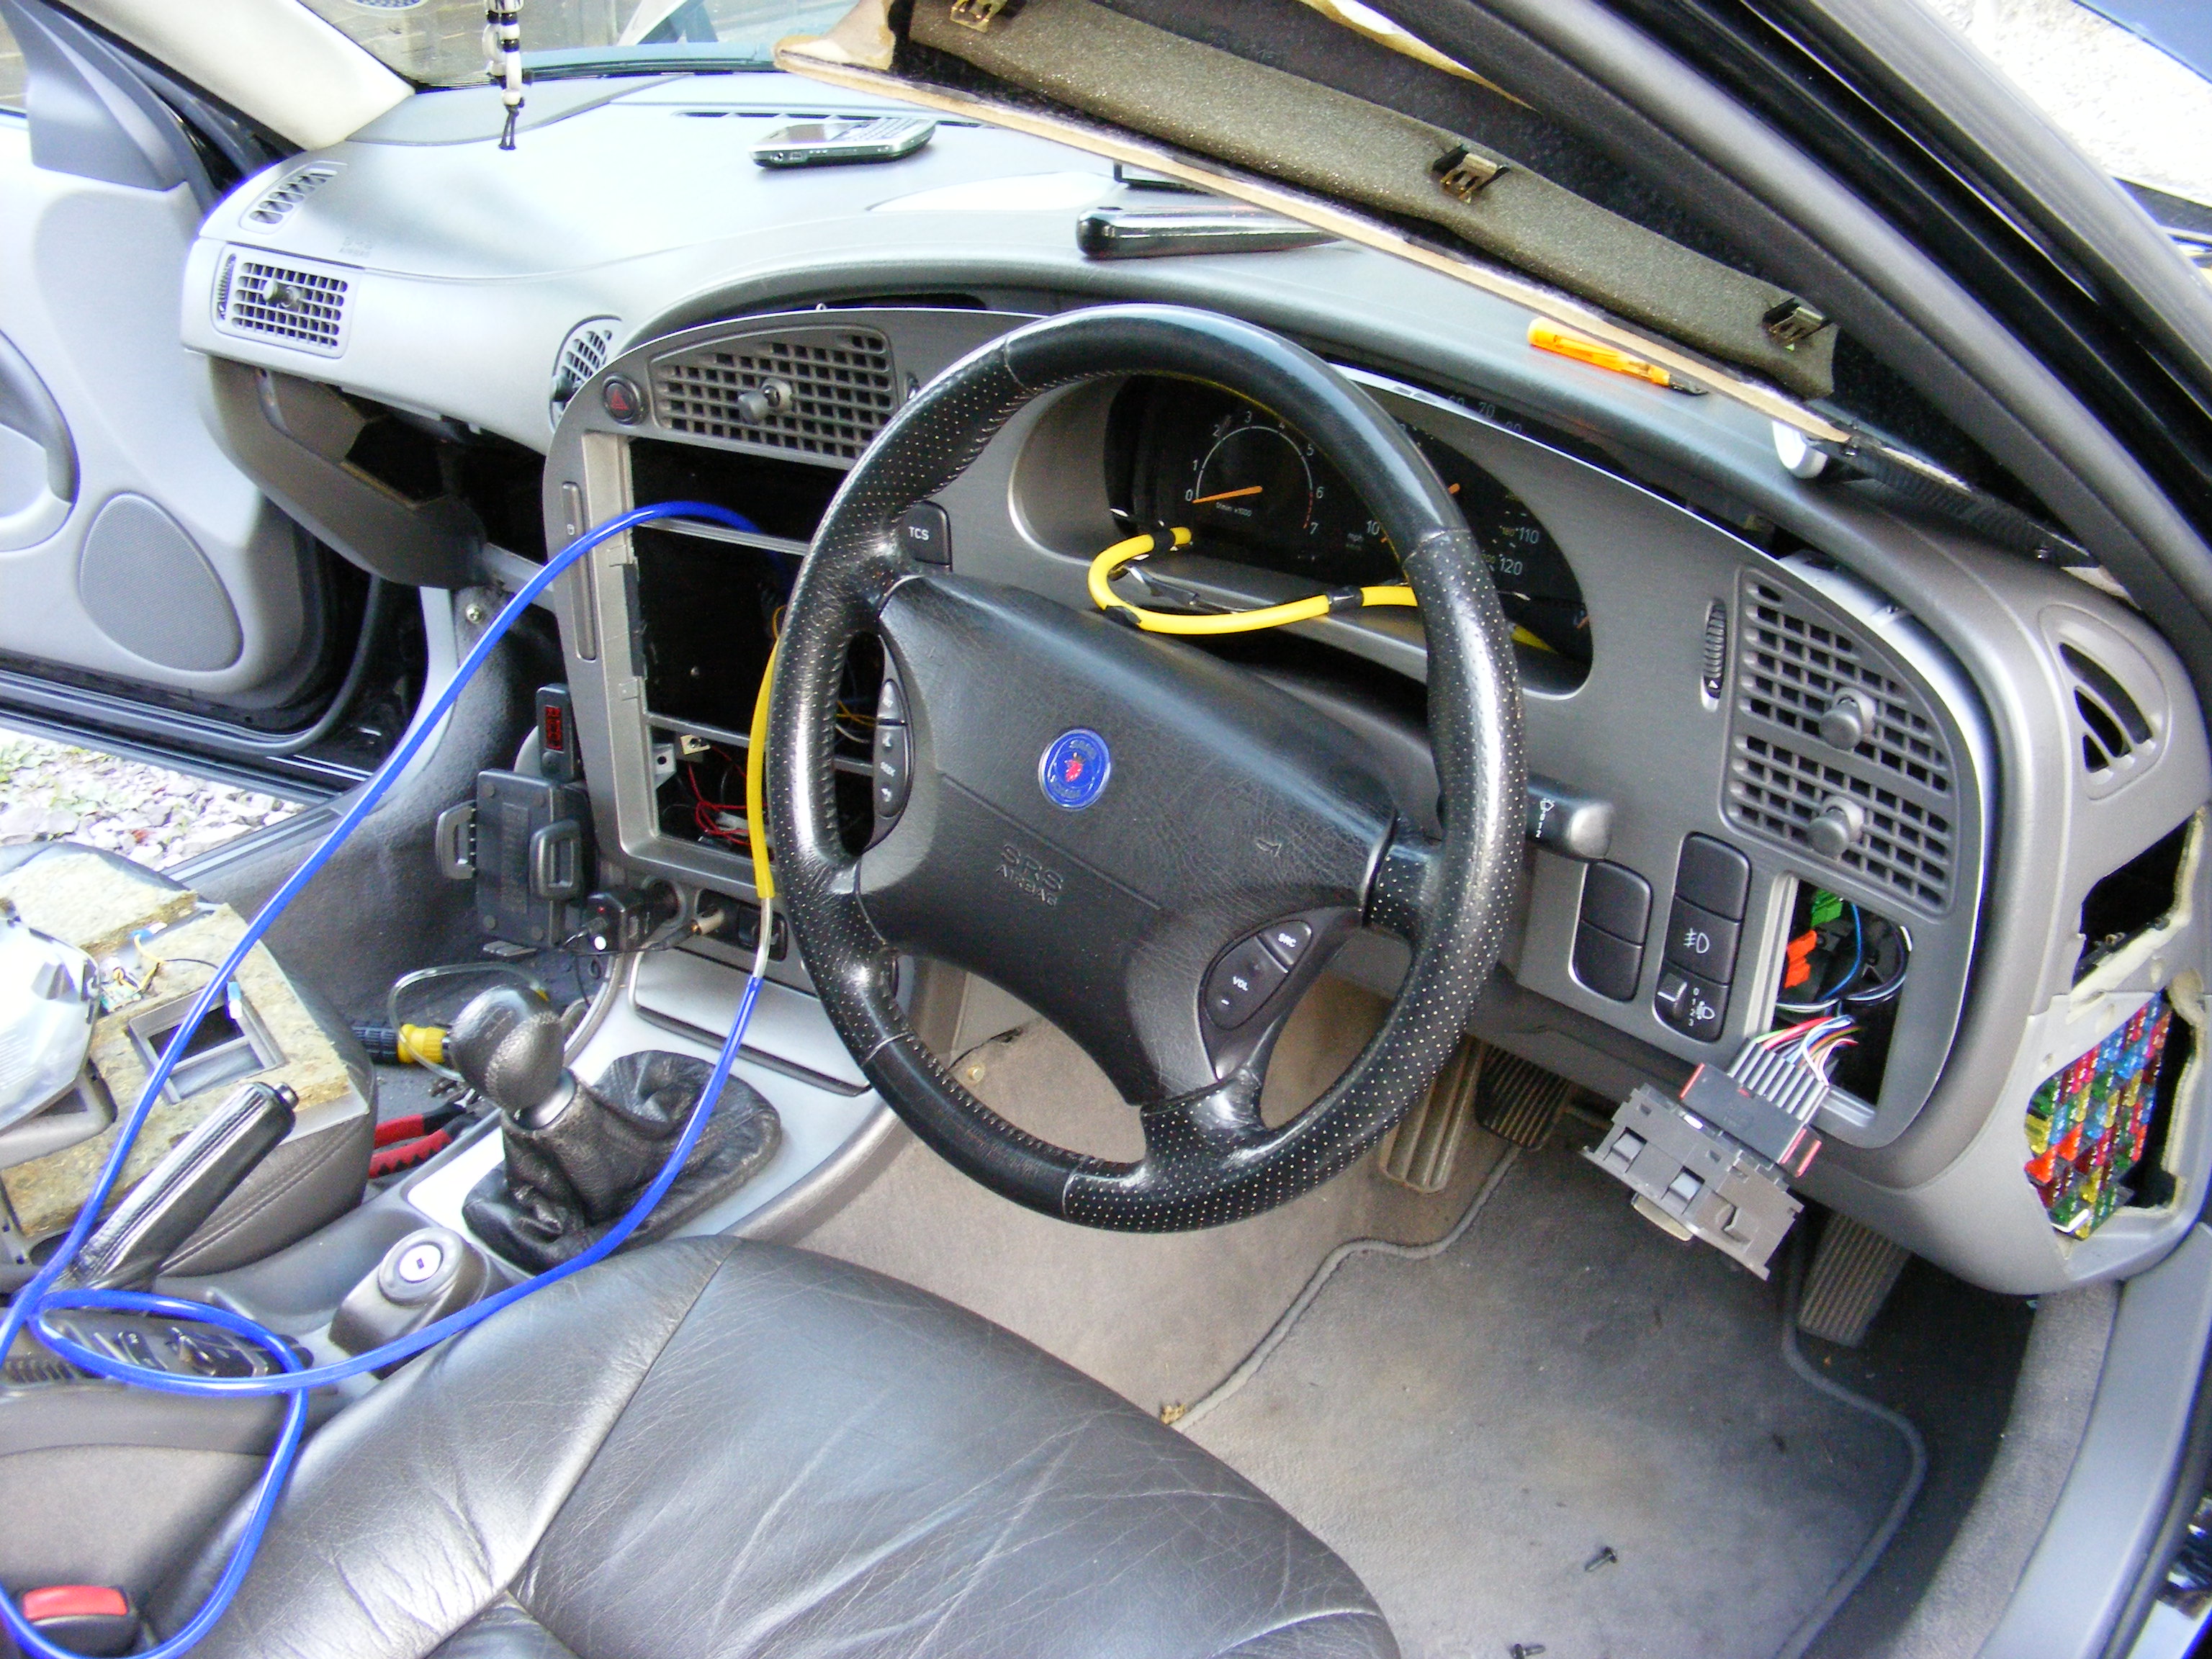
Now, I have fitted the dash cluster from a later Areo into my 2.0 LPT (as you can see from my pictures) just because I wanted the Saab gauge, this was a very complicated project that involved a complete strip down of the dash cluster & soldering bits of wire everywhere, so I wont go into that just now.
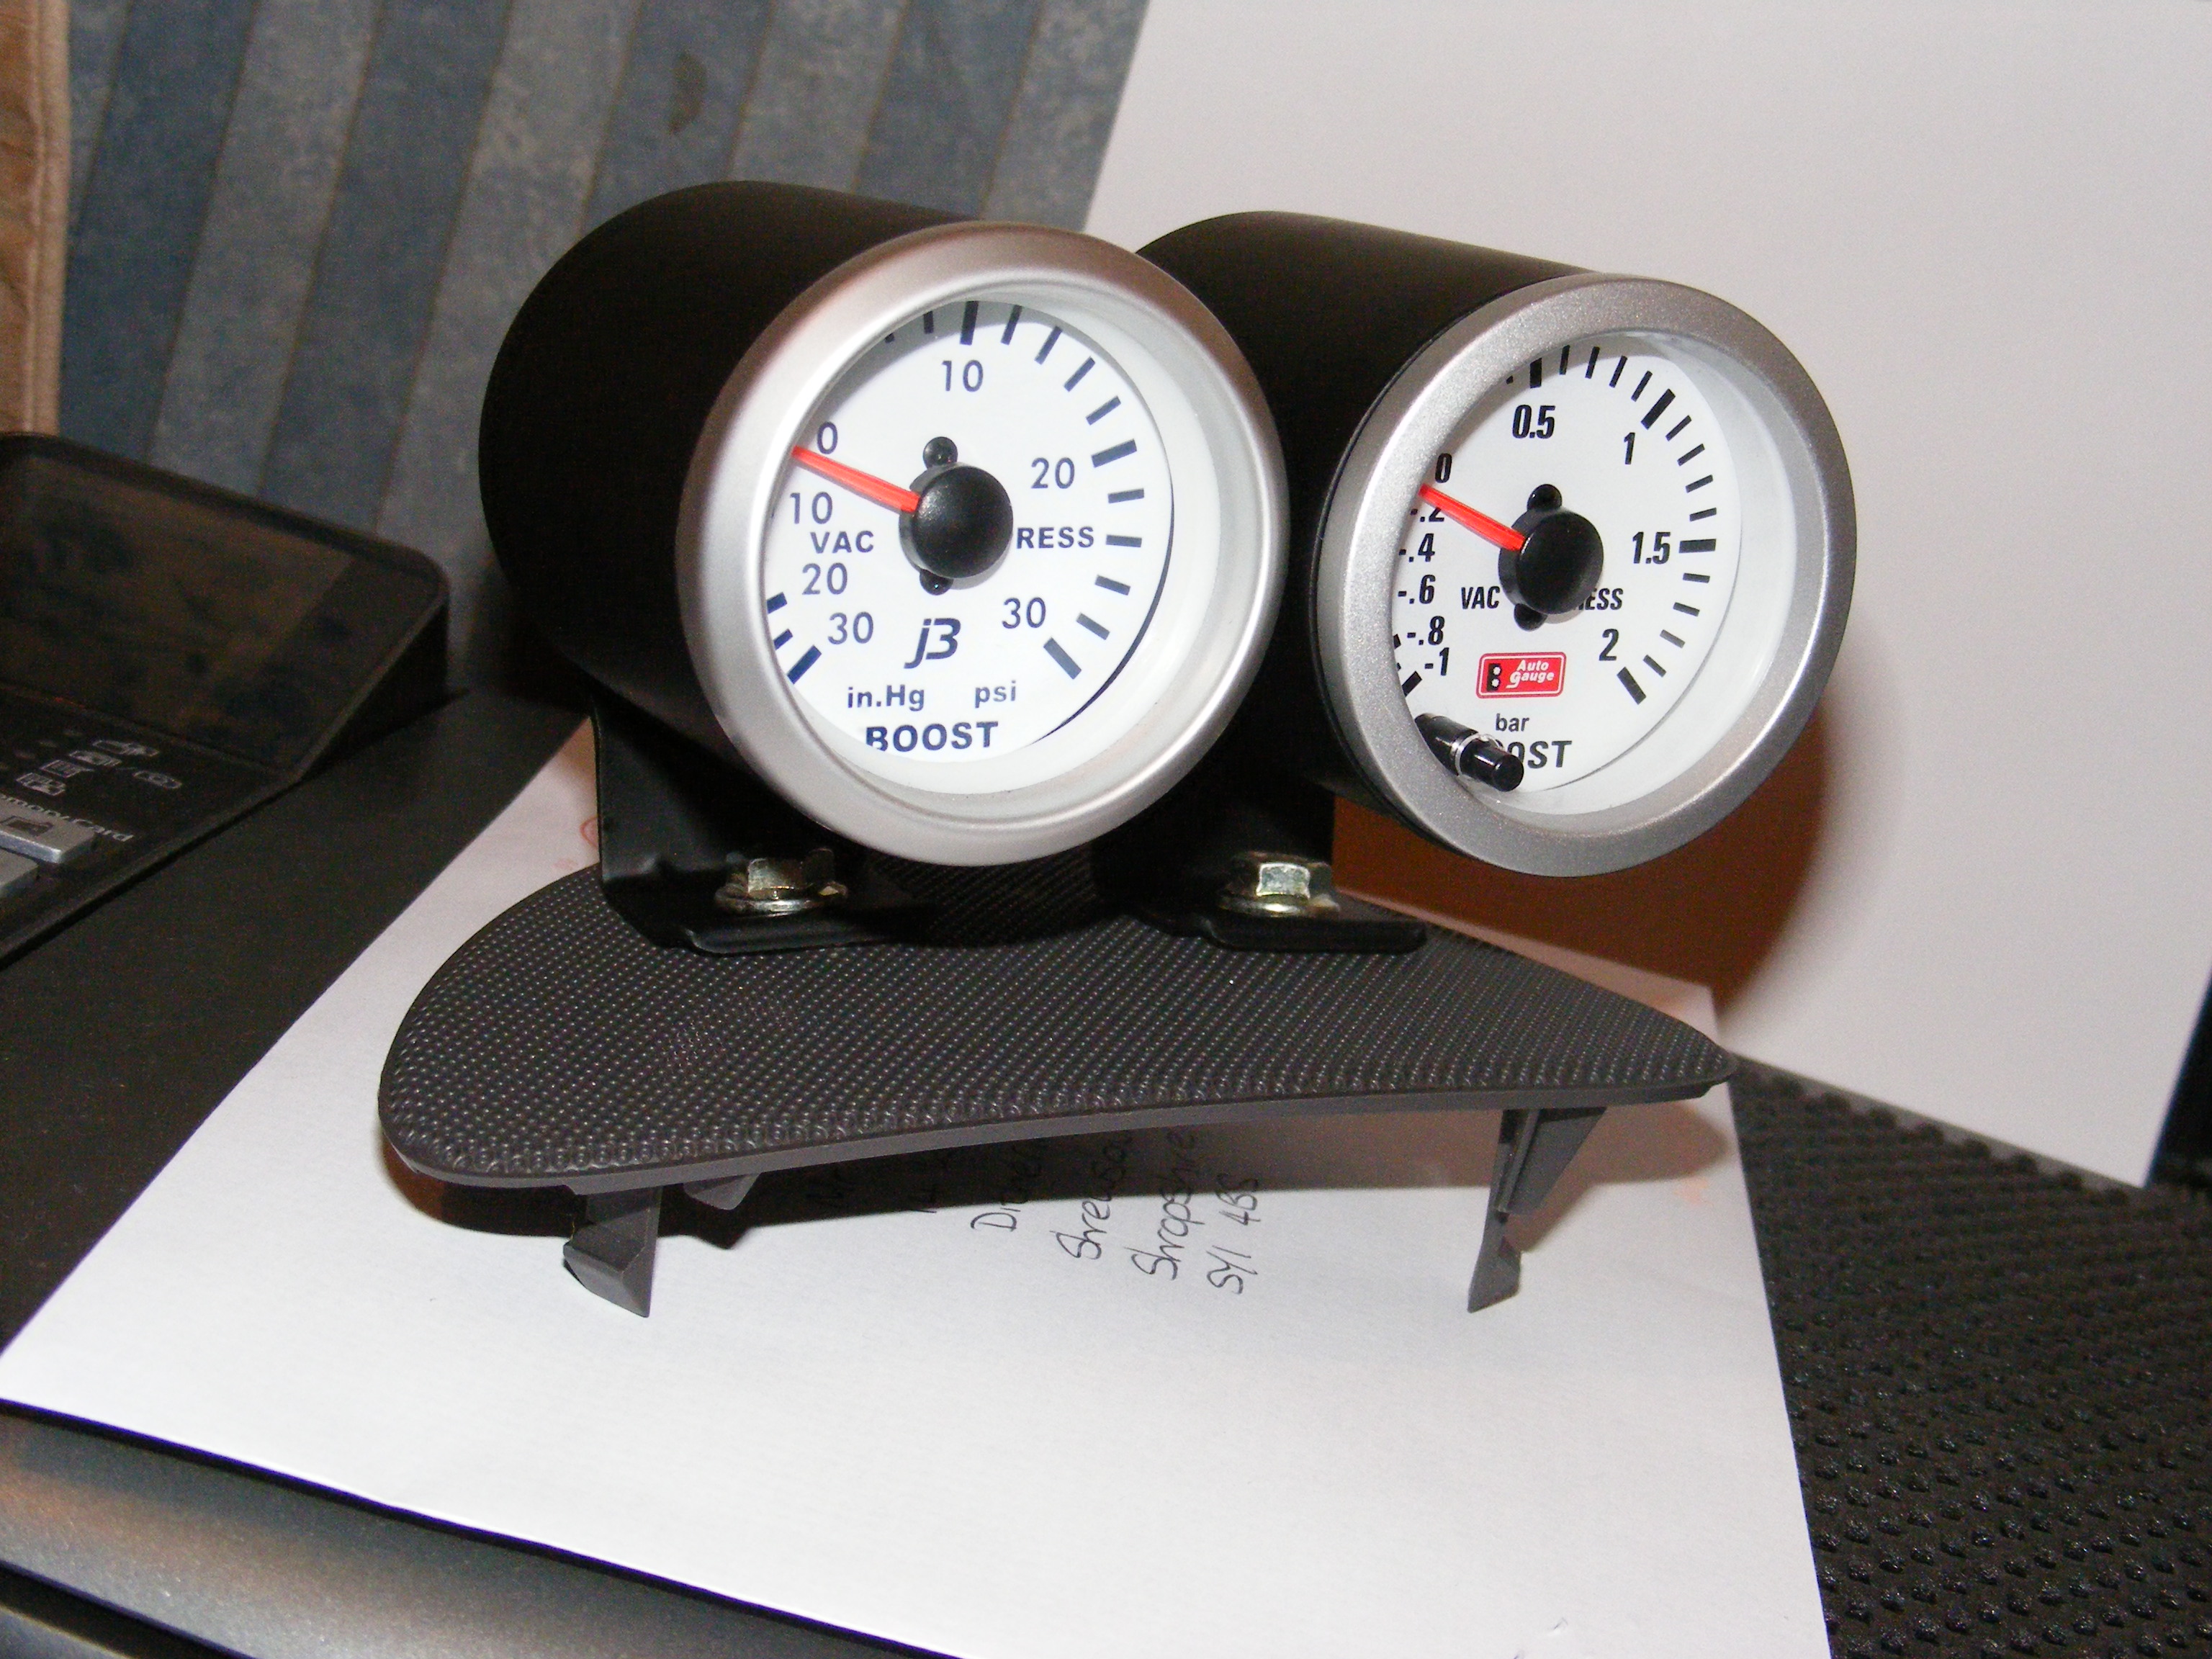
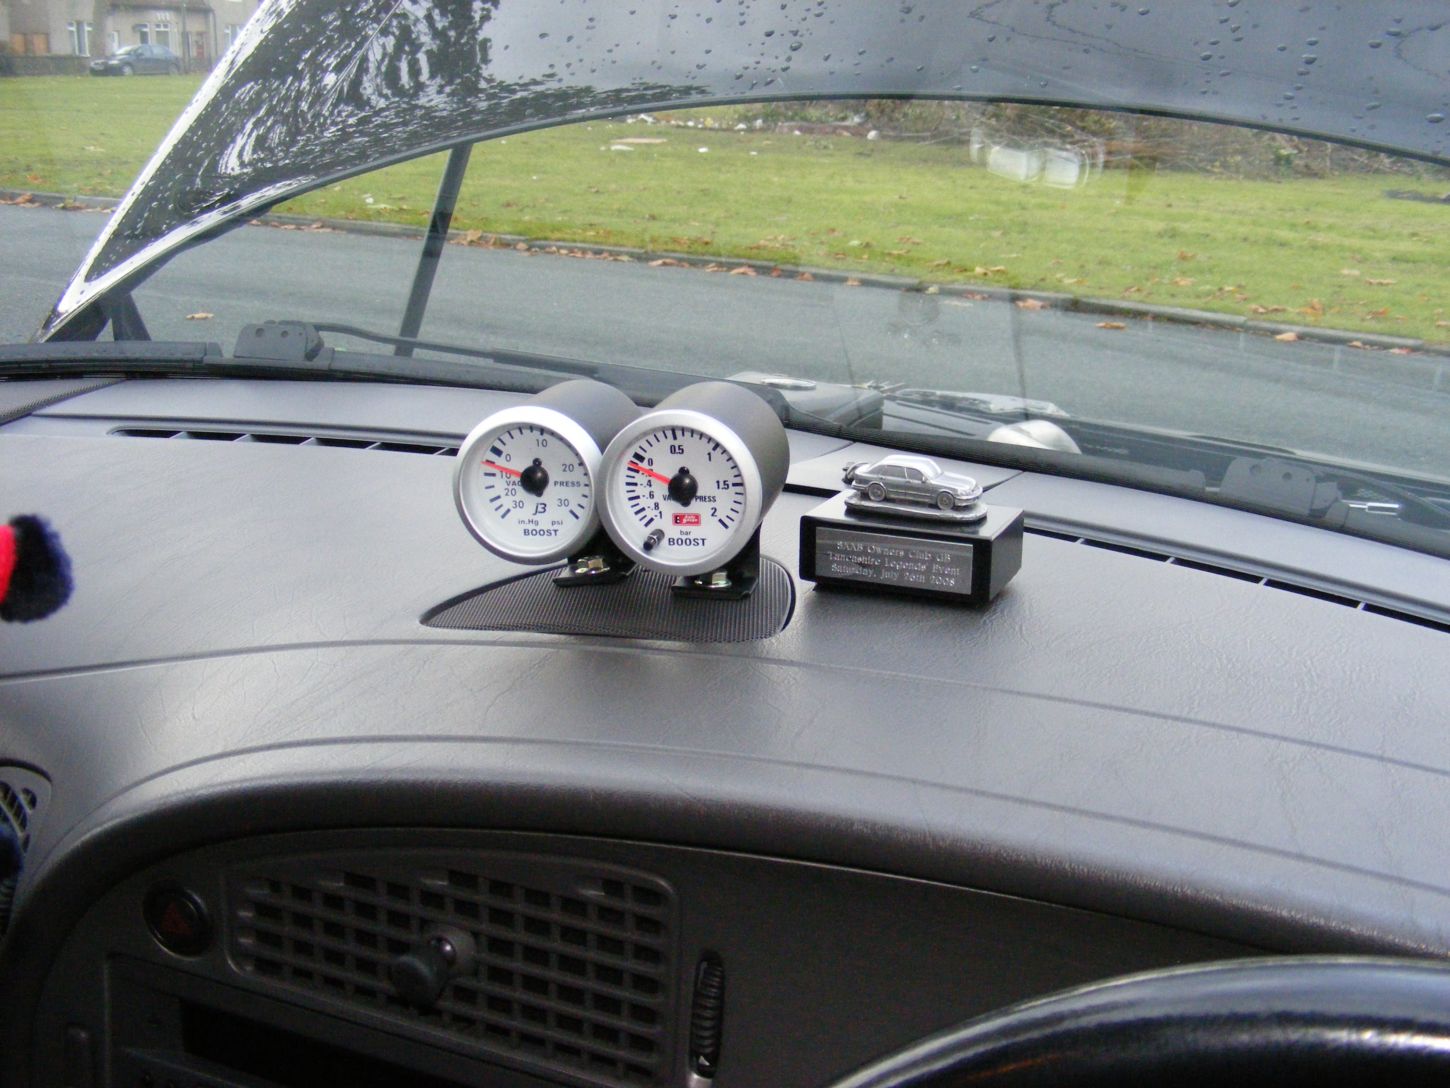
Boost gauges measure the vacuum pressure inside the inlet manifold, either in PSI or BAR. I wanted both so I fitted a JR gauge in PSI & a Auto Gauge in BAR. Any accessory boost gauge kit bought will come with a fitting guide & all the required hoses & a t-piece.
Normal cost is around £20 upwards for a gauge & anything from £5 upwards for a pod to fit it into. Pillar pods are all the rage these days but I went for dash mounted black metal pods, I like the retro old school look myself.
Here is a quick guide on how I fitted mine.
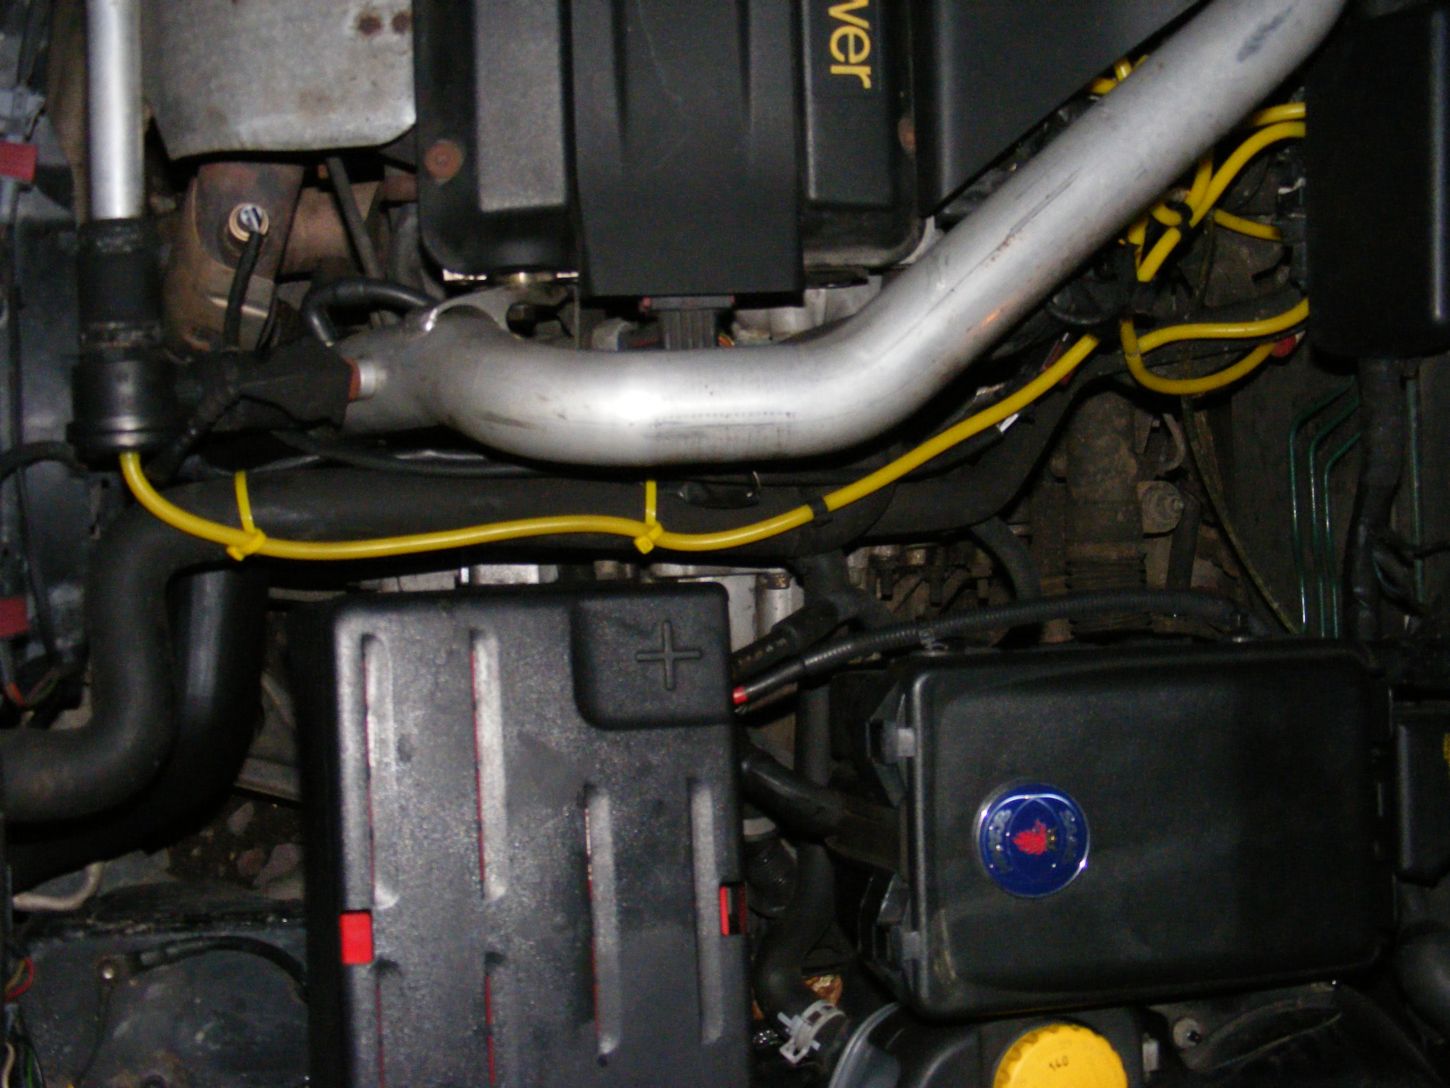 |  |
Question one, where do I take the vacuum feed for my boost gauge from?
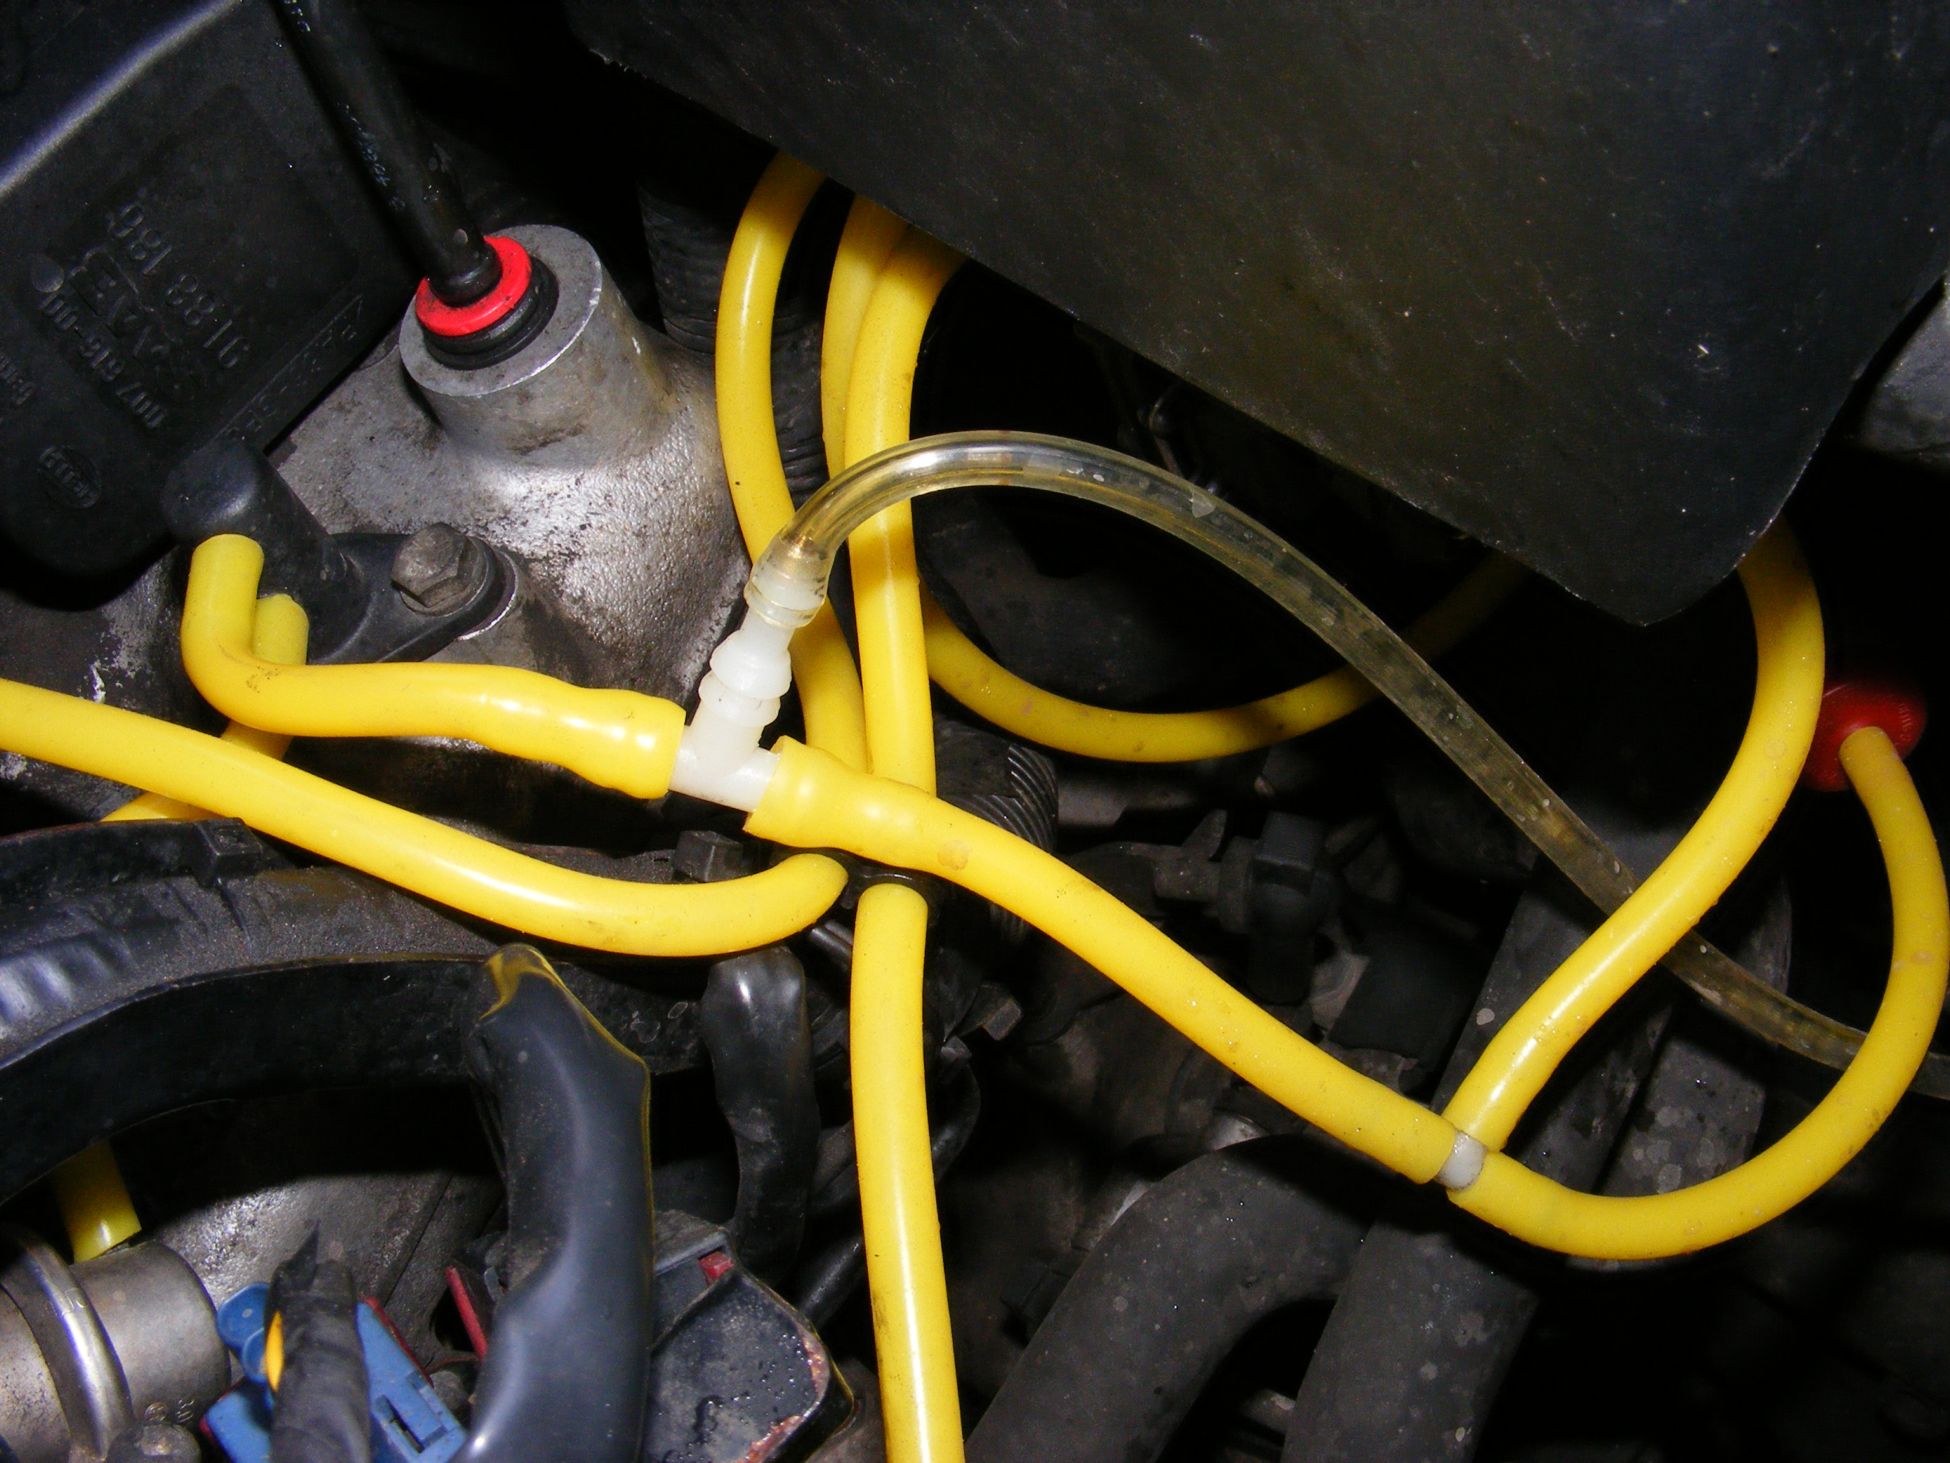
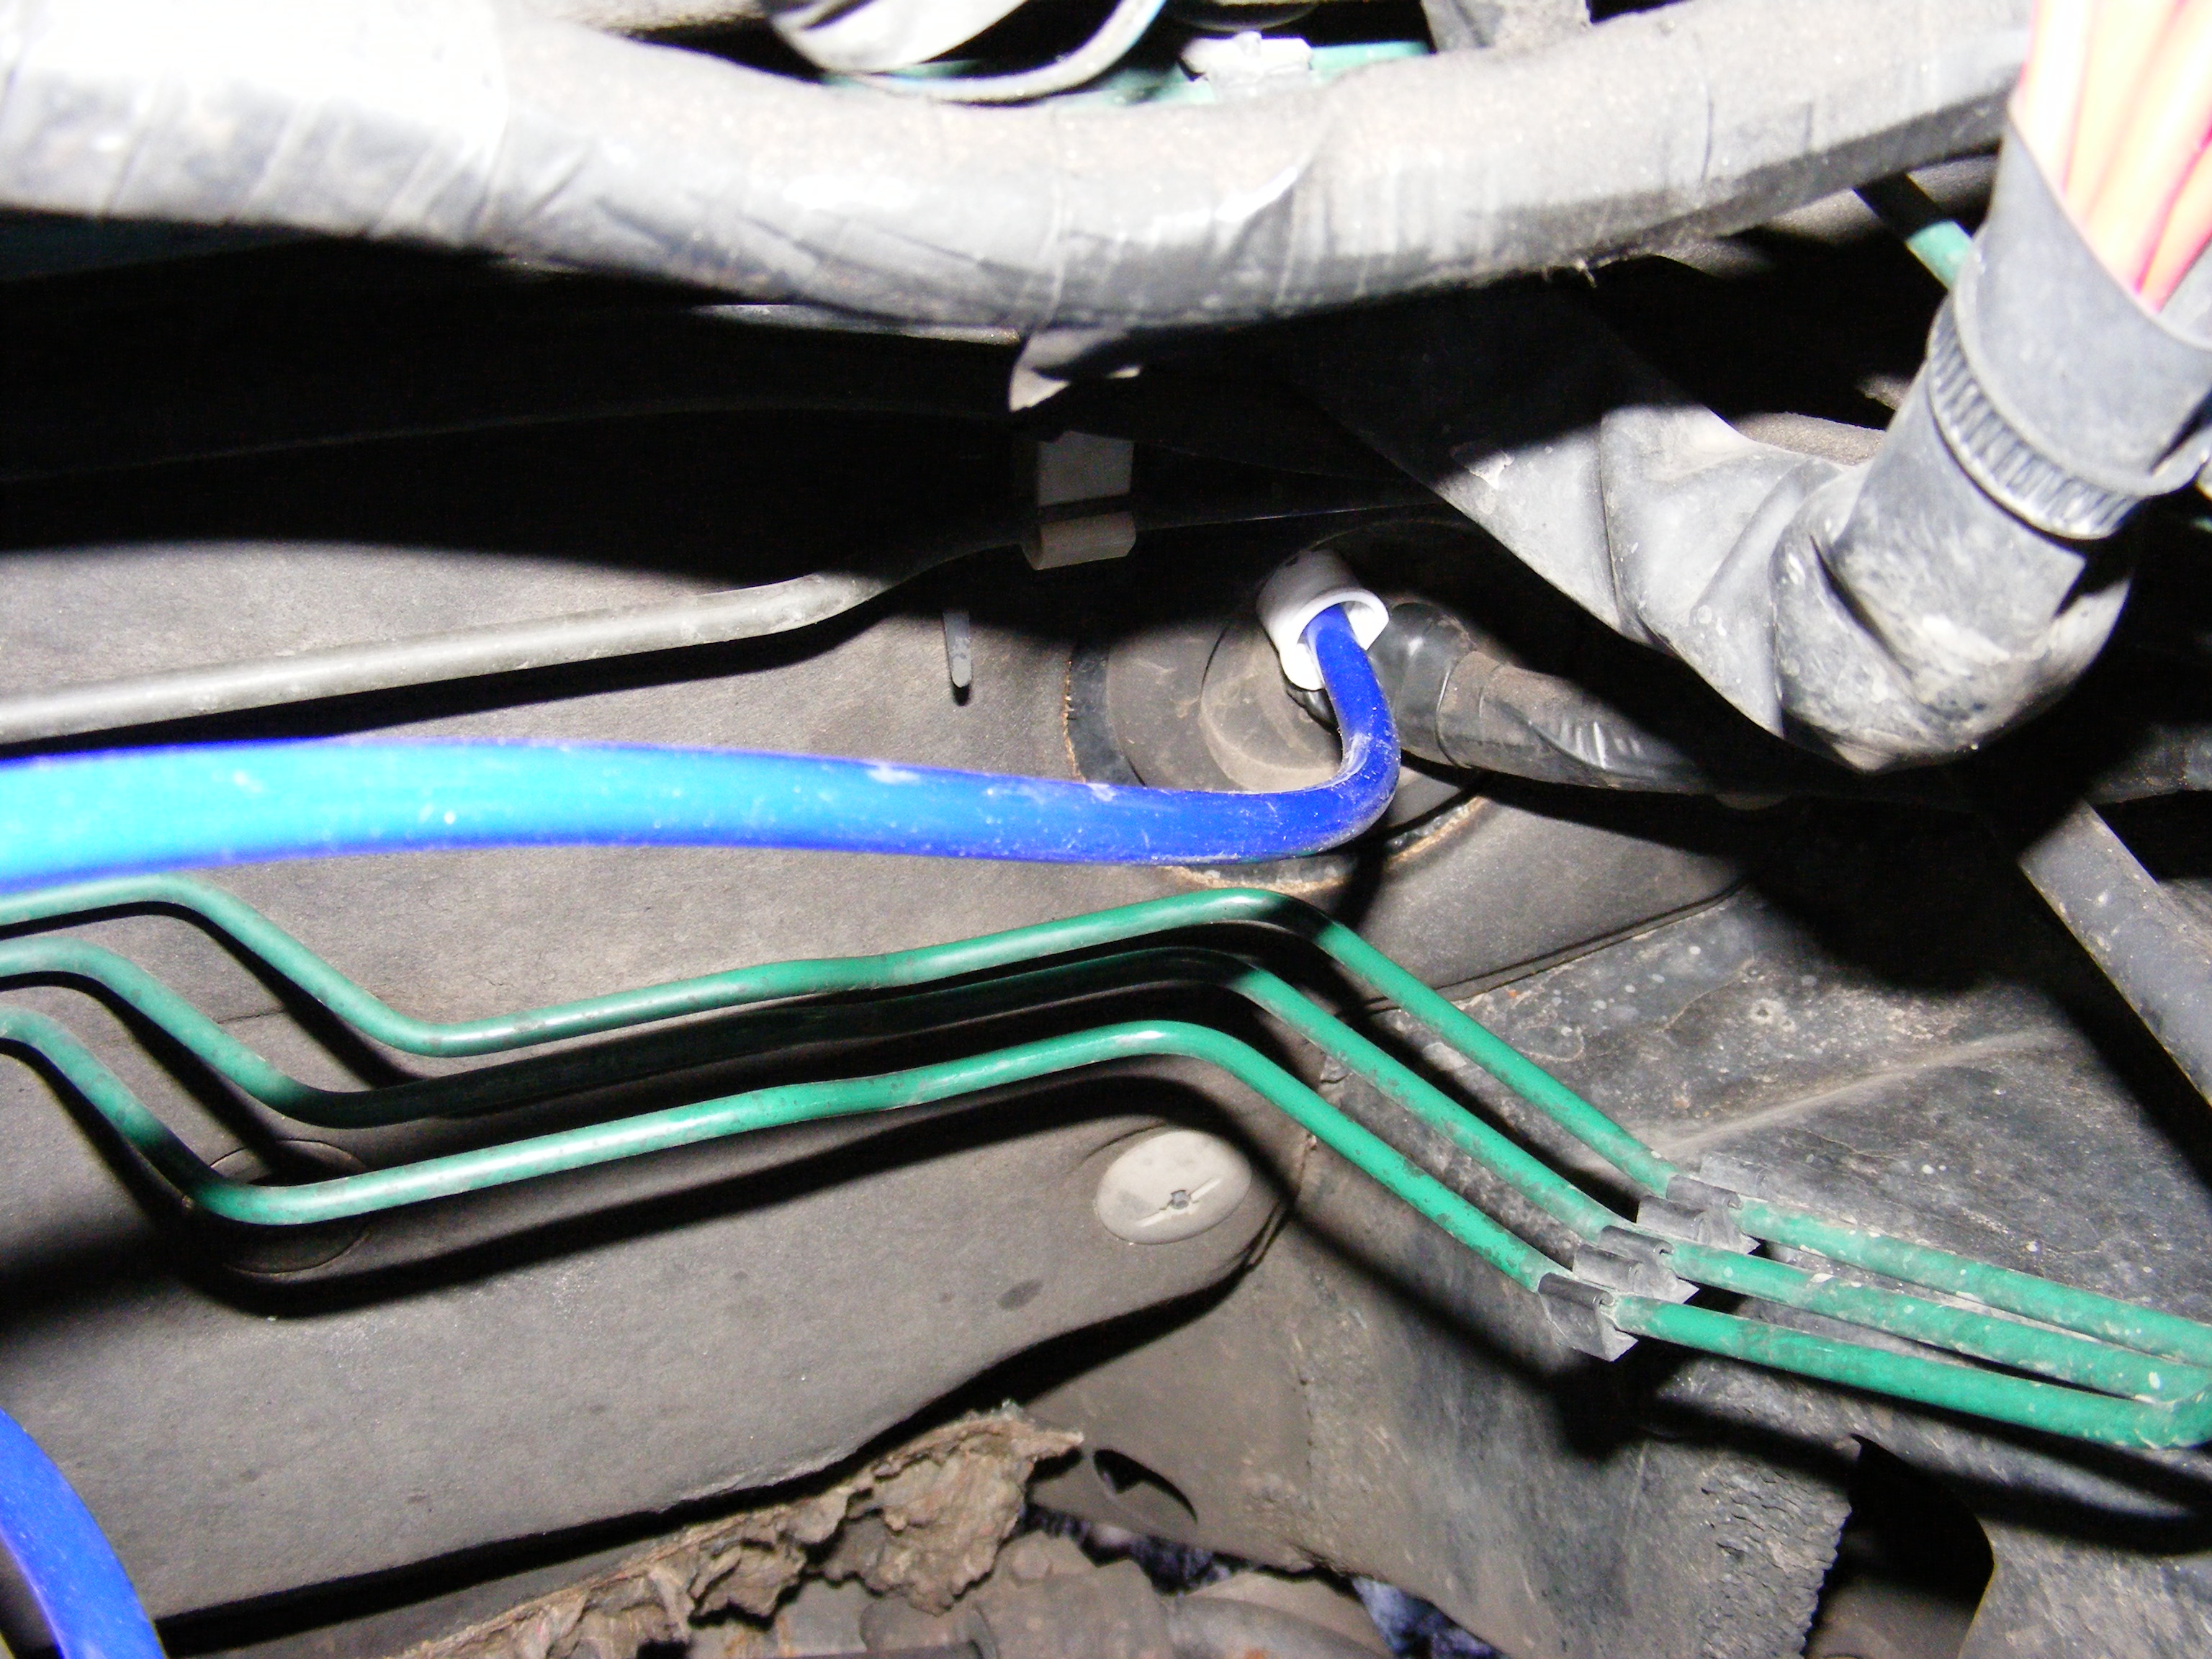
Easy, look for the vacuum hose that comes off the top nipple on a black two way valve fitted on top of the inlet manifold. Thats the hose you need to split, insert the T-piece into that pipe as close to the two way valve as possible. See pic two above.
Saab original vacuum hoses are not the best & prone to cracks & splits causing all kinds of headaches, so I replaced all mine with yellow 4mm silicone hose, bought in a 4 metre length off Ebay, £11 total cost & well worth the effort.
The clear hose in picture two is the feed for the accossory boost gauge fitted to the white T-piece I inserted into the top vacuum hose off the black two way valve.
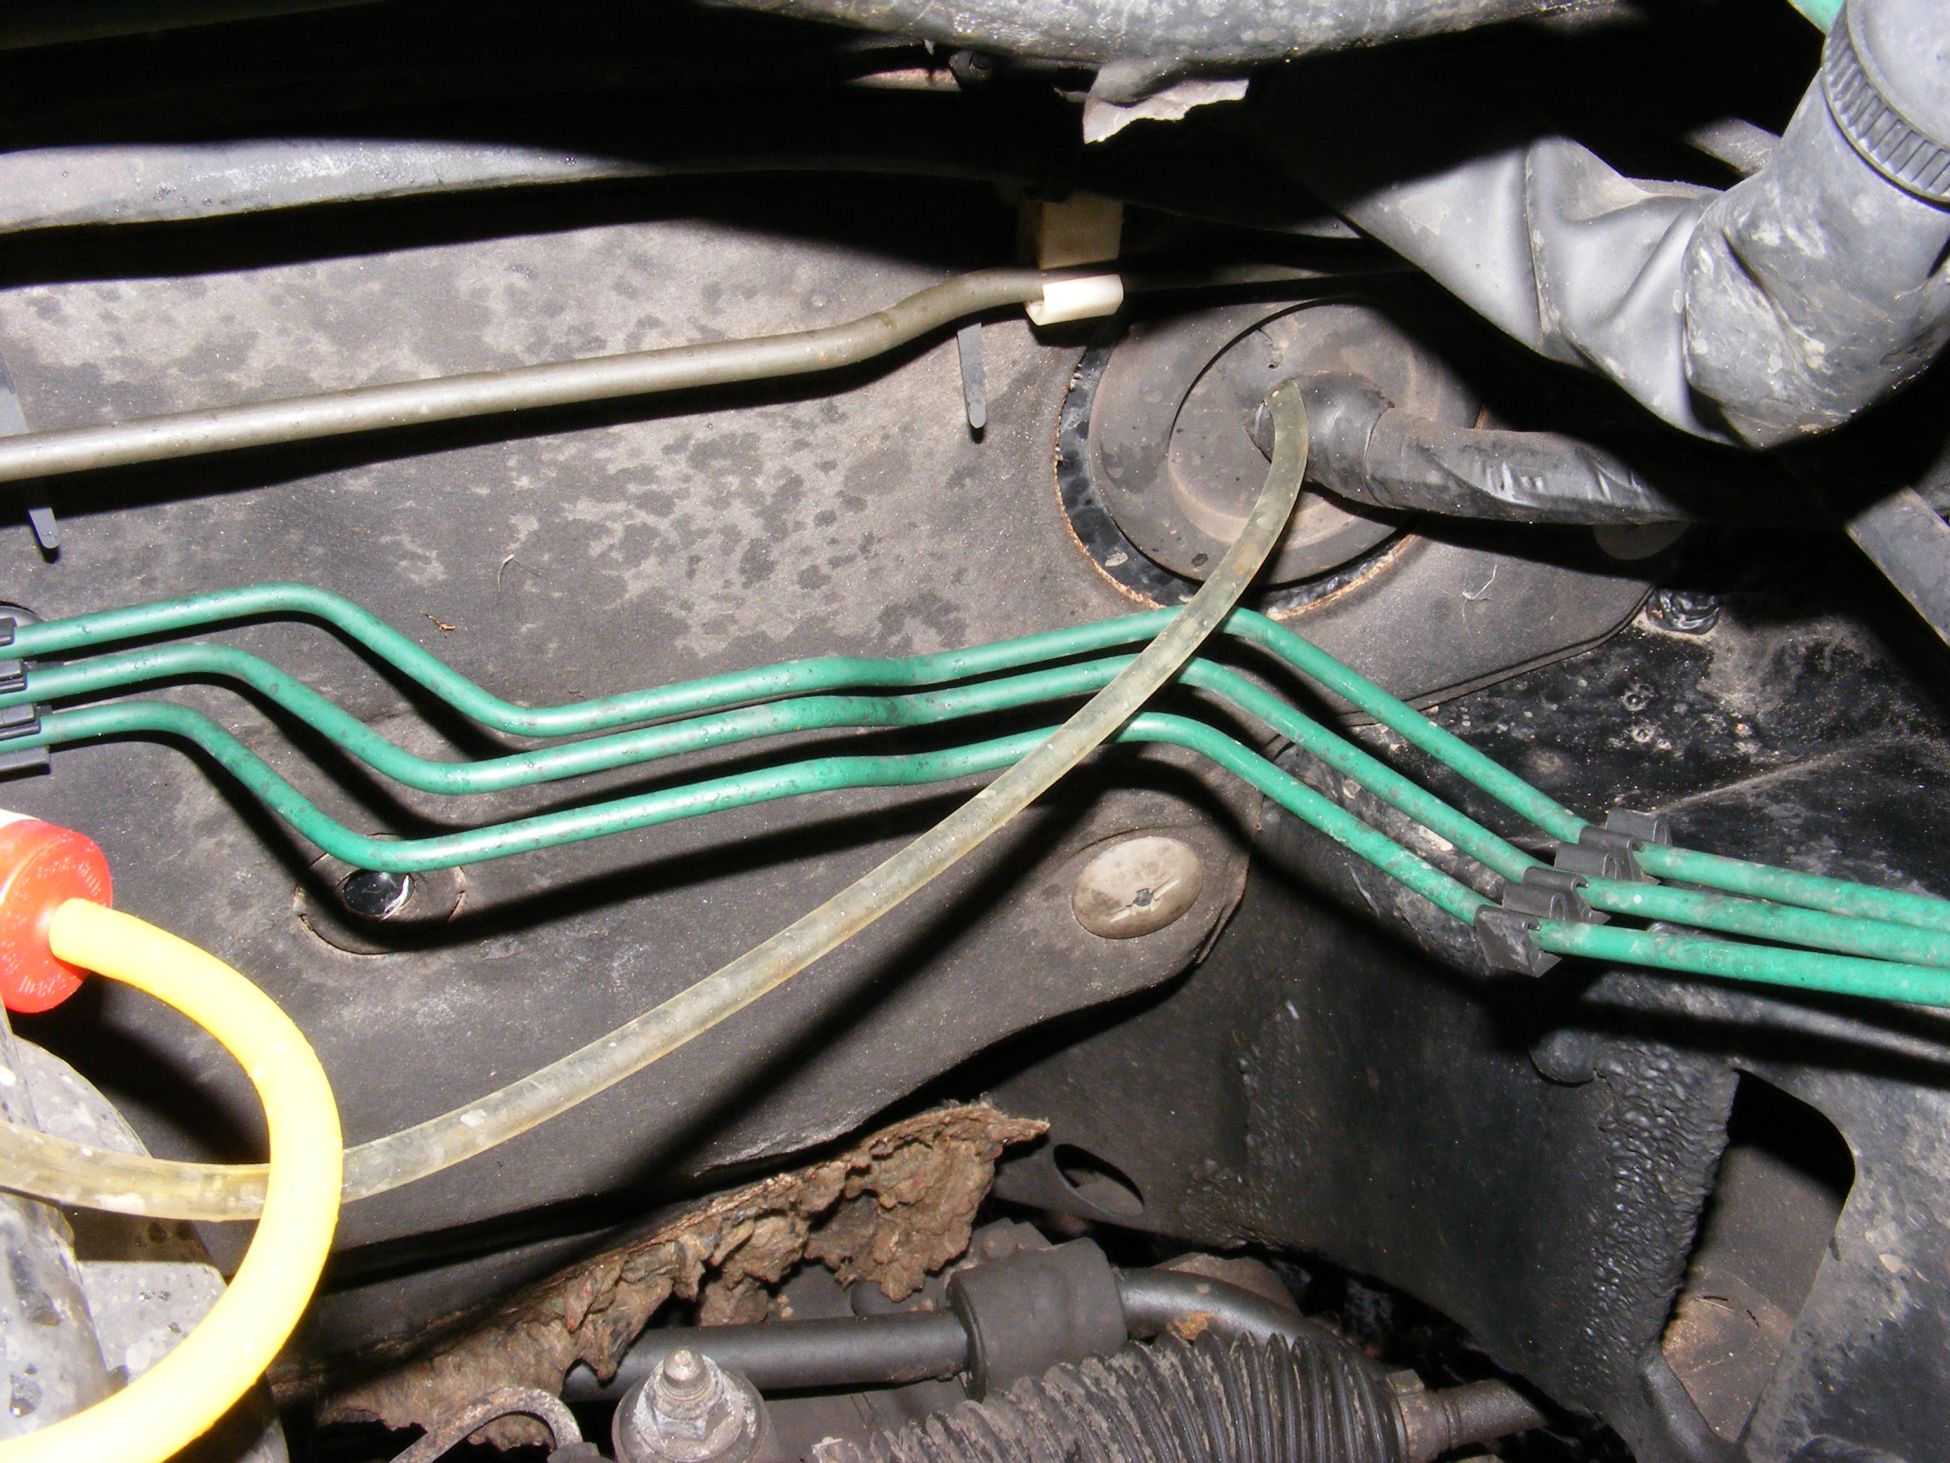 |  |
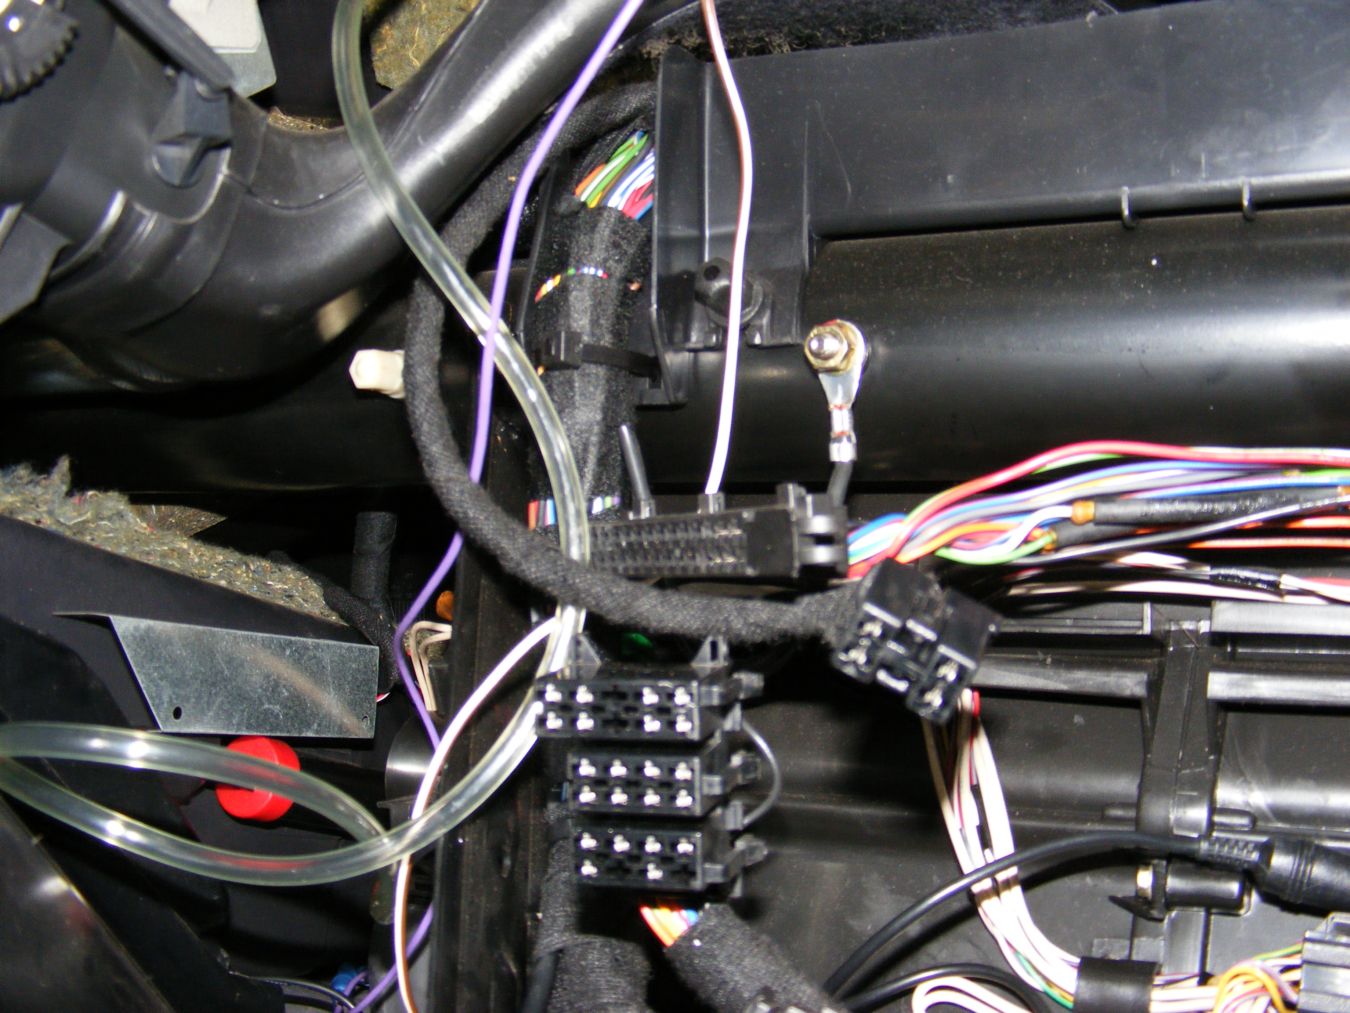
Question two, how do I get the vacuum pipe from the engine bay up into the dash?
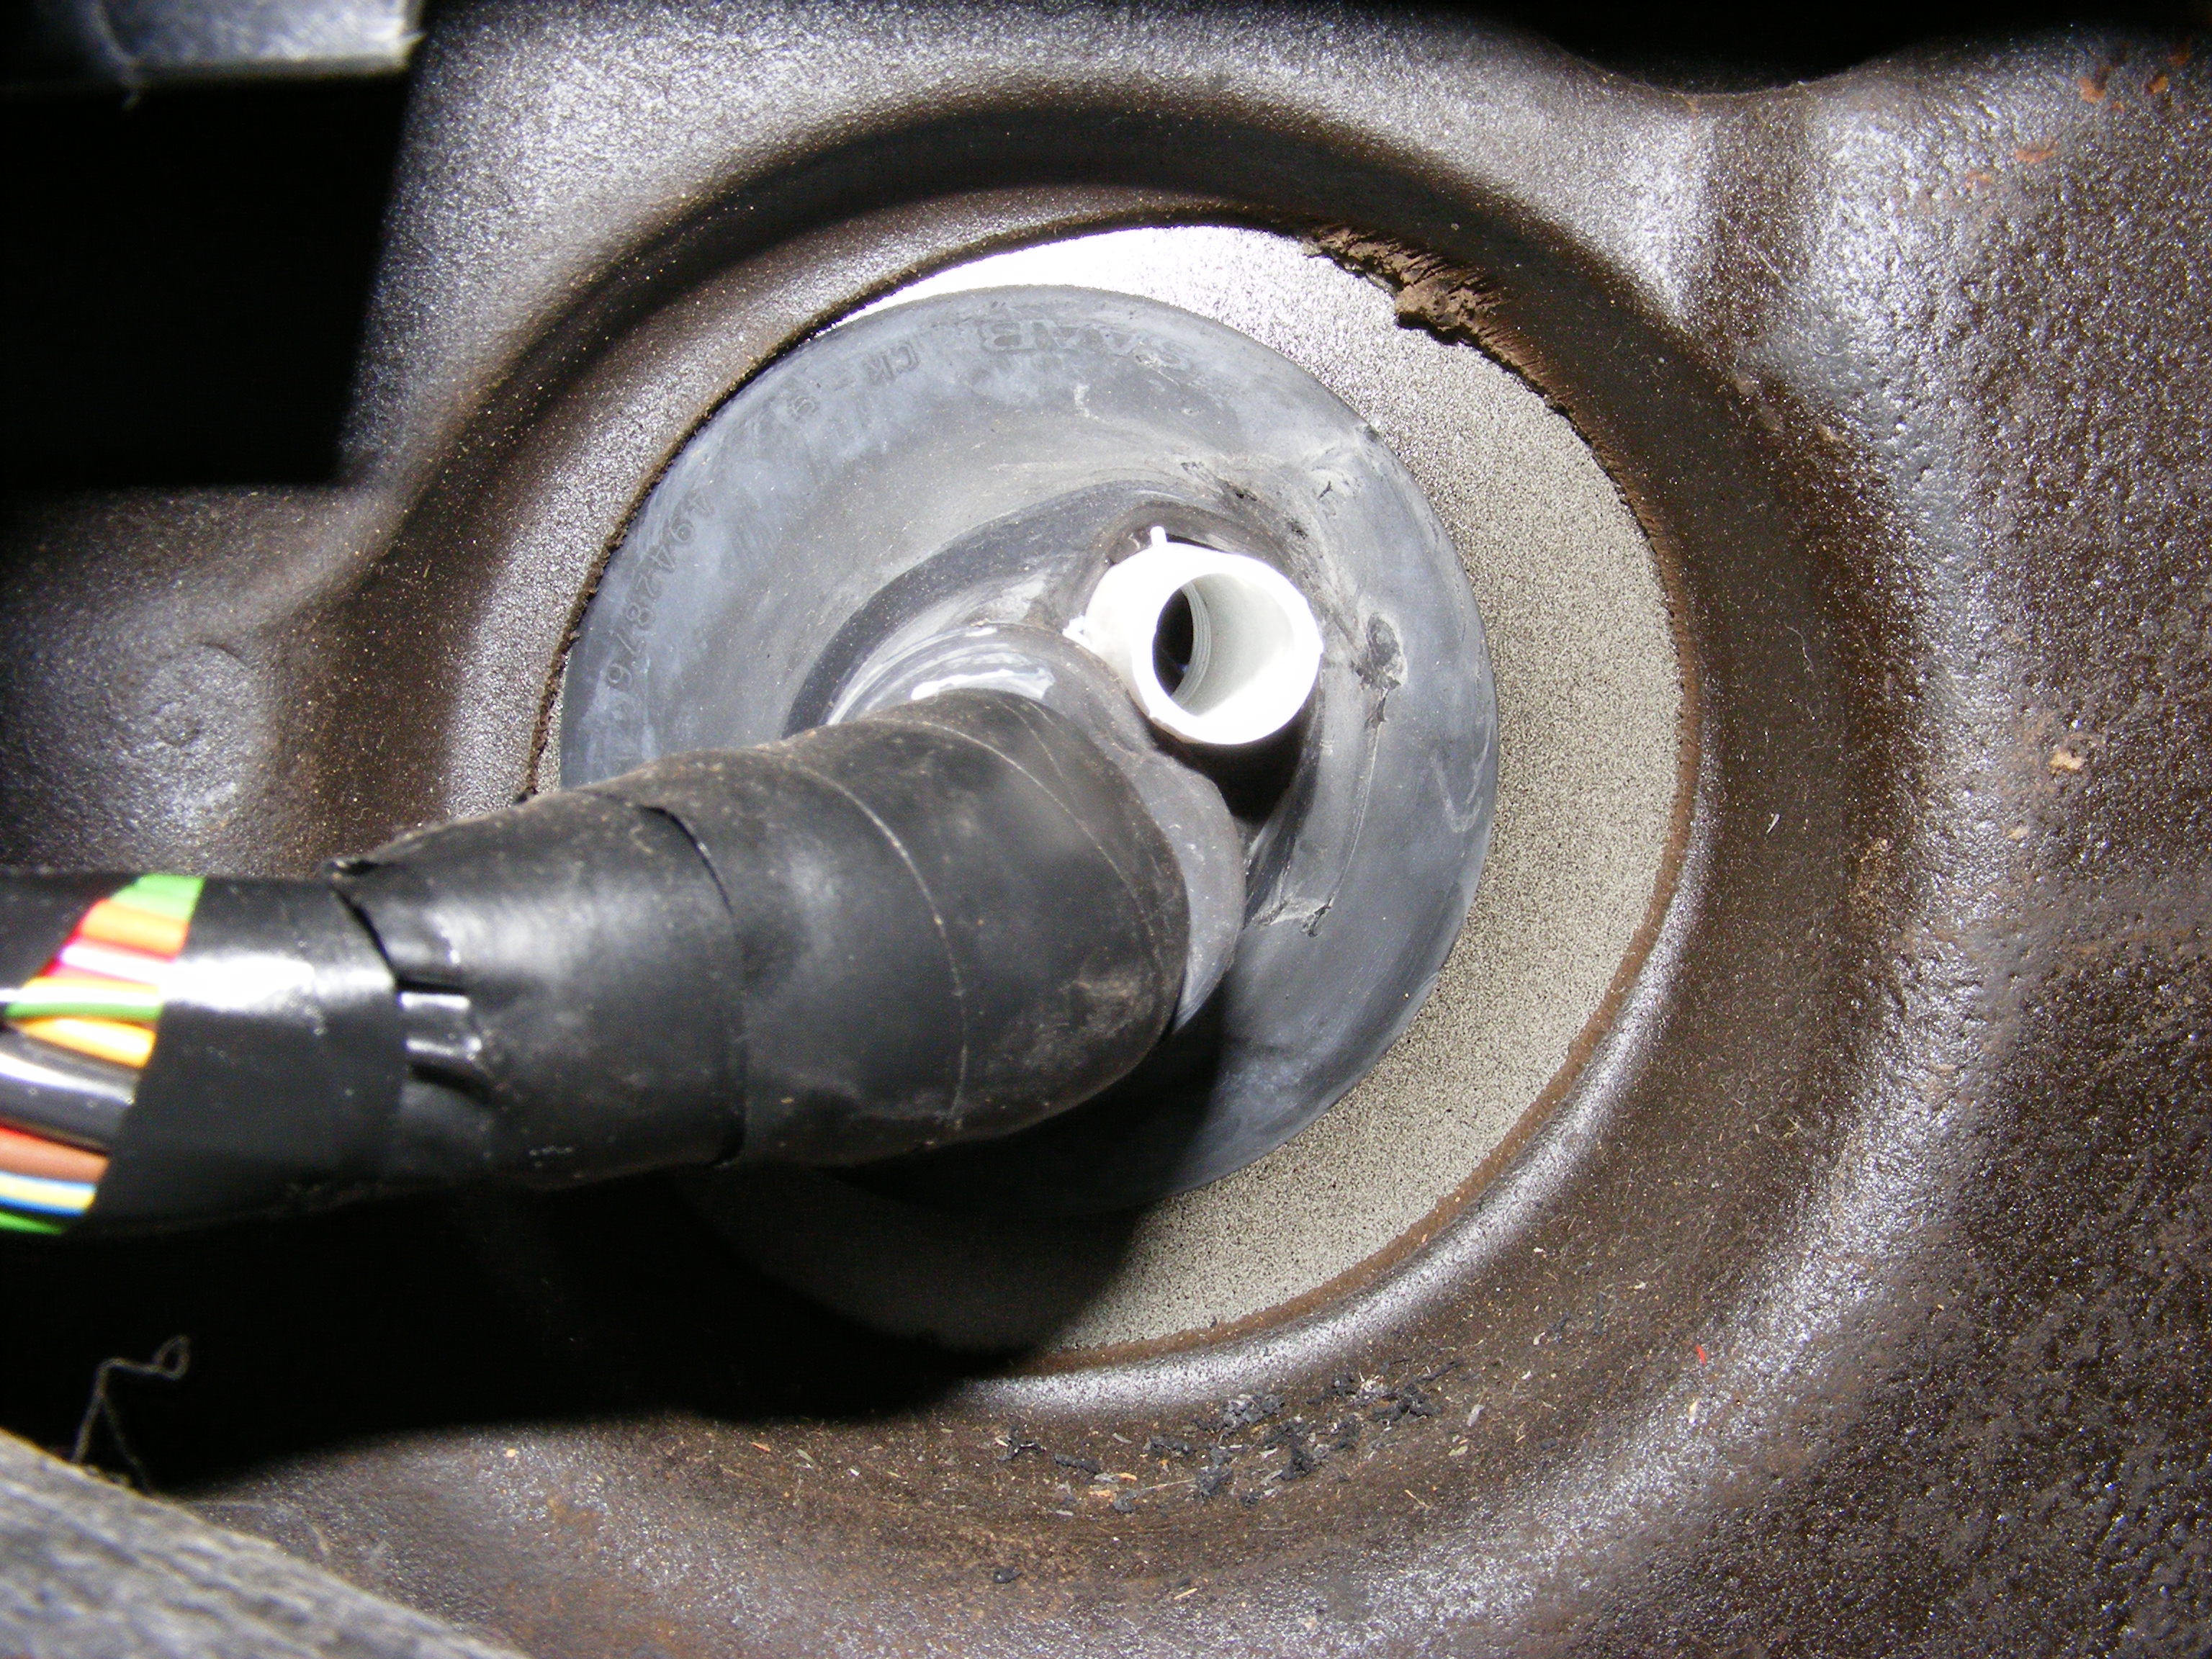
On the right hand side of the bulkhead, behind the three green brake pipes you will see a large black rubber grommet & the wiring loom going into the car. This is by far the eaiest place to run pipes & wires into the car. The original hole is a very tight squeeze though, fine for wires but not suitable for pipes as the pressure will squash the pipe giving you a false reading on your boost gauge.
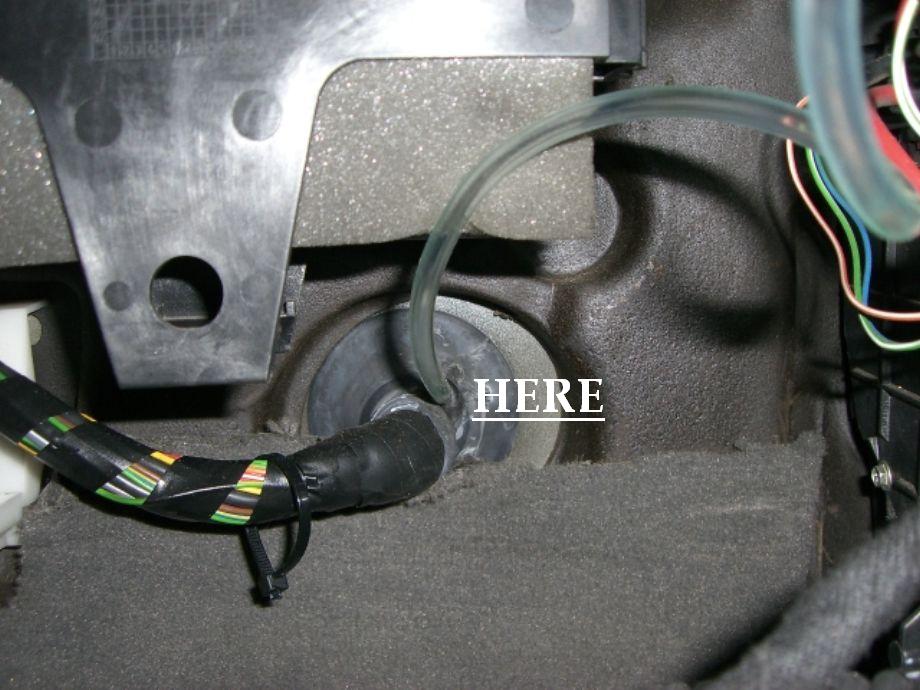
I made an extra hole in the rubber grommet with a piece of sturdy wire, (a wire coat hanger) I then taped the end of the vacuum hose to the wire & pushed it thoough my new hole.
From inside the car you need to remove the glovebox & unplug the ACC hose & lamp wire plug that go to it.
With the glovebox out of the way you will see the piece of wire & you need to pull this with the vacuum pipe attached into the car.
(if you are fitting a pillar pod you will also need to remove the main dash panel to run the pipe accross the dash to the pillar)
 |  |

I wanted my gauges in the middle of the dash so mounting them on the center speaker grille cover was my only option, without drilling holes in the dash top. Easy little task, drill three holes in the speaker grille, two for the mounting bolts (if you are fitting two gauges) & one for the vacuum pipe & gauge illumination wires just to the right hand side of the grilles rear retaining clip.
The hole in the dash top for the grilles rear retaining clip is large enough to push the vacuum pipe & wires through from the underside of the dash top & I did not have to remove the speaker which still works fine.
I used some large metal washers on the underside of the grill to avoid breaking the plastic & to also eliminate any vibration.
 | 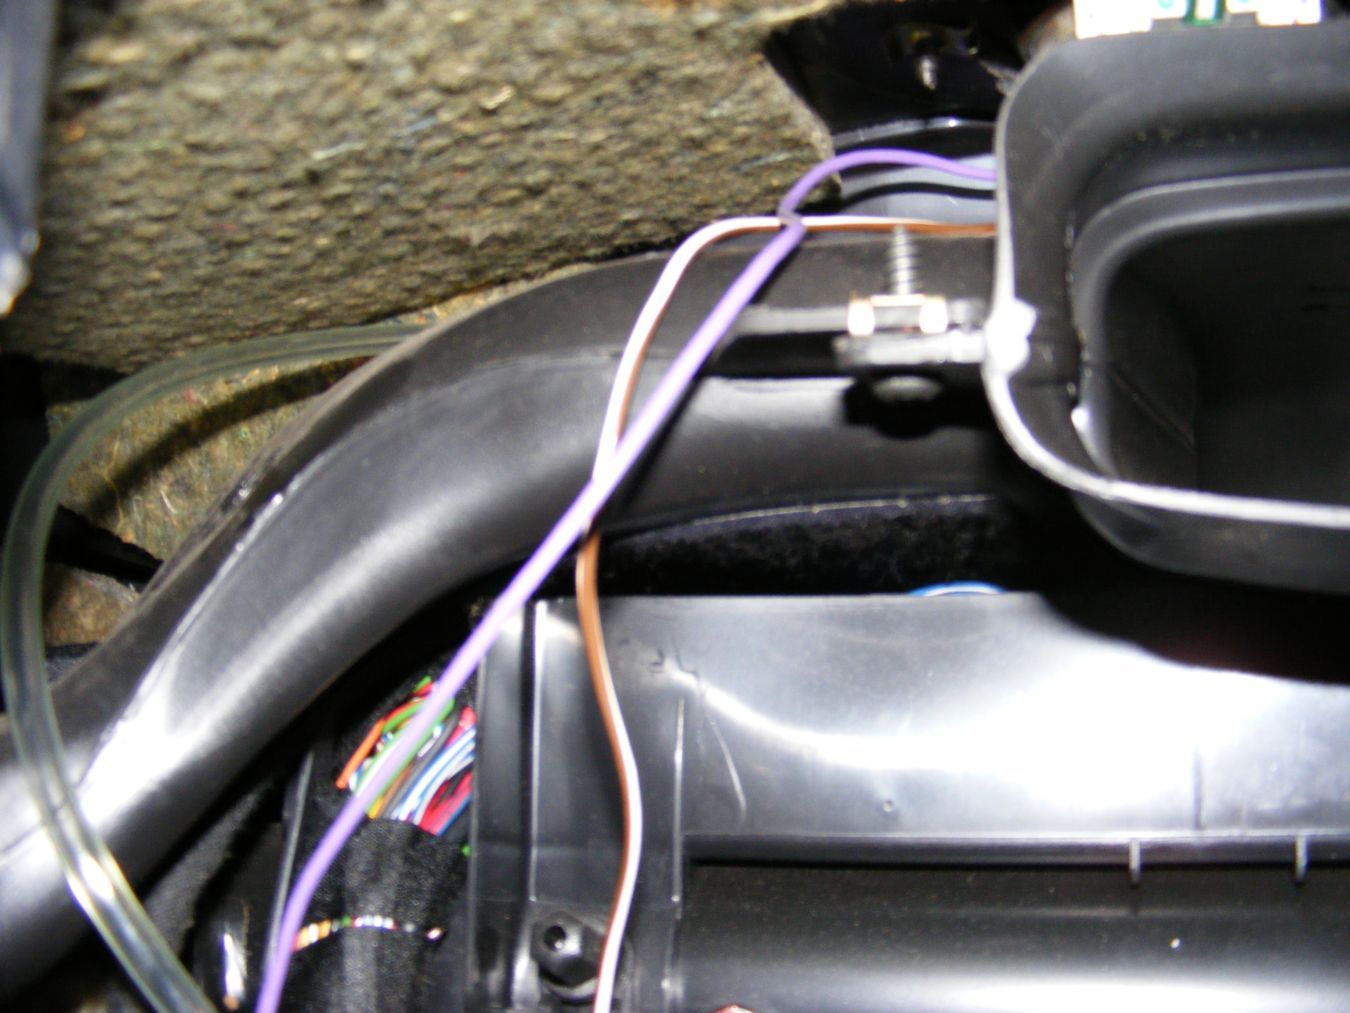 |
The above two pictures show the route of the vacuum pipe running from behind the glovebox & going up through the center speaker cover hole.
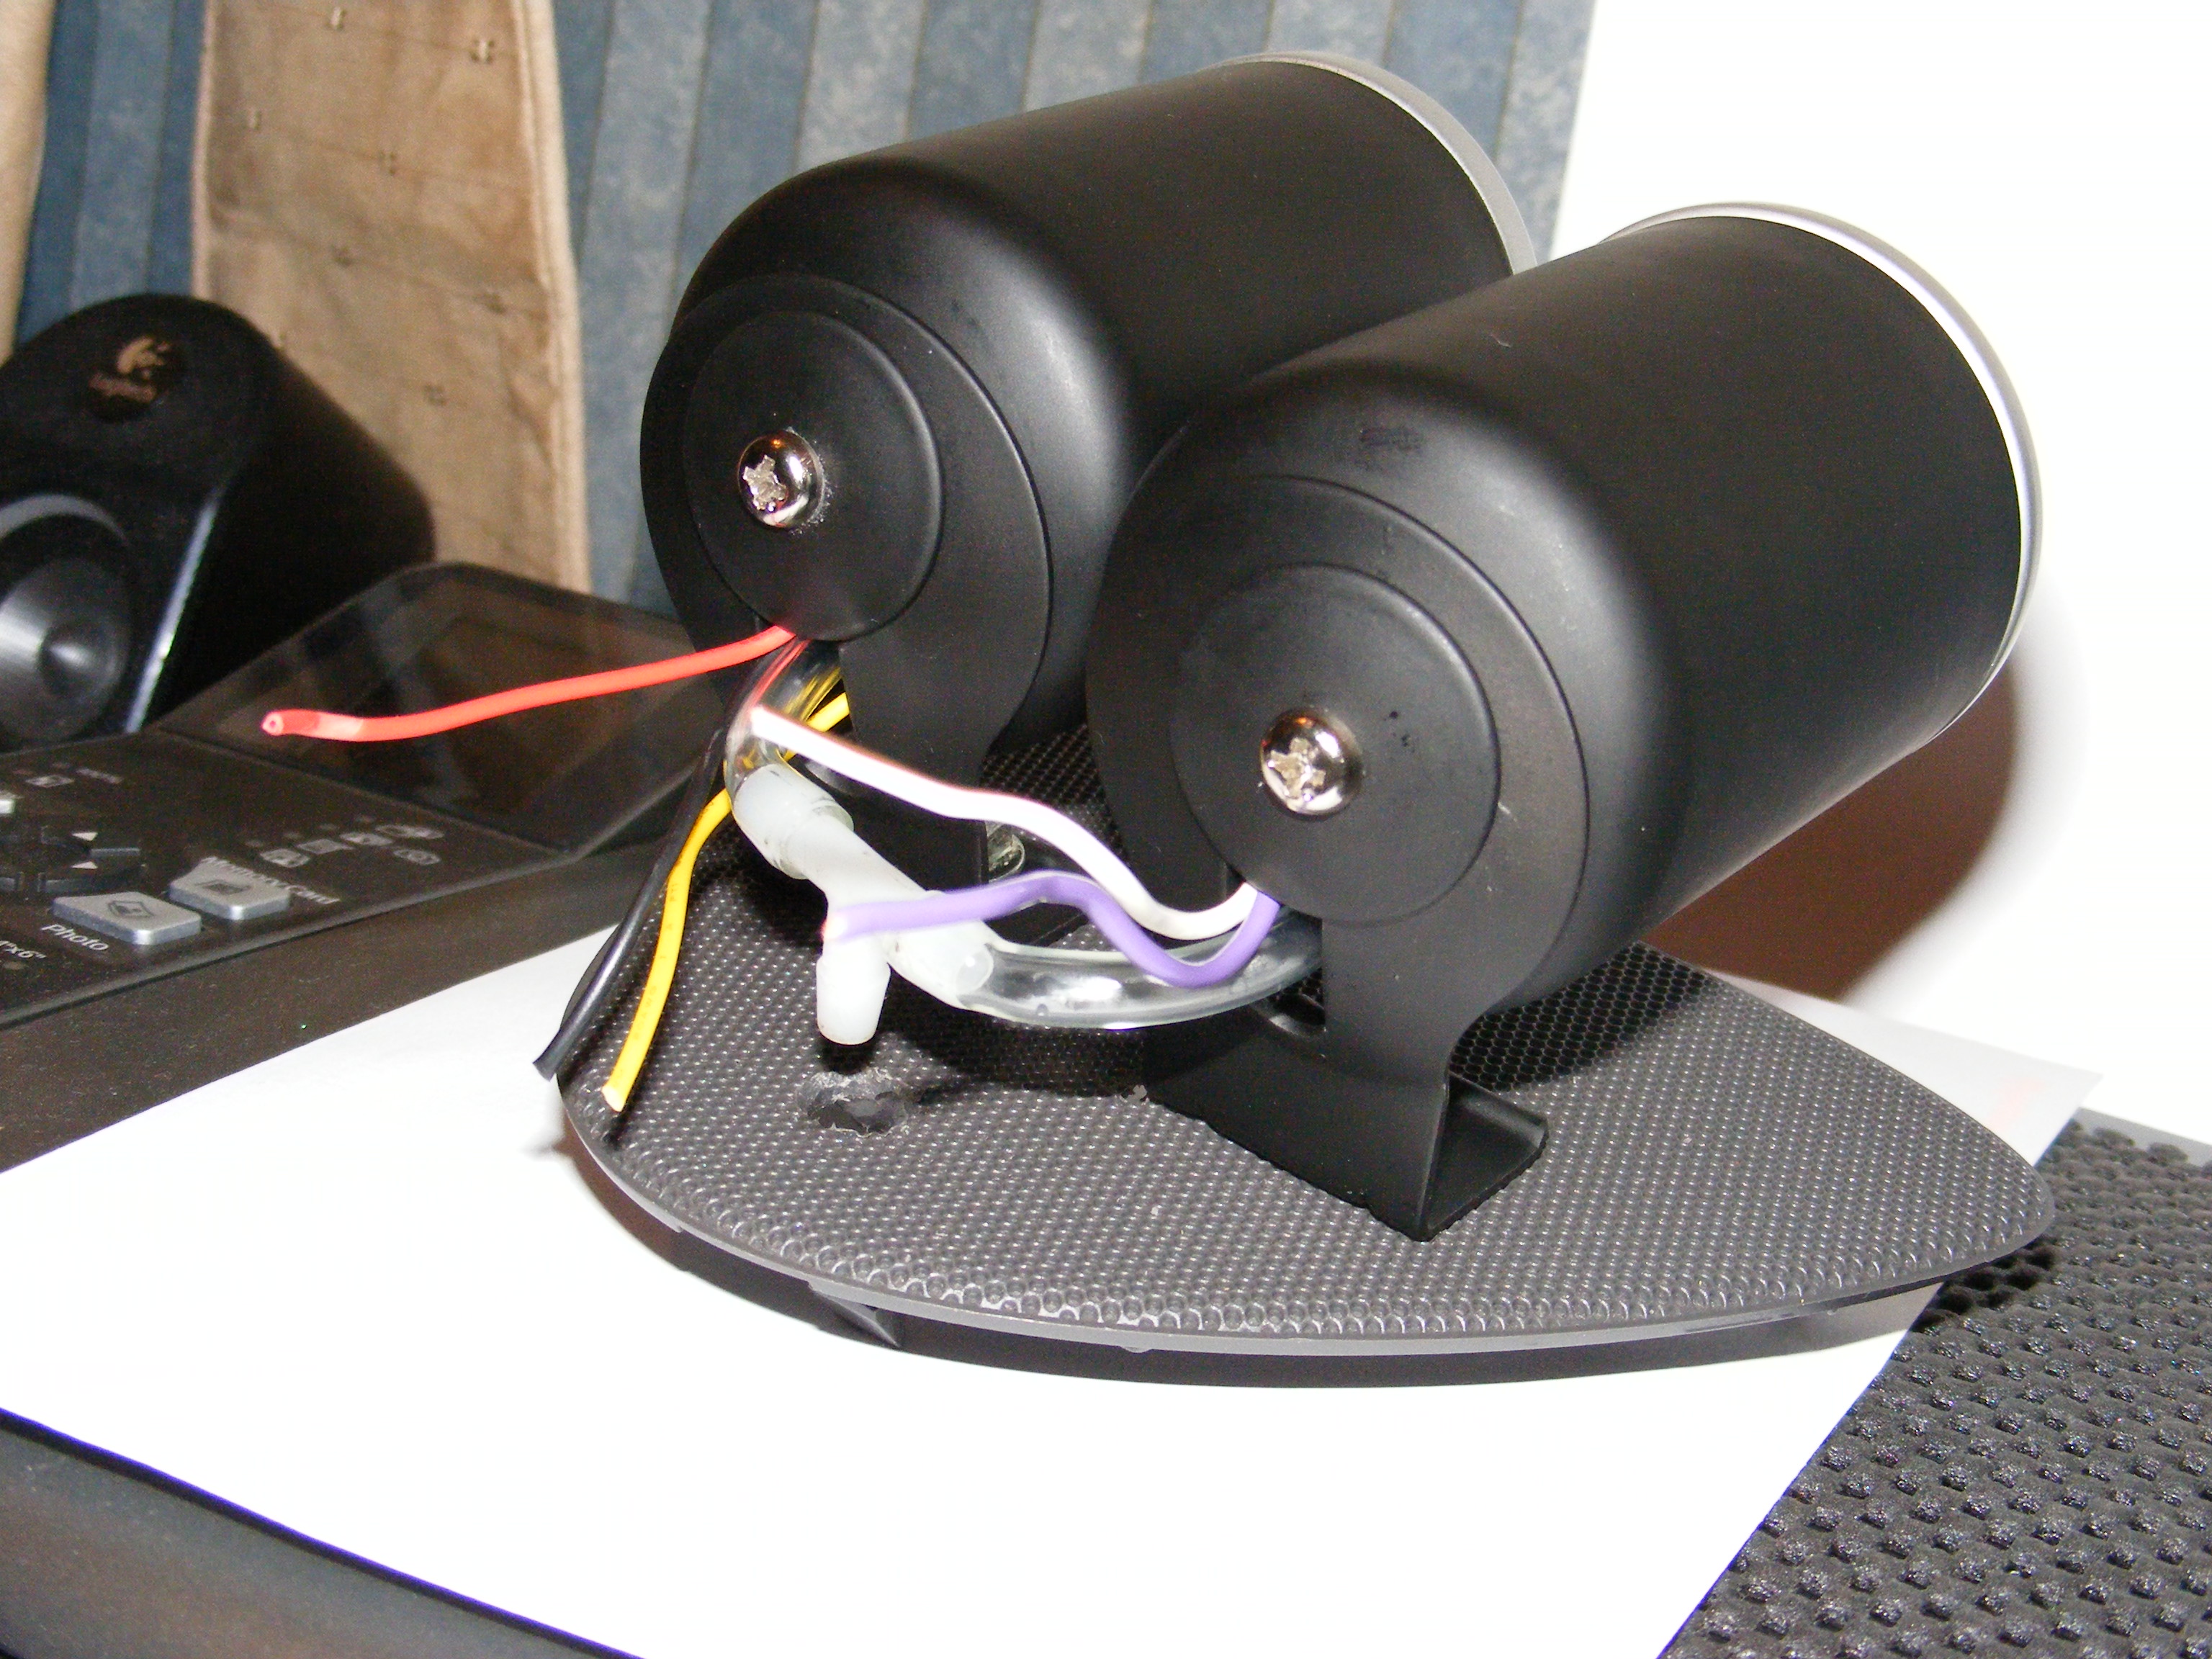
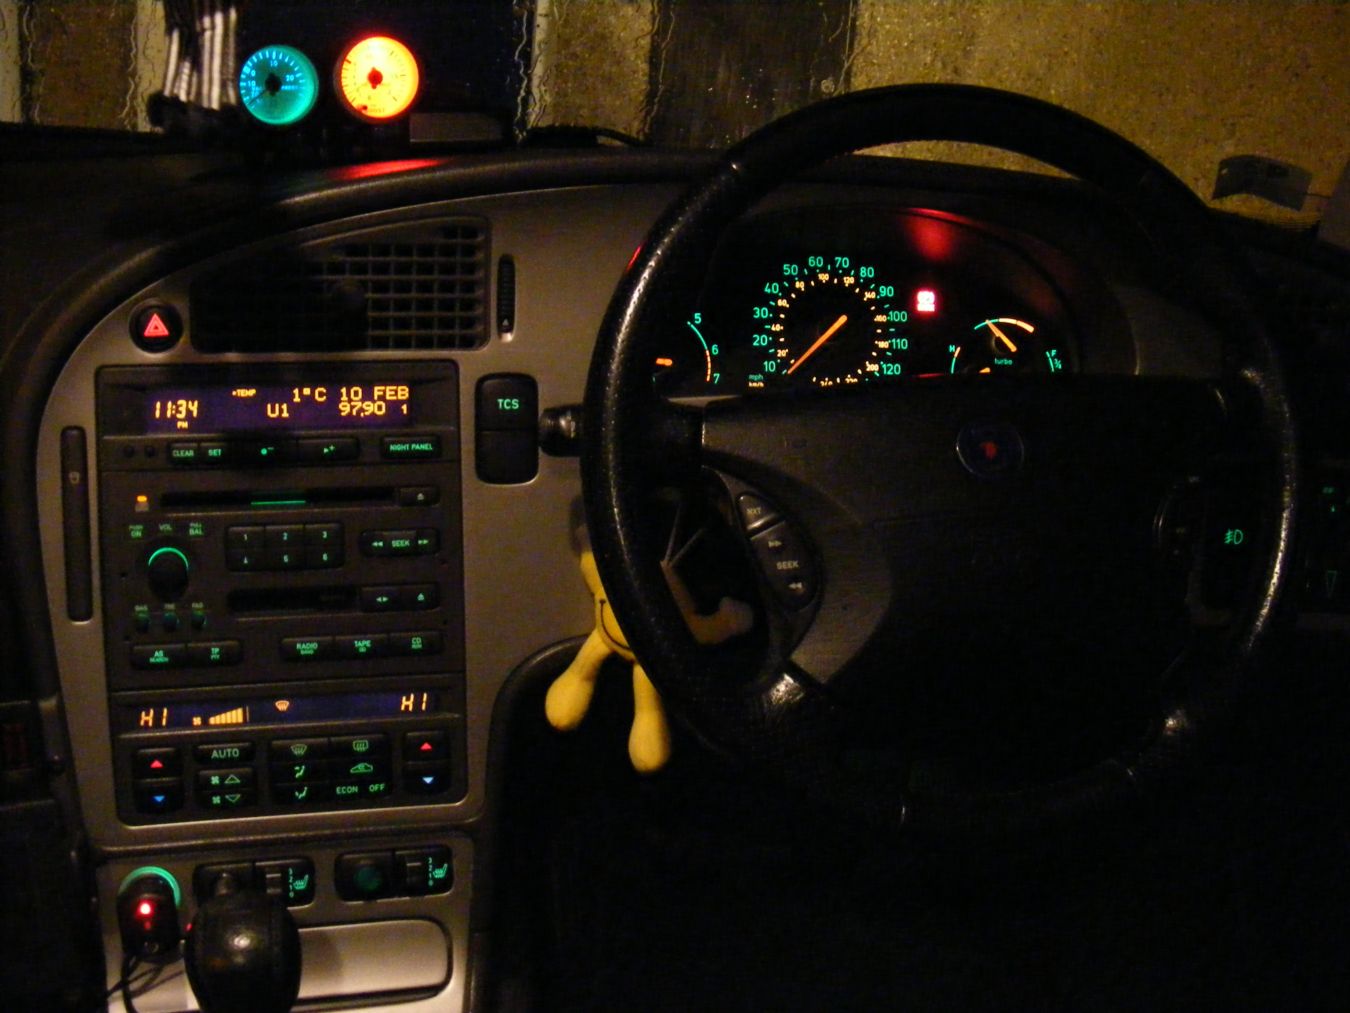
I took the gauge illumination feed from the ciggy lighter bulb wiring plug so the gauges dim with the dash light dimmer switch.
The JR gauge has a single 4W green bulb, the Auto Gauge has a multi coloured LED light, there is a push switch on the front of this gauge to change the colour displayed & a yellow wire that needs to go to a constant fused live feed, the gauges memory remembers what colour it was set at & will always light up in that colour to save you going through all the colours until you get to the one you want.
& thats it, all fitted & working & I now know my LPT is boosting at 8PSI.

Time for an update I think.
Well, I decided my dash looked too messy with two boost gauges & my other bits & bobs, so Ive gone with the chav crowd & fitted a pillar mounted carbon fibre pillar pod.
Quite an easy little job & I wanted to replace all my yellow silicone vacuum hoses anyhow.
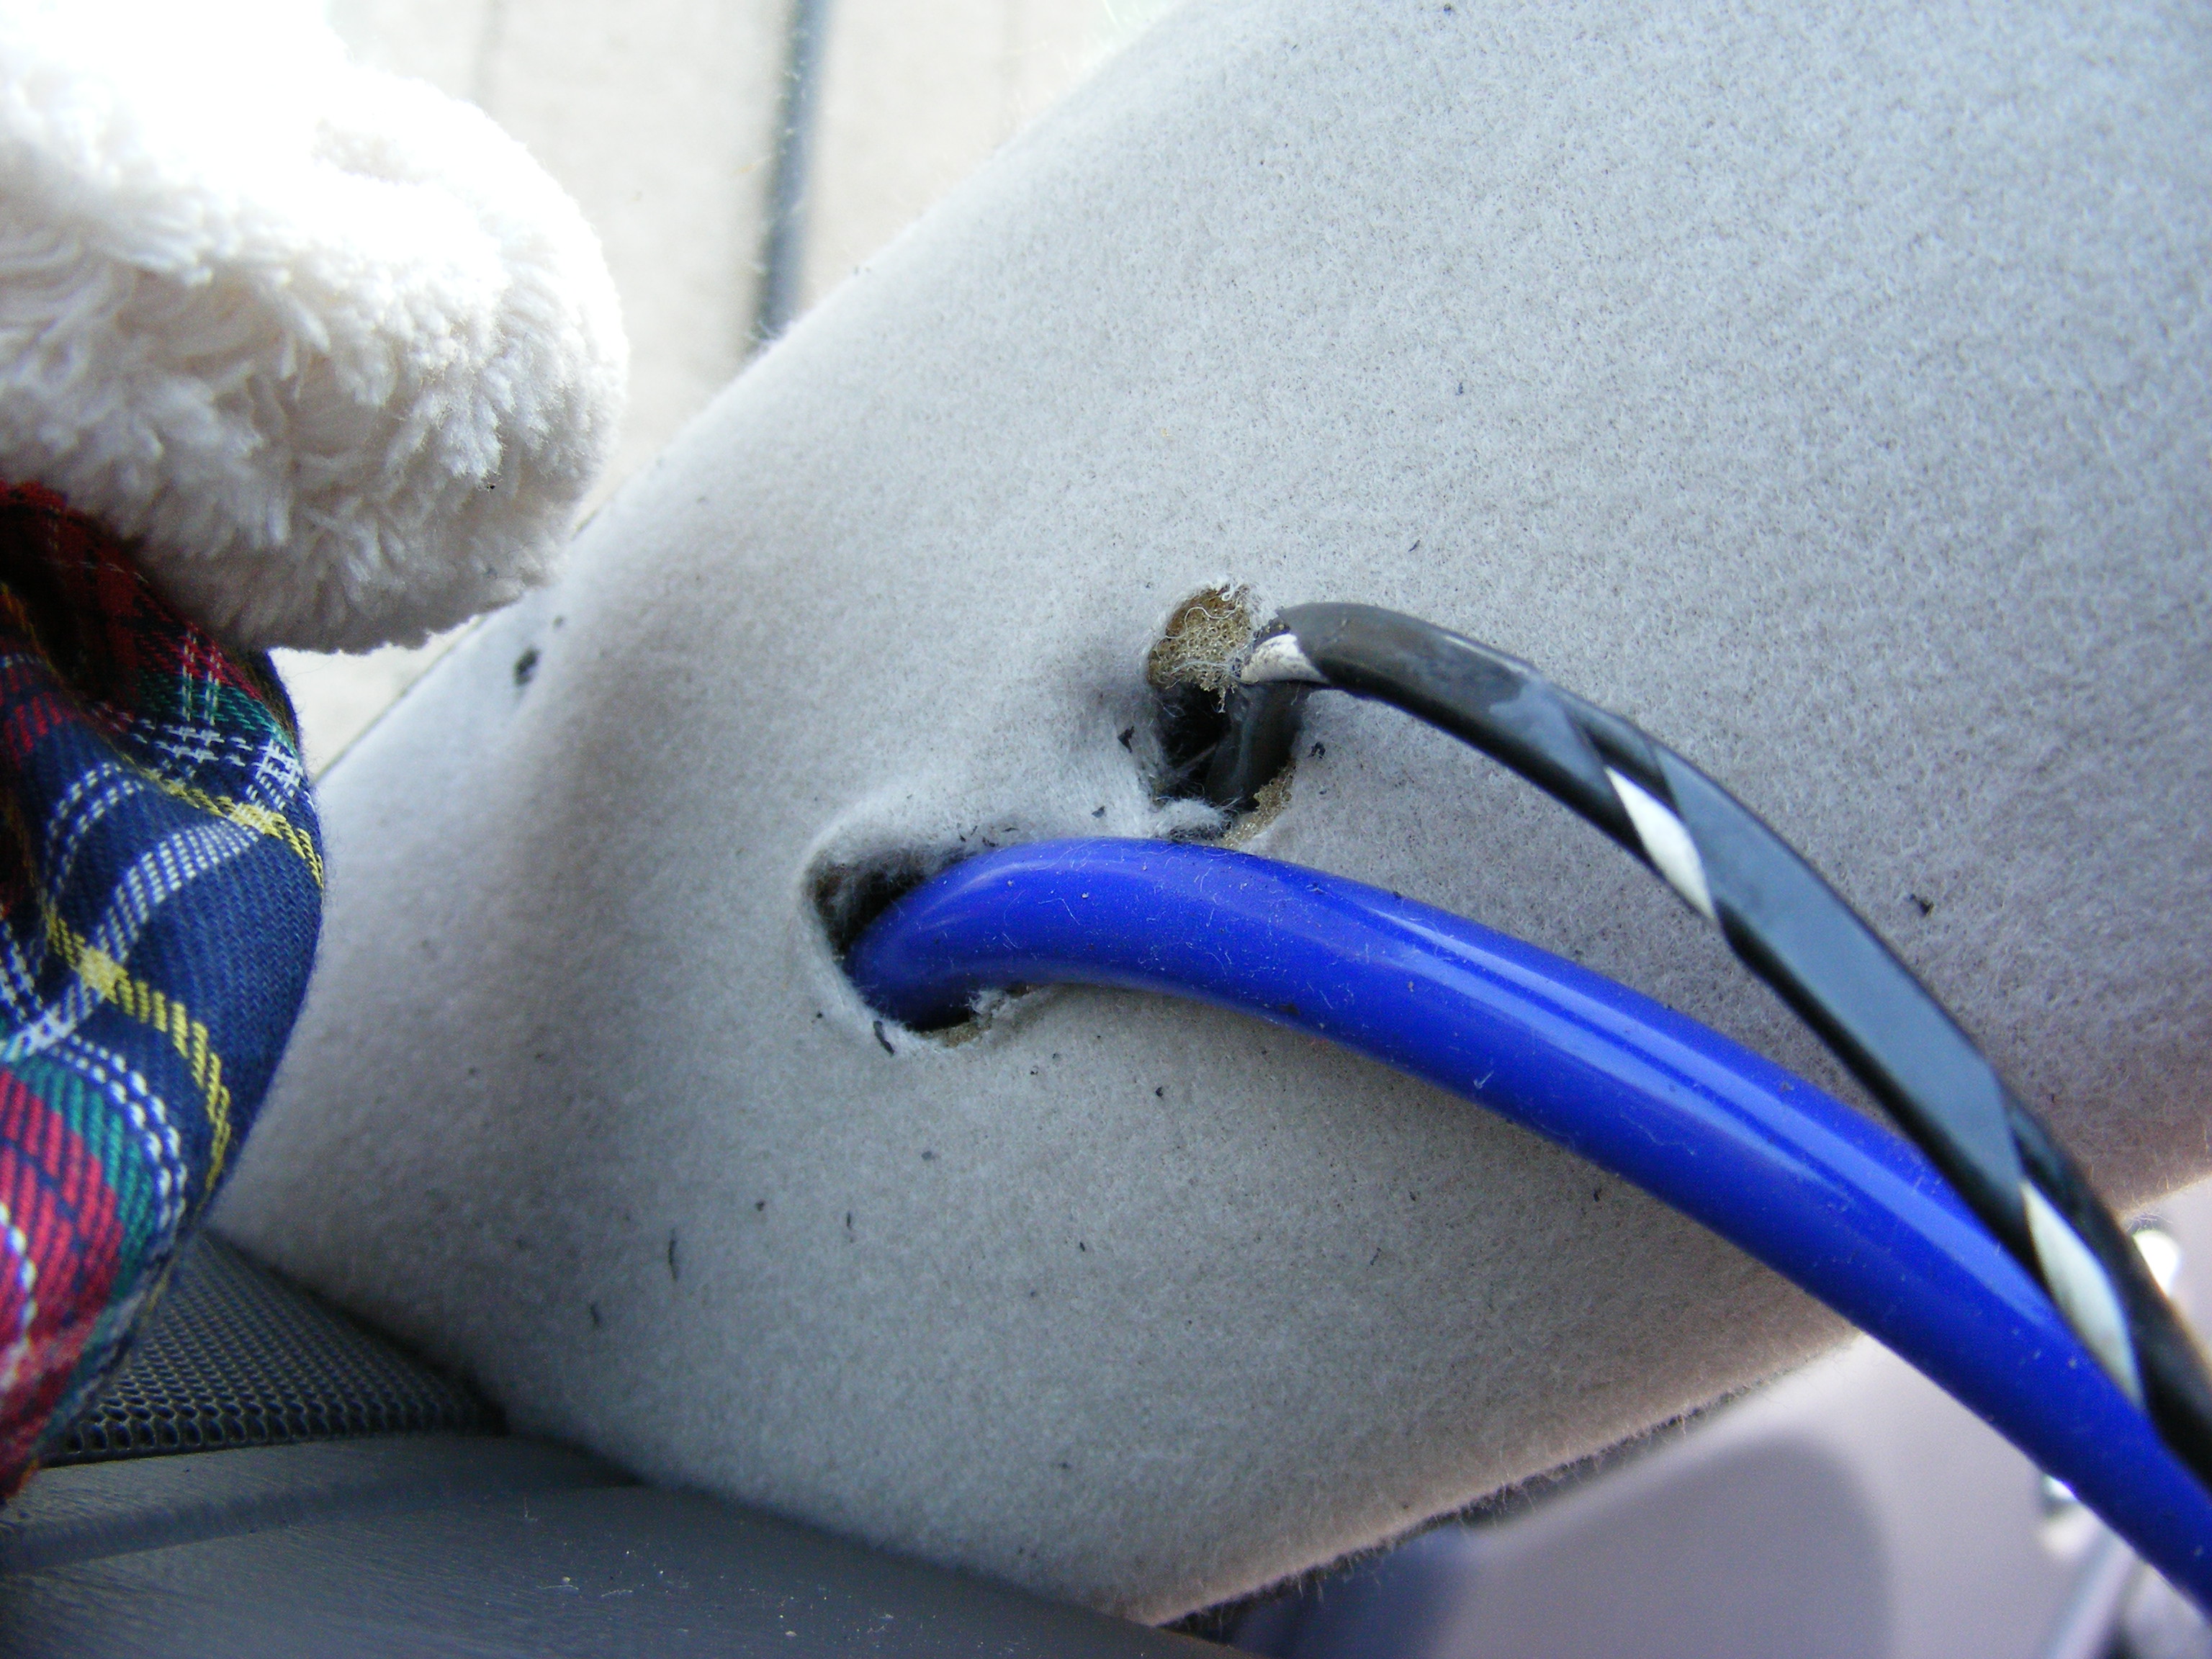
I was getting some weird readings on the dash mounted gauges, it seems the vac pipe was being squashed by the rubber grommet where it came through the bulkhead, I also had a couple of joins in the vac hoses so I needed to find a way to keep the new blue silicone from getting squashed.
I used a nozzle from a tube of silicone sealer & pushed it through the bulkhead rubber & threaded the new vac hose through it, this worked well.
 |  |

Now its just a case of running the vac hose behind the dash & up to the pillar.
 |  |
Thats the worst bit done, quite easy really & now its just a case of trimming the pod to fit the Saab pillar & fit it into place. The pillar trim just pulls off & clips back in place when your done.
I bought my pillar pod from Demon Tweeks in Wrexham, North Wales.
This is also where I got my silicone hoses from.


I just trimmed the pod to shape with a sharp craft knife, then drilled four small holes in the corners & screwed it to the pillar trim. I plan to re trim this with black cloth so this will hide the screw heads & let the carbon fibre pod blend in to its surroundings.
So there you have it, two ways to mount your boost gauge, but I must say after trying both I prefer the pillar pod to the dash top pods.
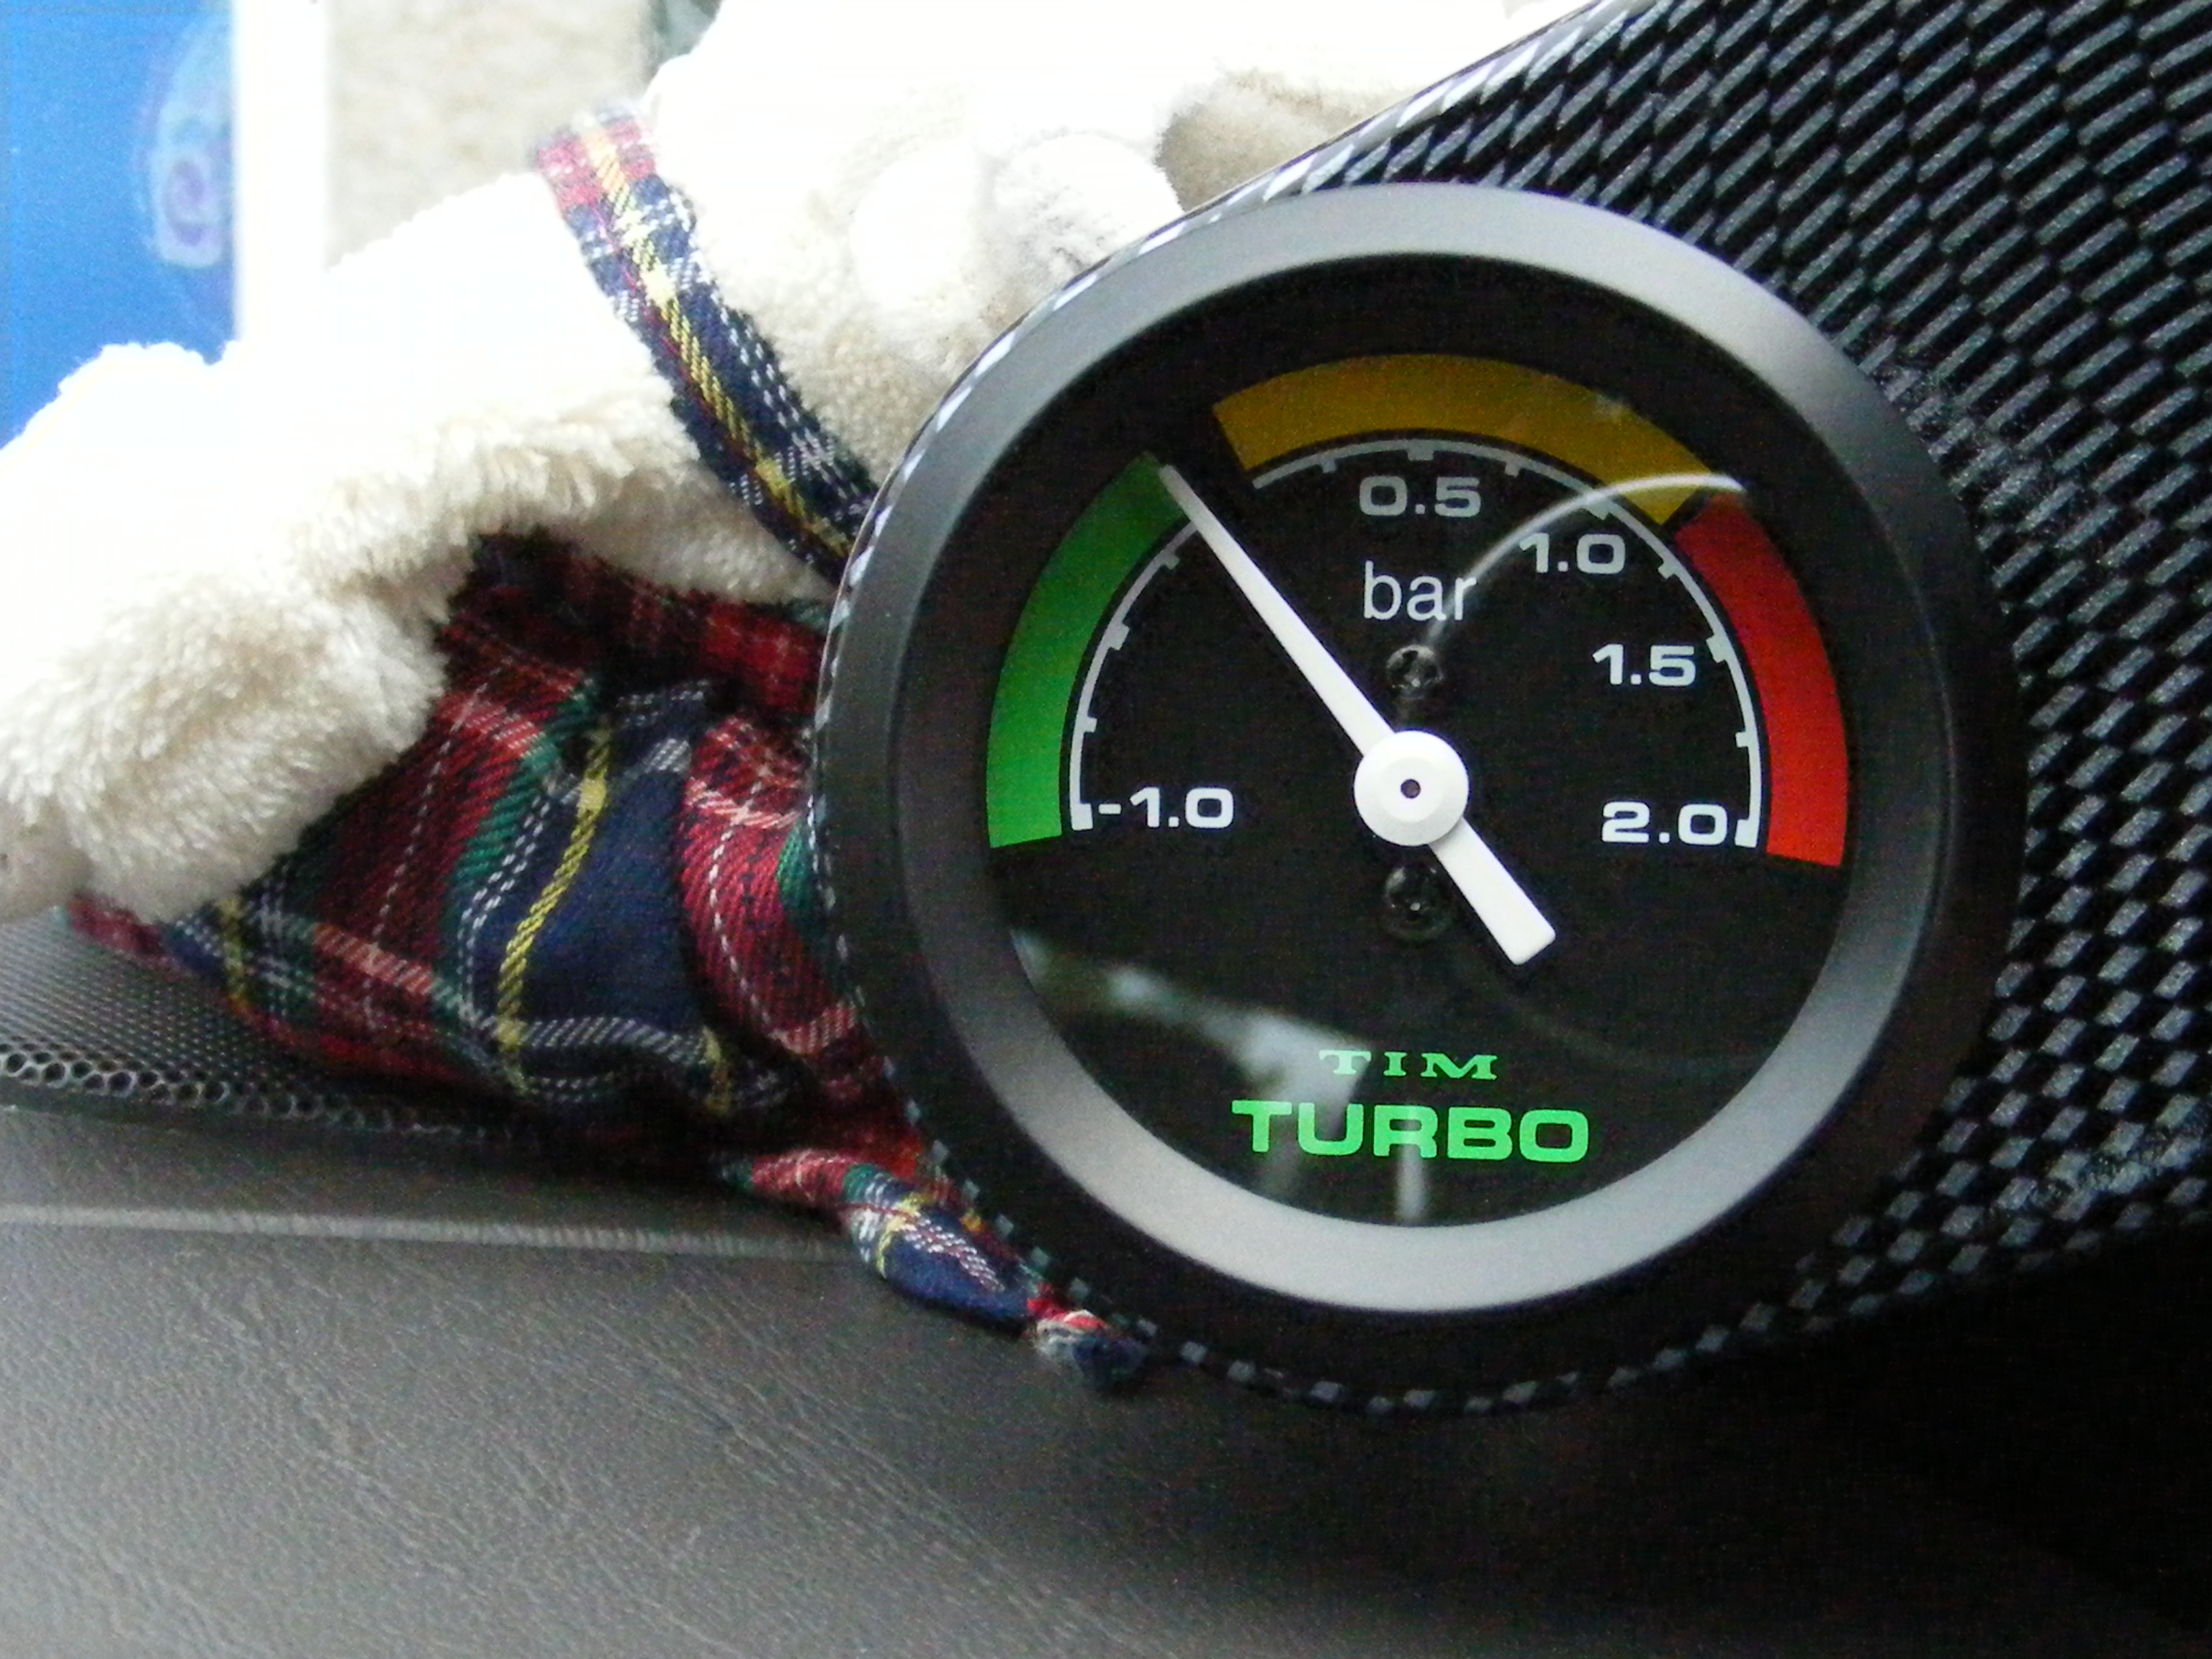
Heres the latest gauge I fitted this weekend.
Its a TIM gauge with a black face rather than all the white faced ones Ive used in the past.
I rather like it, I fitted a green 4w sidelight bulb so it blended in with all the other dash clocks.
This one was £25.00 from Demon Tweeks in Wrexham.
Another update!
I decided I wanted my dash top gauges back, so I bought two Plasma (LED) gauges off Ebay, another boost gauge & a volt meter.
I rather like them but there not to everyones taste.
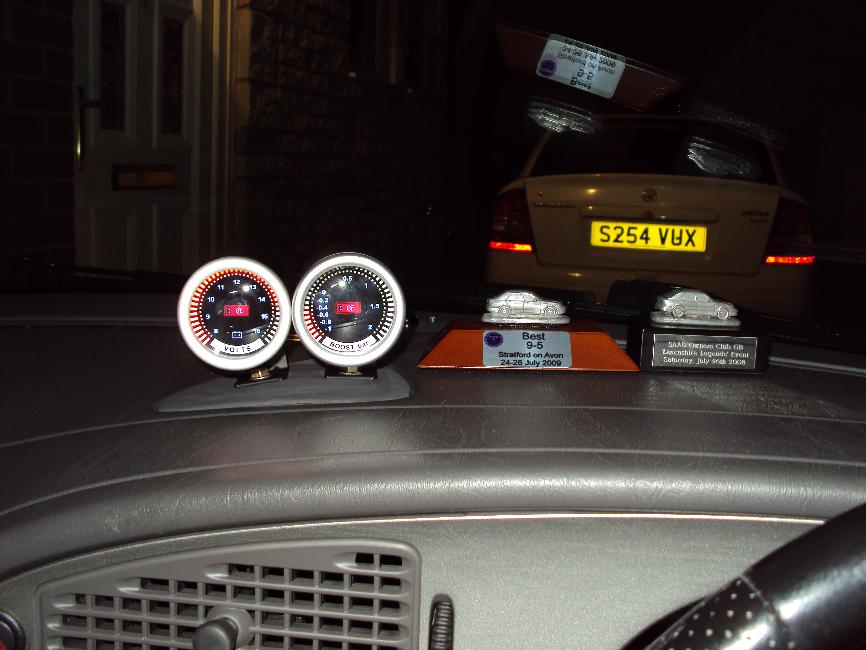
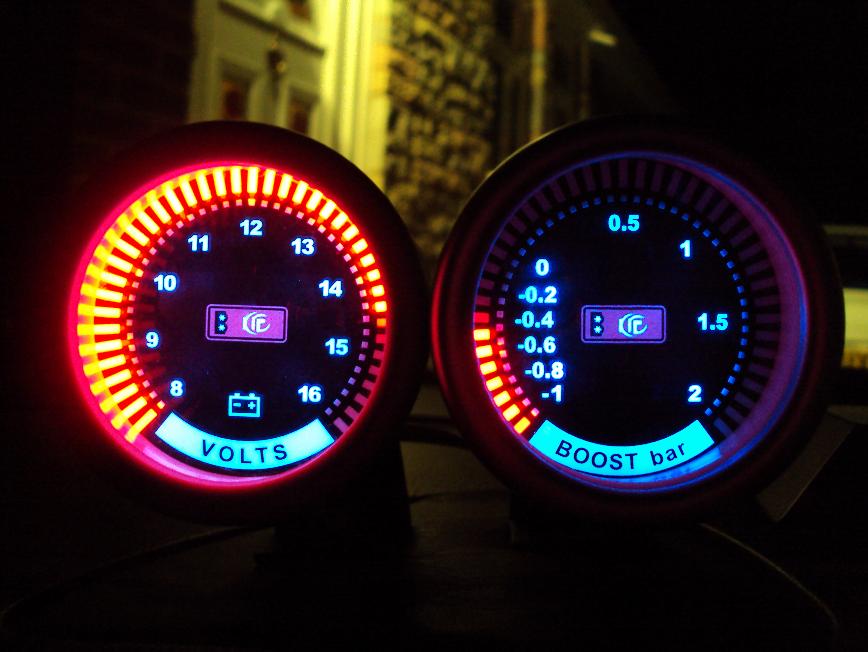
I was quite worried they might be too bright, but there ok for night driving & dont distract or catch the eye......To much!